


 OpenAI
 Perplexity
Having trouble with LifterLMS email notifications?
LifterLMS sends notifications about certain actions, including enrolling in and completing a course, and many more crucial factors that not receiving a notification about may trouble your students.
To ensure a better experience for your students, let’s fix this problem quickly.
This article will walk you through two easy modifications that will help you effortlessly overcome this problem. Without further ado, let’s jump right in!
What is LifterLMS?
LifterLMS is a learning management system (LMS) plugin for WordPress that allows you to create, sell, and protect online courses. With LifterLMS, instructors can manage enrollments, track course progress, issue certificates, and send automated email notifications to enrolled students upon specific actions, such as course enrollments, course completions, quiz submissions, etc.
However, like other WordPress plugins, LifterLMS also relies on your WordPress native email system’s generosity to send the aforementioned emails.
This can be very problematic because WordPress uses the PHP mail() function to send emails by default. Email servers often flag this as spam because of a lack of proper authentication protocols, such as SPF, DKIM, and DMARC.
Thankfully, this is a common issue with a straightforward solution. But before that, let’s understand the problem.
Understanding The Problem «LifterLMS Not Sending Email Notifications»
There can be two main reasons behind the problem; let’s review both before jumping into the solution.
1. LifterLMS’s Misconfigured Email Settings
Sometimes, modifying the settings of a plugin, theme, or software can solve the most complex problems.
The same can be the case here.
LifterLMS has specific email settings that control when and how notifications are sent. If these settings are disabled, incorrectly configured, or not aligned with your site’s current setup, emails might not be triggered at all.
Here’s what you should check:
- Ensure email notifications are enabled globally under LifterLMS ⇒ Settings ⇒ Notifications.
- Verify that individual notification templates are active and correctly set up.
- Ensure that the recipient email addresses and conditions for sending are correctly configured.
A quick review and adjustment here and there can sometimes restore email functionality without needing any deeper troubleshooting. The following section outlines the step-by-step process for doing so.
2. WordPress Not Sending Emails Reliably
Even if LifterLMS is configured correctly, WordPress’s default email wp_mail() function can cause deliverability issues. Earlier, we learned that not having proper authentication protocols may cause your emails to:
- Marked as spam
- Rejected by email providers
- Or lost altogether without any error messages
To solve this issue, you need to use a reliable third-party email sender with the necessary protocols updated, allowing the receiving server to conduct necessary authentication checks to ensure the email wasn’t tampered with during transit.
LifterLMS Not Sending Email Notifications: Step-by-Step Guide
Let’s fix the problem in three easy steps.
Firstly, we will alter the LifterLMS email settings, and then force emails through a reliable third-party email server. So, let’s get started!
Step 1: Fixing The LifterLMS Email Settings
First and foremost, let’s ensure the LifterLMS settings are exactly as they should be.
Head over to LifterLMS ⇒ Settings and go to the «Notifications» tab. Here, you will see a bunch of email options. Click the underlined Email to get to the settings.
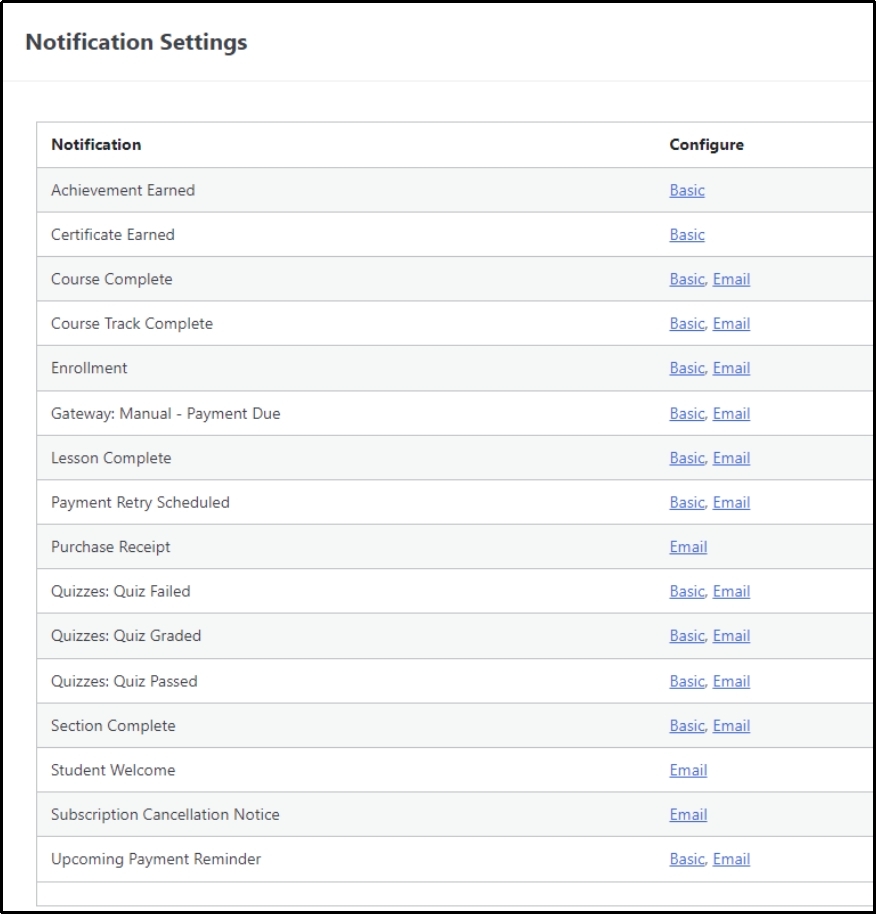
Specify the recipients who should be notified using the checkboxes.

Similarly, go to each email setting and ensure every email goes to everyone it may concern.
Next, go to Engagement ⇒ Emails and make sure the correct tag is in the «Email To» input box.

Finally, being on the same Engagement tab, go to the Engagement subtab.

Click the «Add New Engagement» button and make sure to add the correct triggers here.

Now that the settings are intact, let’s move on to the second step.
Step 2: Installing SMTP Server With Post SMTP
As discussed earlier, WordPress’s default mail function is unreliable. It uses port 25 and lacks industry-standard authentication protocols, which leads to email servers blocking all the emails coming from the PHP mail function.
Thus, forcing emails through a reliable email service is essential to improve email deliverability and to eliminate these email-related issues, not only with LifterLMS but across WordPress.
This change can also help you get rid of the petulant «WordPress not sending email» issue.
To do so, you have to install the Post SMTP plugin.
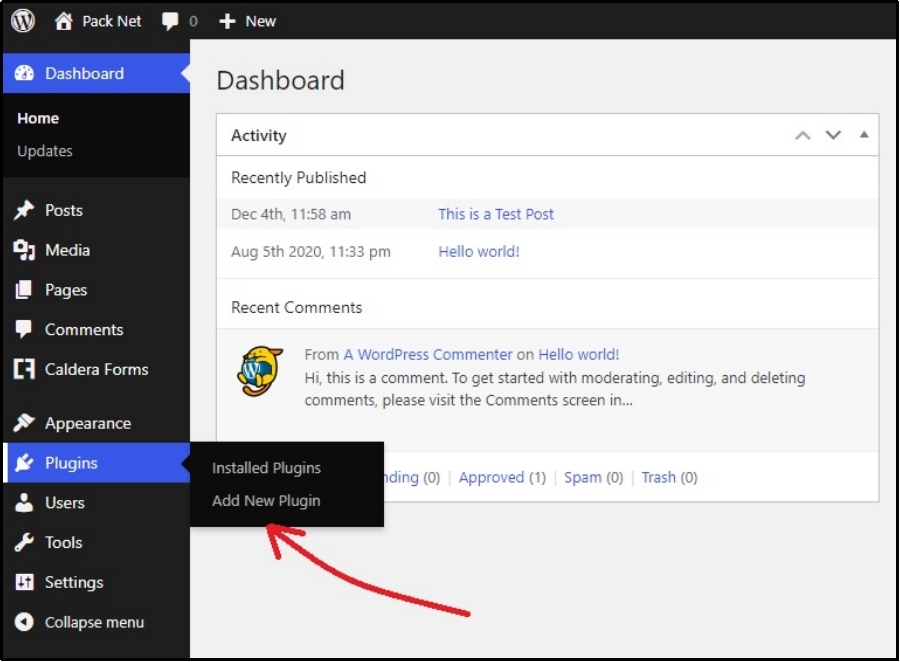
First and foremost, log in to your WordPress and navigate to Plugins ⇒ Add New Plugin.
Next, search for Post SMTP using the «Search Plugins» bar.
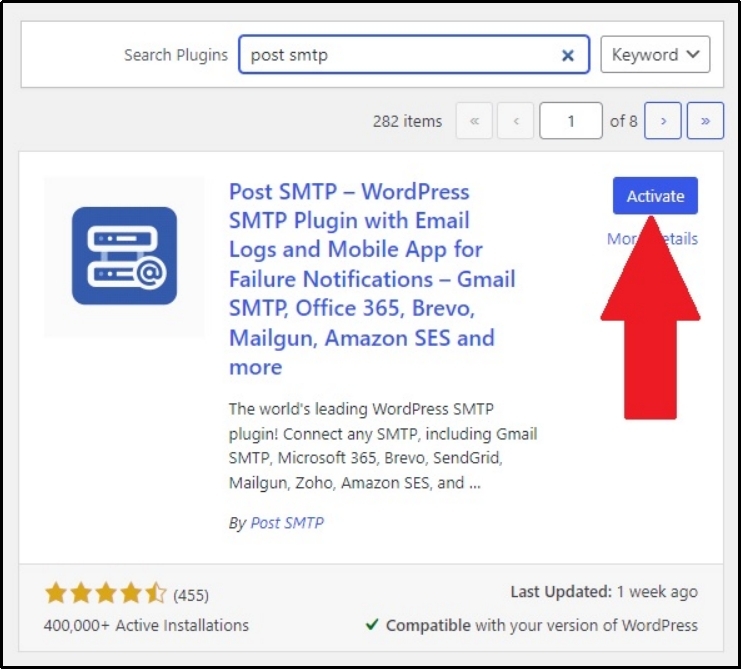
Now, install the plugin and use the ‘Activate’ button that appears after a successful installation.
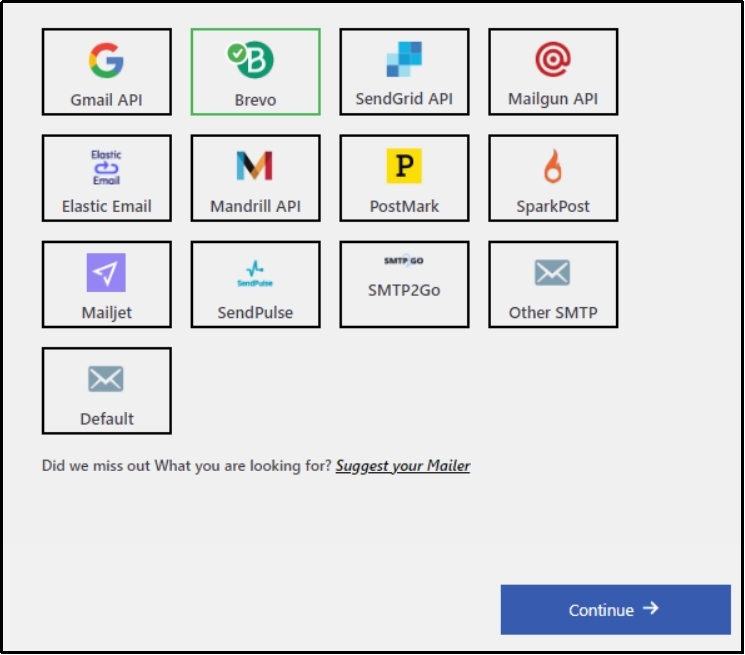
Once activated, go to the plugin’s settings, open the setup wizard.
Here is what it looks like.

Here, you can select the mailer you want. Every option is linked to its documentation to help you set up your favorite mailer.
- Brevo
- Gmail API
- SendGrid API
- Mandrill API
- Mailjet
- Mailgun API
- SparkPost
- SendPulse
- PostMark
- Elastic Email
- Amazon SES
- Microsoft 365
- Zoho
Can’t find your favorite one on the list?
The «Other SMTP» link can help you add any mailer of your choice. If you want it on the list, you can suggest one using the «Suggest your Mailer» link.
After choosing one, you will be required to enter your API keys.
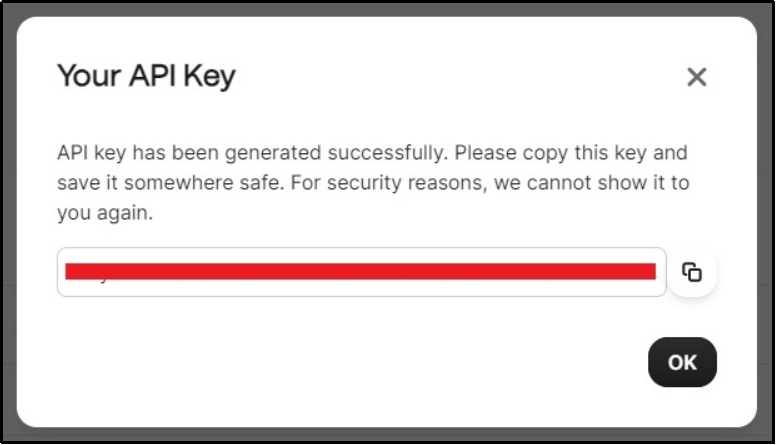
Once you get the API keys, save them, return to the Post SMTP wizard, and paste them into the API Key input box, as shown in the image.
Save the progress using the «Save and Continue» button.
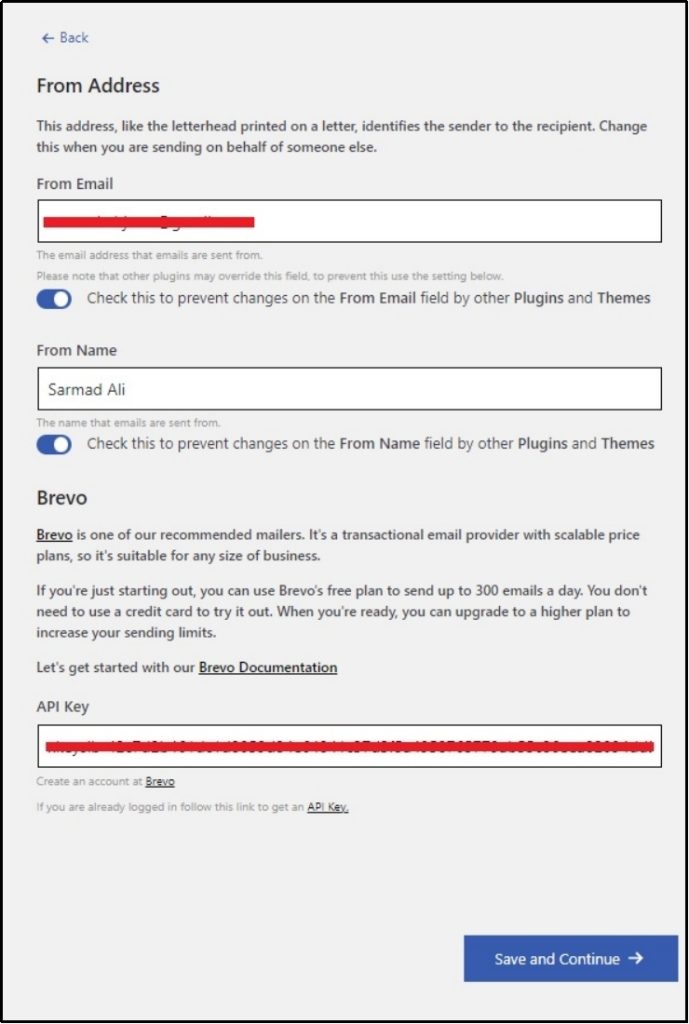
Step 3: Forcing From Emails
Plugins and themes can often overwrite settings, causing inconsistency with From emails. The From name is the name shown with the email, allowing the recipient to decide whether to open the email.
Therefore, it is imperative to prevent that from happening to ensure the highest email deliverability.
To do so, go to the Post SMTP’s Settings ⇒ Messages tab.
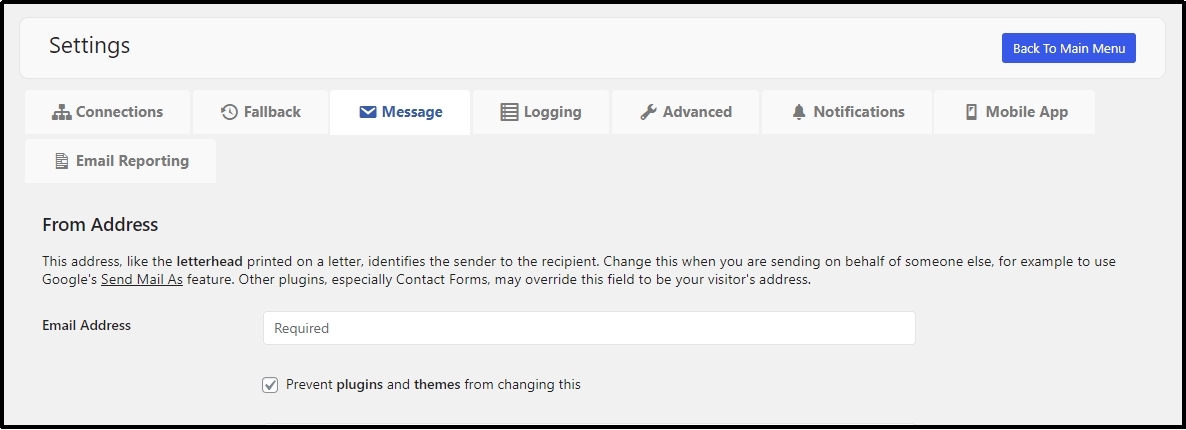
Enter your email address in the input box and check the «Prevent plugins and themes from changing this» checkbox.
That’s it! That should prevent any alteration from other themes and plugins.
You are free to test the LifterLMS email now. Altering the plugin’s settings will ensure it reaches the correct recipients, and Post SMTP will ensure proper deliverability.
Fixing Email Deliverability With Post SMTP
Earlier, we learned the essence of authentication protocols in email deliverability. With Post SMTP, you can force your emails to be sent via any reliable third-party email service provider that takes good care of such protocols.
This practice is dear to most email receiving servers. It allows emails to flow effortlessly, solving all your email deliverability problems with ease!
Frequently Asked Questions
How to fix the LifterLMS not sending email notifications issue?
To quickly fix the email notification issue, you can make sure the email settings are correctly set with all emails going to every person to whom it may concern. Moreover, you should set up an SMTP server using Post SMTP and force email through a reliable third-party email server with the necessary email authentication protocols intact.
How can I handle bounced emails from LifterLMS notifications?
You can easily resend bounced emails from LifterLMS via the Post SMTP plugin. After setting up an email server, the plugin enables you to resend failed emails with a single click. The good part is, you can even do that from your mobile phone using Post SMTP’s mobile application—available for both iOS and Android.
Is there a way to track email delivery failures in LifterLMS?
Yes, there is! With the Post SMTP plugin, you can track email deliverability failures with a single click, thereby ensuring every message reaches an inbox.
