


Emails are an integral part of a business.
Every time a customer purchases a product, they expect an email. Whenever they create an account, they look for an email.
They want to reset their password. You guessed it. They wait for an email.
However, for a startup or a niche business with a not-so-long list of customers, most email services seem costly at a stage where every penny matters.
Even if you decide to pay, email deliverability exacerbates the situation when emails never reach customers’ inboxes, leading to complaints, lost business, and damaged reputation, both financially and in terms of customer loyalty.
This article has a solution for all that drama, and the good news is that it’s under $100 per month. Follow along as we explore how to set up a reliable SMTP system for under $100. Before that, let’s take a moment to understand why email deliverability issues occur and how SMTP fixes them.
Why Do WordPress Emails Fail?
By default, WordPress uses the wp_mail() function, which doesn’t follow proper authentication protocols because it’s archaic, and email security has evolved significantly.
Without authentication, receiving servers treat them as suspicious, sometimes sending them straight to spam or rejecting them entirely.
To understand these protocols better, let’s look at the three main ones:
- DKIM (DomainKeys Identified Mail): Adds a cryptographic signature to emails sent from a domain. This signature proves that the email hasn’t been tampered with during transit. Without DKIM, servers cannot verify that the message originated from your domain.
- SPF (Sender Policy Framework): Defines which mail servers are authorized to send emails on behalf of your domain. Without SPF, your emails may appear fraudulent, which can lead many providers to block or filter them as spam.
- DMARC (Domain-based Message Authentication, Reporting, and Conformance): Builds on SPF and DKIM by telling receiving servers what to do with unauthenticated emails. You can choose to deliver, quarantine, or reject them. Without DMARC, your domain has no enforceable policy, making it easier for bad actors to spoof your domain.
How SMTP Solves This Problem
Instead of sending emails directly from your hosting server, SMTP (Simple Mail Transfer Protocol) authenticates them with proper credentials, ensuring emails are sent through verified servers and that authentication protocols are correctly applied.
By using an SMTP plugin such as Post SMTP, you bridge the gap and follow the necessary protocols that modern email servers look for before letting an email into their system.
Now that you understand the importance of the SMTP server and how it can benefit your business, let’s dive into the setup, where we will learn to select an email service and install the best SMTP service for an affordable and reliable email system step by step.
Setting Up an SMTP Server for Under $100/Month: 3 Steps
Depending on your business needs, the perfect choice may differ. We will list a few for you to choose from.
Here’s the plan: we need to determine our email sending needs, find an API service under budget that provides a sufficient number of emails, and establish a connector to link the API service with WordPress.
Let’s proceed to execution.
Step 1. Understanding Your Email Sending Needs
Before we dive in, it’s essential to understand your business and its specific needs. The need for total emails can vary dramatically depending on the size of the business, the industry it operates in, and its communication strategy.
For example, a startup store’s needs for transactional emails would include password resets, new user registrations, contact form submissions, and order confirmations. For a new or small business, this could range from 10 to 50 emails per day, which translates to 300 to 1,500 emails per month. If we also include a few marketing push campaigns, the tally would reach around 3,000 emails.
On the contrary, for a mid-sized business, transactional emails can quickly add up to 100,000 or even more per month. For example, an e-commerce store with up to 5,000 daily sales will generate around double the emails, considering most stores send an order confirmation and a gratitude email for completing a purchase.
Simply put, it’s necessary to predict your monthly email volume to avoid overpaying. If you already have a number in mind, let’s move on to the next step.
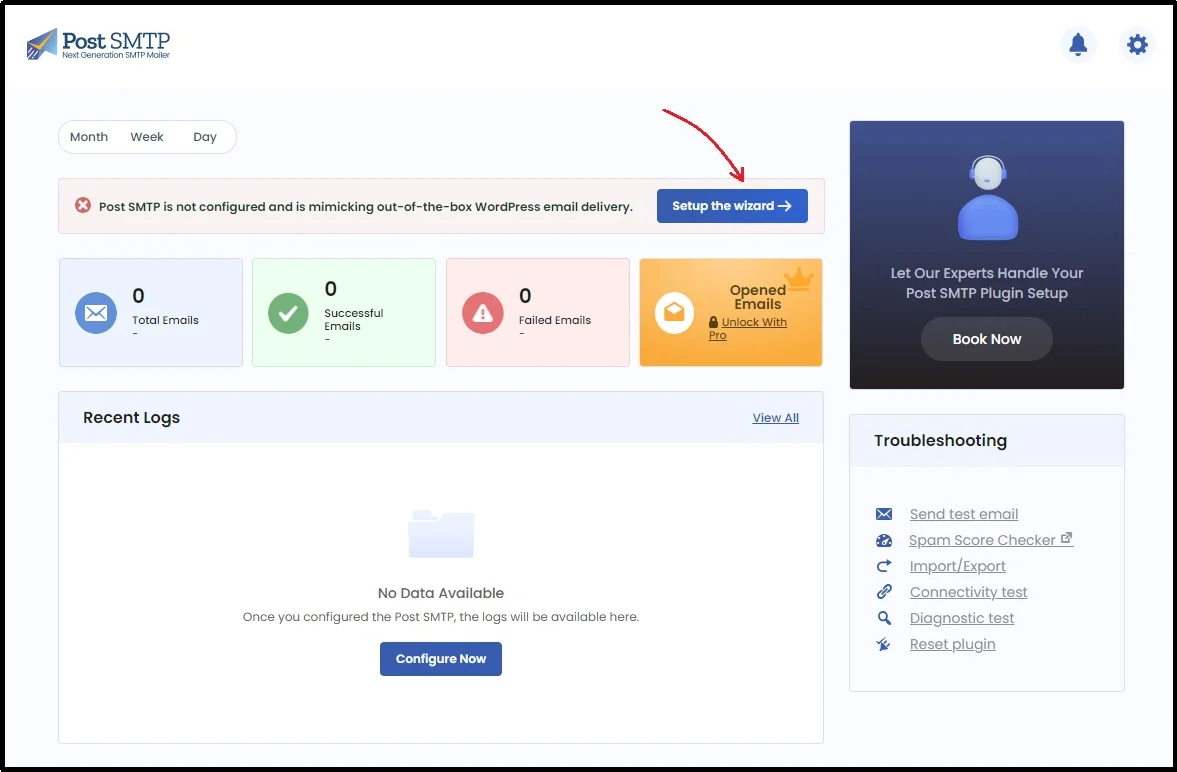
Step 2. Install Post SMTP Plugin!
Given the importance of authentication protocols, let’s walk through how to establish the «connector» that will help us connect with the API service of your choice.
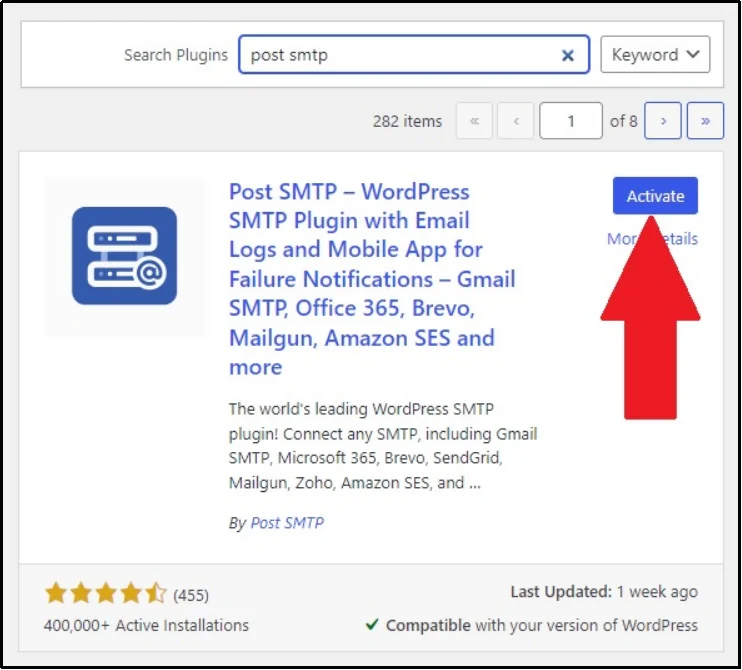
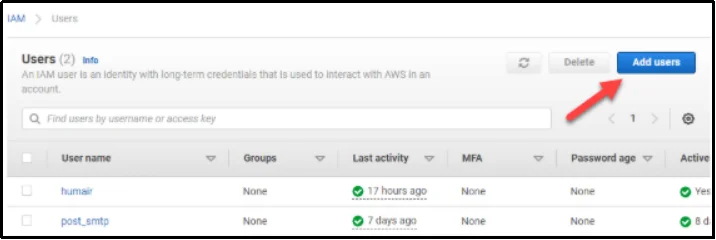
Navigate to the admin dashboard on your WordPress → Plugins → Add Plugin → Using the search bar. Look up «Post SMTP,» install and activate the plugin.
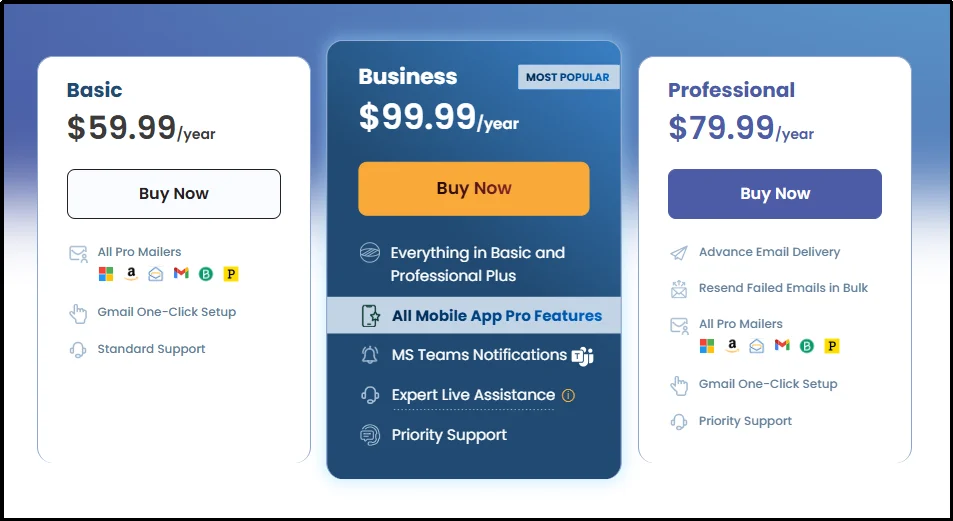
Later in this article, we will utilize features that are exclusive to premium plans. Considering our budget of $100, let’s spend the $59.99 on Post SMTP’s Basic plan.
However, it is important to note that this expense is annual.
Simply put, once you’ve spent this month’s amount, you won’t need to buy it again next month, allowing you to dedicate your entire budget to API services.
So, navigate to our pricing page, and we can only go with the Basic plan, which costs $59.99/year.
Once you complete the purchase, you will receive a welcome email with the Post SMTP premium and a license key.
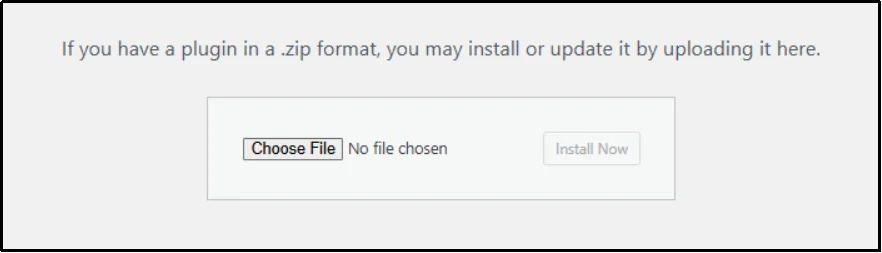
Download the ZIP file on your computer and navigate to your admin dashboard.
Once again, go to Plugins → Add Plugin. This time, use the Upload Plugin button in the top left corner.
Next, click Choose File. Browse to the location where you installed the premium plugin, and then click Install Now.
Once the plugin is active, use the license key to unlock premium features. Here are a few salient ones:
- Access to big volume sender: Ensure continuous email delivery success on your WordPress website by connecting your site’s SMTP with reliable services like Zoho Zeptomail or Amazon SES.
- Instant email failure notifications: Gain peace of mind with instant email failure notifications sent directly to your mobile app, so you can address problems the moment they happen and never miss a critical message.
- Email logs: Get a comprehensive email log of every message sent from your site. This is invaluable for auditing, compliance, and resolving customer support issues.
- View email error details: Easily access detailed error messages within the logs to quickly pinpoint the cause of an email failure
- Open email tracking: Go beyond delivery with open email tracking to understand how your emails are performing and gain insights into what content resonates with your audience.
- Email health report: Receive a weekly email health report that gives you a birds-eye view of your deliverability statistics
- Chrome Extension: Configure and receive all your WordPress email failure alerts on your Chrome extension.
Step 3: Choosing The Email API Service
Choosing the best email API service can be demanding. You must look at deliverability rates, latency, speed, scalability, security, and much more.
Read: 12 Best Email API Services for Developers (2025)
Since we have a budget of $100 and we have already spent around $60 for Post SMTP’s basic plan, we are left with $40.
Here’s what you can start with:
Option 1: Resend

If you’re looking for a modern, lightweight, and developer-friendly email service, Resend is an excellent choice.
At just $35/month, you can send up to 100,000 emails, making it an affordable option for small to mid-sized businesses.
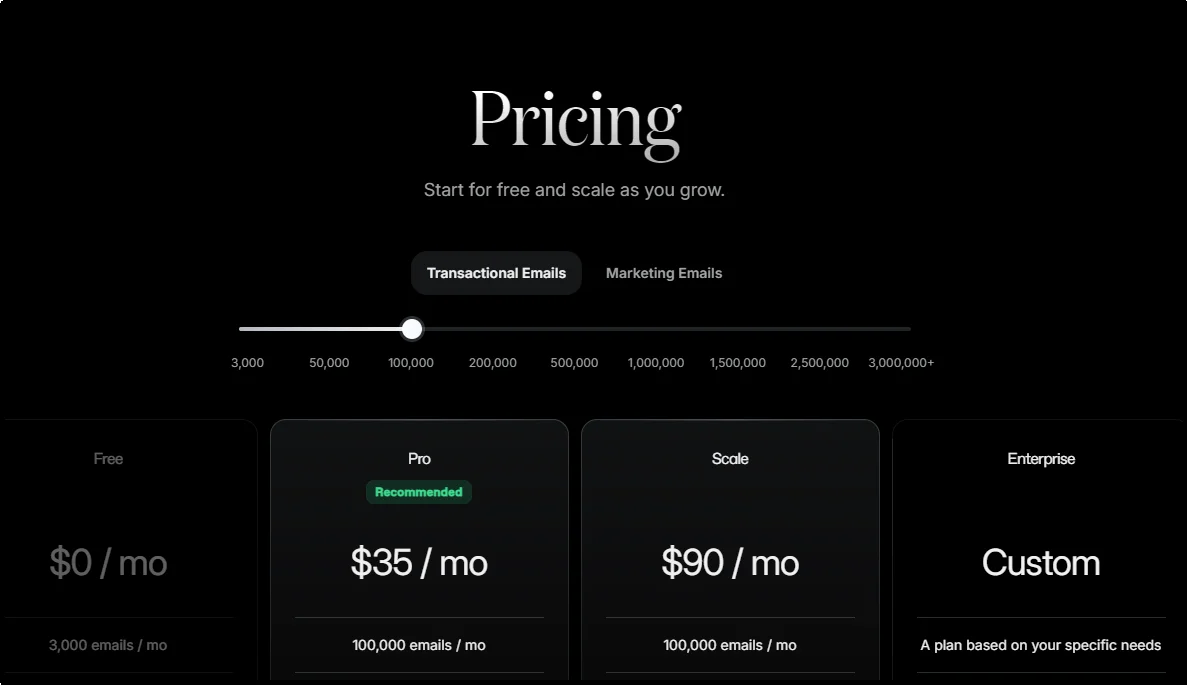
Resend integrates seamlessly with WordPress when paired with Post SMTP, giving you proper authentication through SPF, DKIM, and DMARC.
This ensures your messages are trusted by receiving servers and delivered reliably.
It’s particularly useful for SaaS products, startups, and growing e-commerce sites that need more than just a free tier but still want to stay well within budget. With an intuitive setup and simple API keys, Resend balances affordability with ease of use, letting you scale as your communication needs expand.
Next month, by paying $90—since you don’t have to pay for PostSMTP again—you can upgrade to the Scale plan, which offers other benefits, such as Slack & ticket support, 7-day data retention, 1,000 domains, no daily limit, dedicated IP with add-on, and much more.
Option 2: Zoho Mail
Zoho provides one of the most cost-effective email-sending solutions available. For just $35/month, Zoho Mail allows you to send up to 140,000 emails, offering an impressive balance of volume and affordability.
Unlike traditional subscription-based models, ZeptoMail operates on a flexible, pay-as-you-go credit system.
Each credit you purchase is valid for sending 10,000 emails and costs approximately $2.50. This means you buy only the credits you need, when you need them, without the pressure of a monthly subscription. For instance, to reach a volume of 140,000 emails, you would purchase 14 credits, costing you around $35. All purchased credits are valid for a period of six months, providing a great deal of flexibility for businesses with fluctuating email volumes.
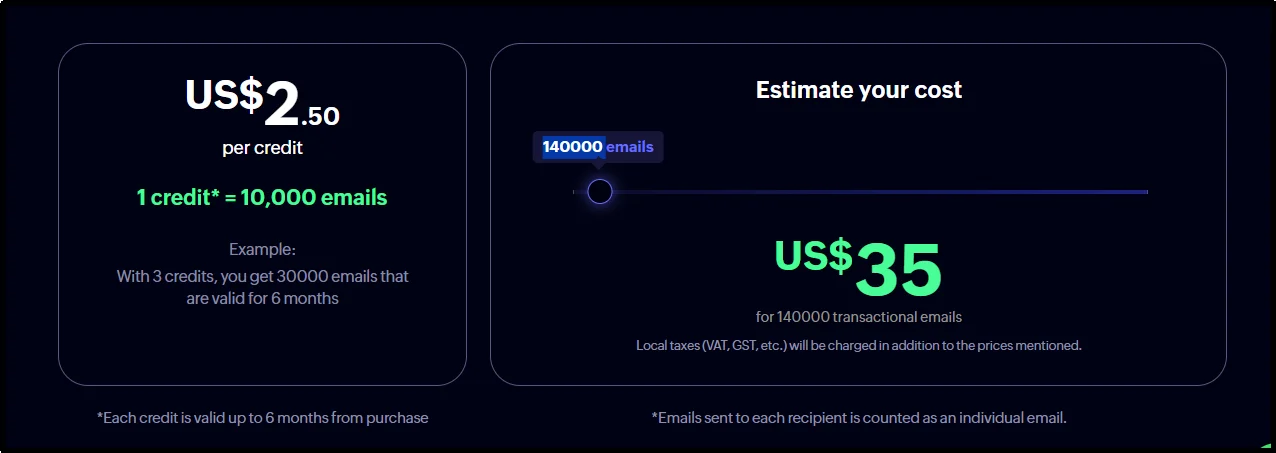
This option is ideal for businesses that need to manage larger subscriber lists or send frequent transactional emails without overspending.
Zoho also comes with the reliability of a full-featured suite, offering strong inbox placement and compliance with industry standards.
With Post SMTP, Zoho Zeptomail integration is straightforward, and you gain additional benefits like tracking, error notifications, and domain authentication, and everything we discussed earlier, ensuring your emails consistently reach their destination.
Following months, you can get 400,000 emails for $100.
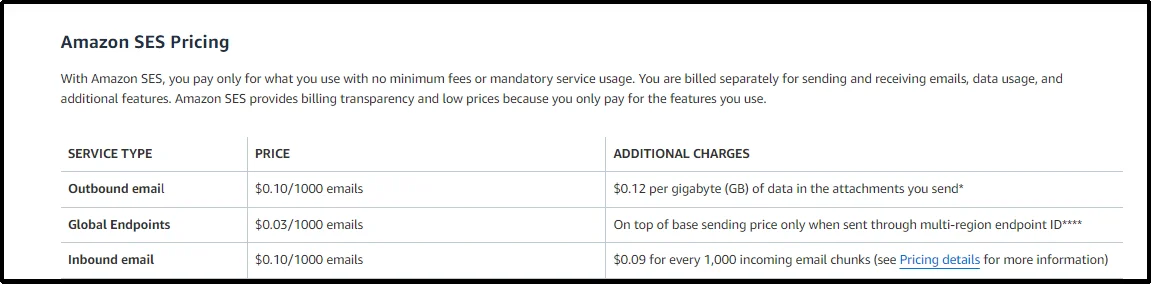
Option 3. Amazon SES
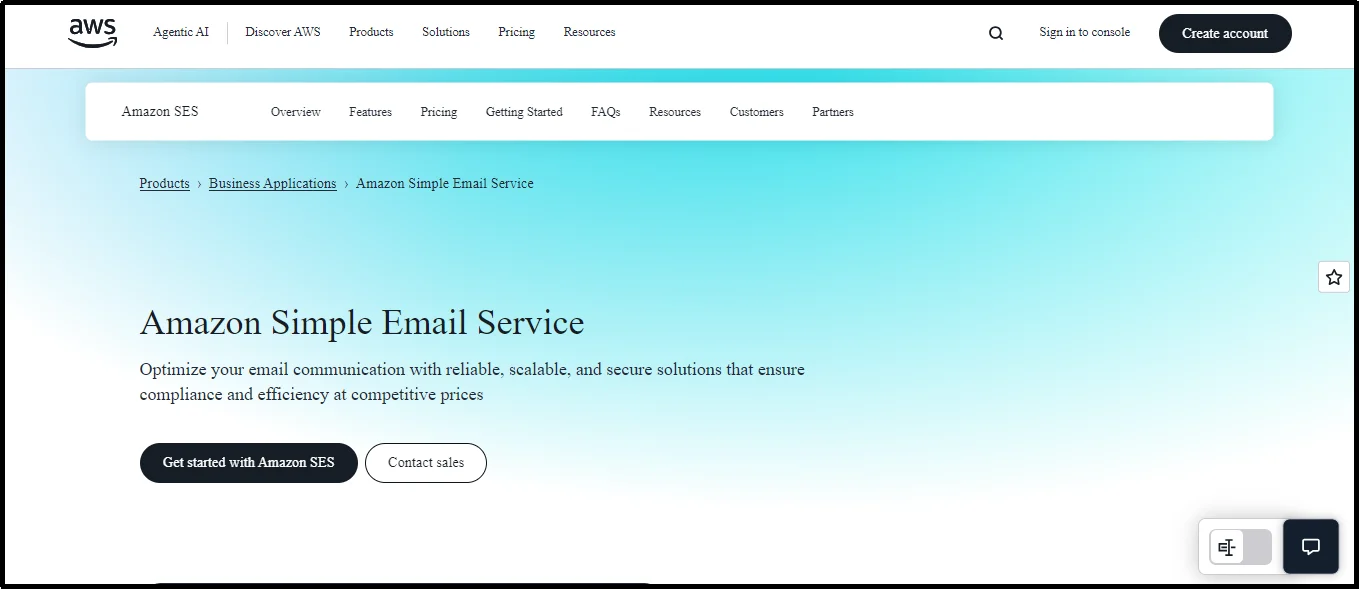
For businesses that prioritize cost efficiency and scale, Amazon Simple Email Service (SES) is unmatched. At $0.10 per 1,000 emails, you can send up to 400,000 emails for $40/month, making it the most affordable option at scale.
This pay-as-you-go model has no fixed monthly fees, so you only pay for what you use.
The primary cost is the sending fee of $0.10 per 1,000 emails. It’s important to note that this is the cost for outgoing messages. There are additional, minimal charges for data transfer (for attachments) and incoming emails, but for most use cases, the sending fee is the main component of your bill.
This simple, transparent pricing structure is why SES is the go-to choice for businesses with rapidly growing or fluctuating email needs.
SES is highly reliable and fully compliant with SPF, DKIM, and DMARC, but the trade-off is complexity. Setup requires domain verification, IAM user creation, and navigating AWS’s production access process.
Paired with the Post SMTP Basic plan, Amazon SES unlocks enterprise-level performance at a fraction of traditional ESP pricing. It’s the go-to solution for developers, high-volume e-commerce stores, or agencies that want maximum control at minimal cost.
In a nutshell, you consider the following choices:
- Resend: Best for startups, SaaS products, and small to mid-sized businesses that want simplicity, modern APIs, and reliable deliverability at $35/month for 100,000 emails.
- Zoho Mail (ZeptoMail): A flexible, pay-as-you-go option ideal for businesses with fluctuating volumes, offering 140,000 emails for about $35 and credits valid for six months.
- Amazon SES: The most cost-efficient option at scale, giving you up to 400,000 emails for $40. Perfect for developers and enterprises willing to handle a more technical setup.
Step 4: Connect The API Service With Post SMTP
Once you’ve selected the right provider for your needs, the next step is to integrate it with WordPress.
Resend:
Use the Setup the wizard button from the plugin’s settings.
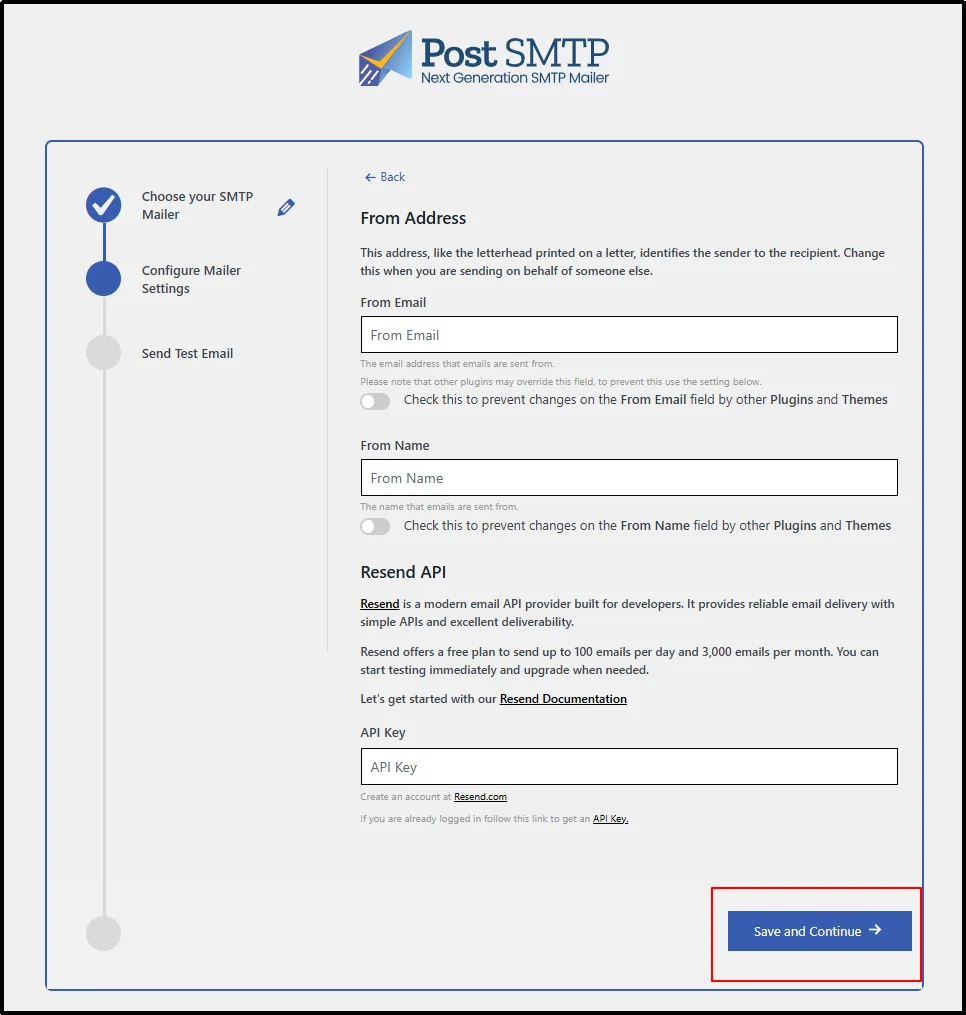
On the subsequent screen, you can select any mailer of your choice. Of course, we will choose the Resend API button.

You have to fetch the necessary keys and paste them into Post SMTP to make it work.
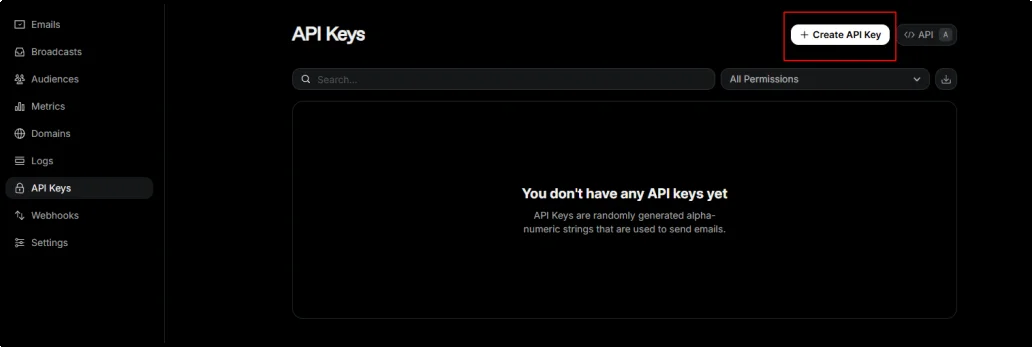
Go to Resend’s sign up page and register a new account. If you already have one, log in to it.
Create a new API key.
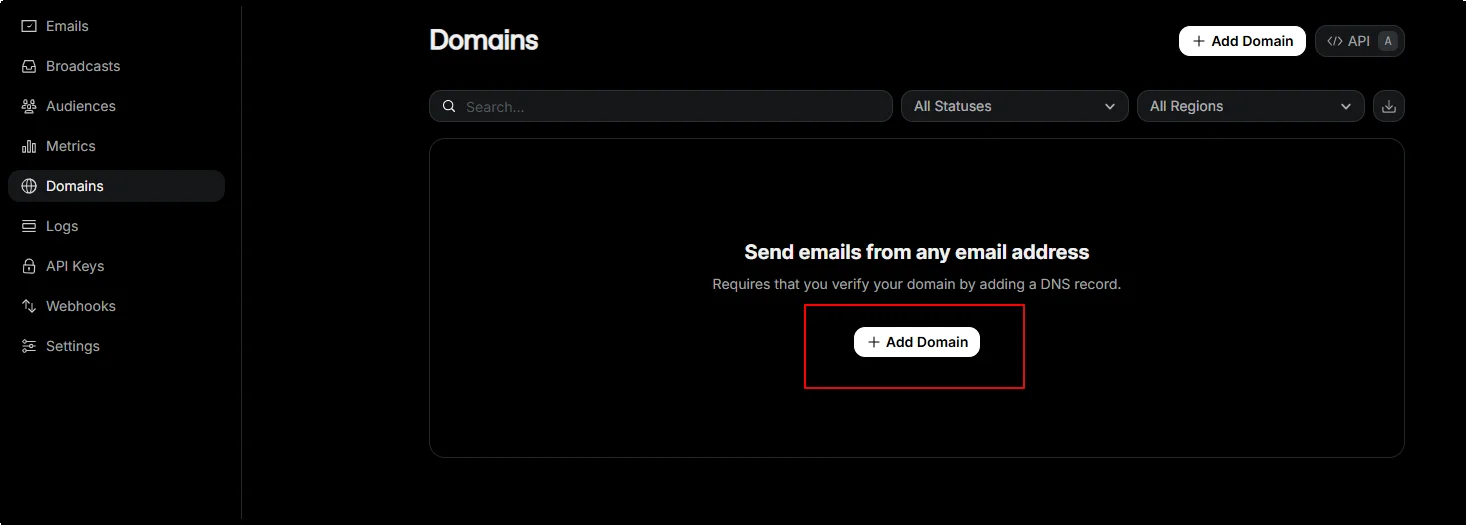
Once you have the API keys set, switch to the Domains tab and verify your domain.
Add the necessary details in the respective input boxes and click Save and Continue.
Our detailed documentation can help.
Zoho Mail:
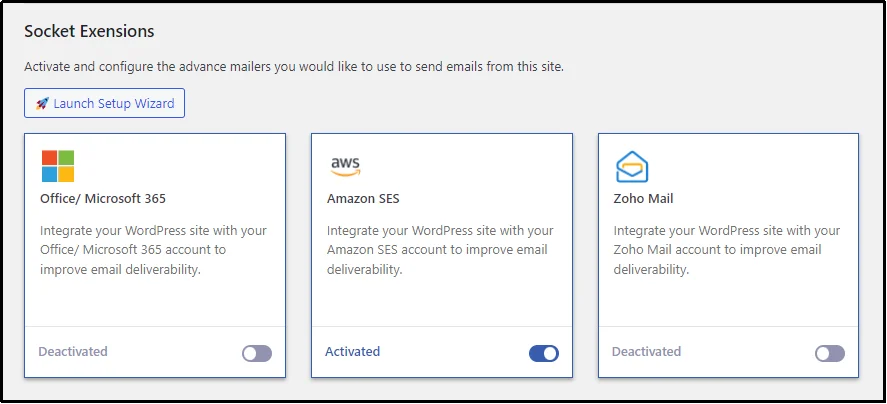
Navigate to PostSMTP → Extensions → Enable Zoho extension and save settings.
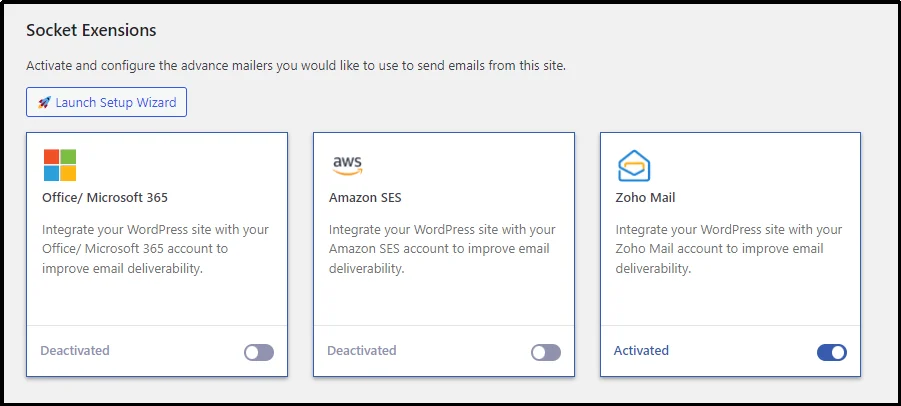
Now run the setup wizard and select Zoho.
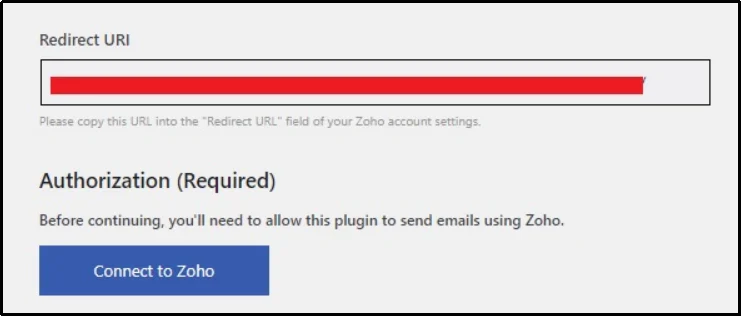
Select Zoho and copy the Redirect URL for later use.
Now, navigate to Zoho, set up an account, and create API credentials, including Client ID and a Client Secret.
You’ll be asked to provide a Client Name and a Homepage URL. You will also need to paste an Authorized Redirect URL that we copied earlier. Paste it and click «Create.»
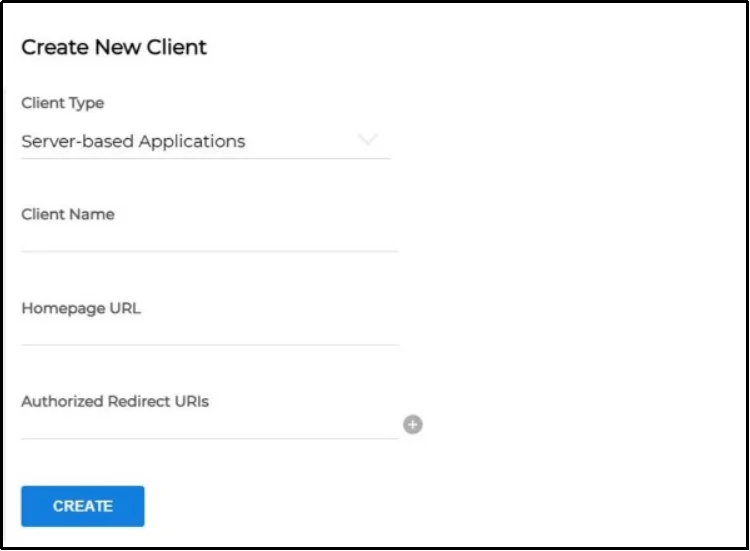
Zoho will then generate your Client ID and Client Secret. Copy these values, then return to the Post SMTP setup wizard and paste the Client ID and Client Secret into their respective fields.
With the credentials entered, click the Connect to Zoho button. This will open a new window asking for permission to allow Post SMTP to access your Zoho account. Click Accept.
For more detailed, step-by-step help, our Zoho with Post SMTP documentation can help!
Amazon SES
Lastly, for Amazon Web Service. You need to create a new IAM user in your AWS account.
This user will have programmatic access via an Access Key ID and a Secret Access Key. You’ll need to attach the AmazonSESFullAccess policy to this user. You will use these access keys to configure Post SMTP later.
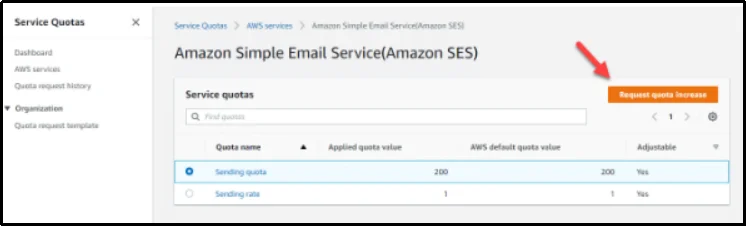
Next, you must request production access, as all SES accounts are currently in sandbox mode.
To remove the sending limitations, you must submit a request for a quota increase to move your account into production. This is a crucial step to prove you’ll be sending legitimate emails.
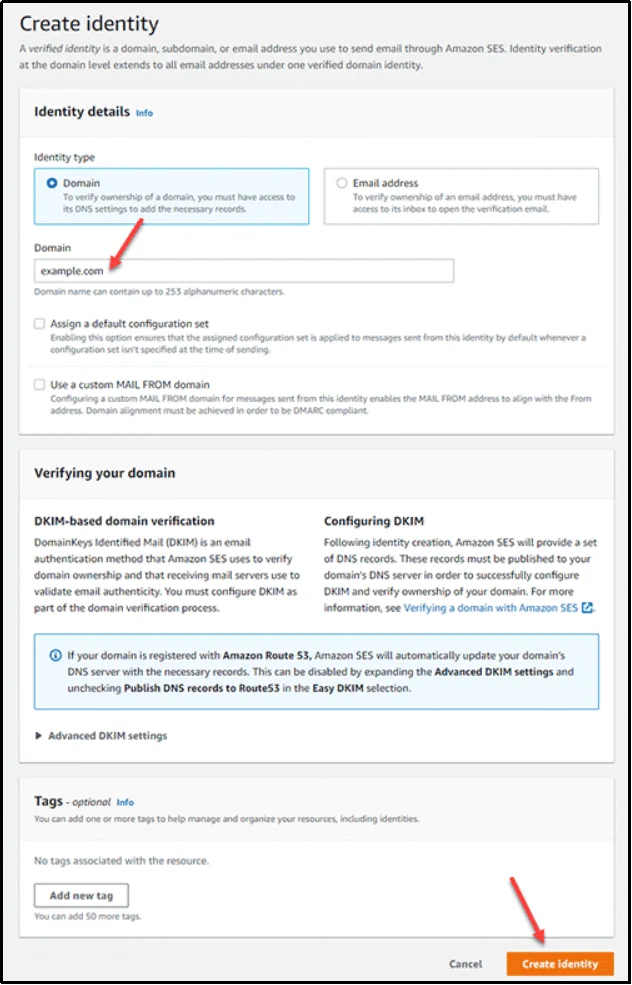
Later, you will have to verify your domain. Doing so will enable sending emails from any address within that domain without individual verification. This involves adding CNAME records provided by SES to your domain’s DNS settings.
This step can be done while you are waiting for your production access request to be reviewed.
Once you have created the IAM user and a verified domain, you can configure the Post SMTP plugin in WordPress.
Head back to Post SMTP, enable the Amazon SES extension, and click Setup the wizard as we did with the previous two.
Select Amazon SES as the mailer and paste the Access Key ID, Secret Access Key, and Region Host from the IAM user you created earlier.
Finally, after configuring Post SMTP, you should send a test email to ensure everything is working correctly.
For further assistance, please refer to this documentation.
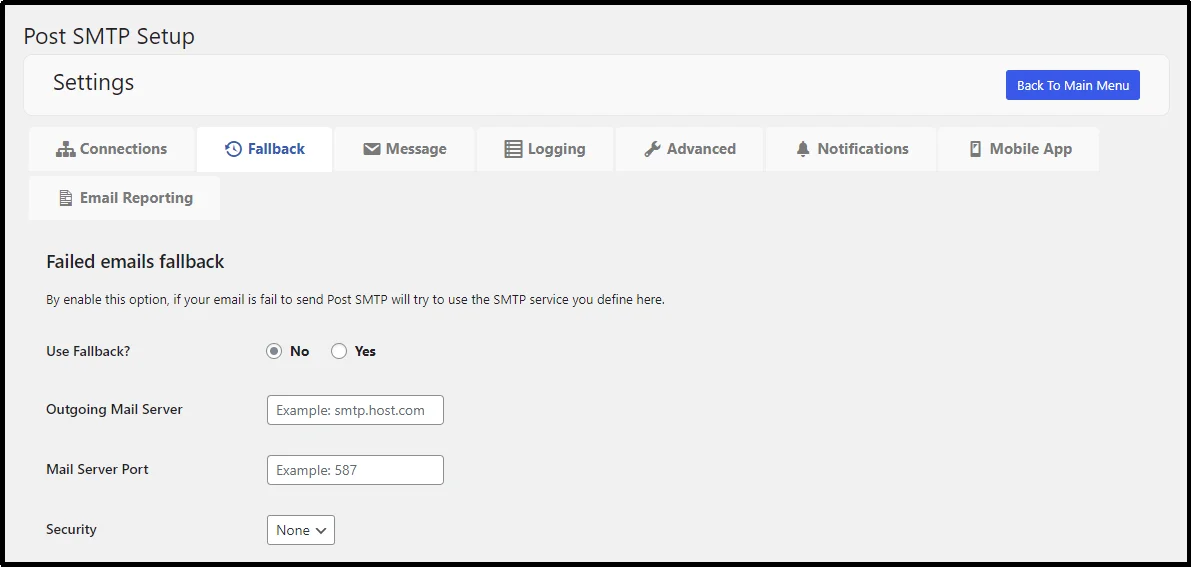
[Optional] Step 5: Set Up a Fall Back Server
For an extra layer of reliability, Post SMTP lets you configure a fallback server. This ensures that if your primary email service experiences an outage or a sending limit is reached, your critical emails will still be delivered via a fallback server.
To set up a fallback server, you can use your remaining budget to create a secondary, low-volume account with another provider. For example, if your primary mailer is Amazon SES, you could use some of your remaining budget to purchase credits on Resend or Zoho.
Here’s a practical way to spend your remaining budget to create a highly resilient email system:
- Primary Mailer (High Volume): Use Amazon SES at $0.10 per 1,000 emails. A $20 monthly spend gets you 200,000 emails, which is more than enough for many businesses.
- Fallback Mailer (Low Volume): Allocate another $20 to Resend. Their starter plan offers a generous volume for this price, and their service is known for its simplicity and reliability. This ensures that even if your primary AWS connection has an issue, your essential emails will still go out.
This setup creates a robust, two-tiered system that provides peace of mind while staying well within your $100 monthly budget.
To configure this, simply navigate to the Post SMTP settings → Fallback tab.
Tips To Improve Email Deliverability
Even with the proper SMTP setup, your emails can still struggle to reach inboxes if best practices for deliverability are overlooked. Here are a few proven strategies:
- Maintain list hygiene. A bloated list full of dormant subscribers harms your sender reputation. If people haven’t opened or engaged with your emails for months, ISPs interpret that as a sign your content isn’t valuable. Periodically clean your list by removing unresponsive addresses, correcting typos (like gmal.com instead of gmail.com), and segmenting inactive users for re-engagement campaigns.
- Authenticate your domain. Email authentication is non-negotiable. Properly configured SPF, DKIM, and DMARC records tell receiving servers that your messages are legitimate and not spoofed. Most modern email services guide you through adding these records to your DNS. Once verified, your domain earns trust, reducing the chance of being flagged as spam.
- Avoid spam triggers. Spam filters evaluate content. Overusing promotional phrases like “limited time offer” or excessive punctuation (!!!) can hurt your placement. Keep subject lines clear, use balanced text-to-image ratios, and avoid sending large blasts from a brand-new domain.
- Monitor reputation and engagement. Track how people interact with your emails. High bounce rates, frequent unsubscribes, or spam complaints signal poor list management. Our logs feature gives you visibility into these metrics. Use the data to refine your approach.
Final Words
Reliable email delivery doesn’t need to exceed your budget. With the right setup, WordPress users can run an authenticated, high-performance email system for under $100 per month. The key is understanding your sending requirements and selecting a service that aligns with them.
We’ve shown that there’s a solution for every stage of business growth, whether you’re just starting out or scaling to millions of emails. For a money-minded entrepreneur, investing in the right setup is essential.
This is where paying for Post SMTP makes sense. For an yearly investment of $60, you unlock volume SMTP providers like Amazon, Zoho Zeptomail, Google One-Click SMTP, and Microsoft 365. Plus, you get backup SMTP connection, detailed email logs, instant alerts on your email and Slack, and access to a mobile app for on-the-go email monitoring.
Whichever path you take, pairing your provider with Post SMTP ensures proper authentication, visibility into delivery, and the confidence that critical emails reach the inbox. Reliable email delivery protects your reputation and supports long-term growth. All it takes is just the right choice, choose Post SMTP, the best choice for your email needs.
