


 OpenAI
 Perplexity
SMTP (Simple Mail Transfer Protocol) is fundamental for sending and receiving email messages online. SMTP is responsible for the transfer of emails between email clients and servers, making it a critical component of email communication. Despite being a fundamental protocol, SMTP can be pretty complex and challenging to understand, particularly for those new to the world of email.
Therefore, we’ve created a tutorial on configuring SMTP2GO with Post SMTP to make your email deliverability experience flawless.
What is SMTP2GO?
SMTP2GO is a cloud-based email delivery service that provides a reliable and efficient way to send emails. It is designed to help businesses, organizations, and individuals send transactional and marketing emails quickly and easily without needing to manage their email infrastructure. SMTP2GO is a third-party email service provider that offers an easy-to-use platform and APIs to manage and send emails securely and reliably.
It acts as a mail relay service, meaning it receives email messages from its clients and forwards them to the recipient’s email servers. The service provides a range of features, including email tracking, analytics, reporting, spam filtering, and virus scanning. SMTP2GO is compatible with a wide range of email clients and devices, making it an ideal solution for businesses of all sizes.
What is Post SMTP?
Post SMTP is a plugin for WordPress that enables users to configure and send an email directly from their WordPress site. It is a popular plugin that helps WordPress site owners to overcome the common problem of emails not being delivered from their website.
The plugin provides a simple, easy-to-use interface for configuring SMTP email delivery on a WordPress site. It allows users to send emails using an SMTP server instead of relying on the default PHP mail function. This can help improve the reliability of email delivery and reduce the risk of emails being marked as spam.
How to Configure SMTP2GO Email with Post SMTP
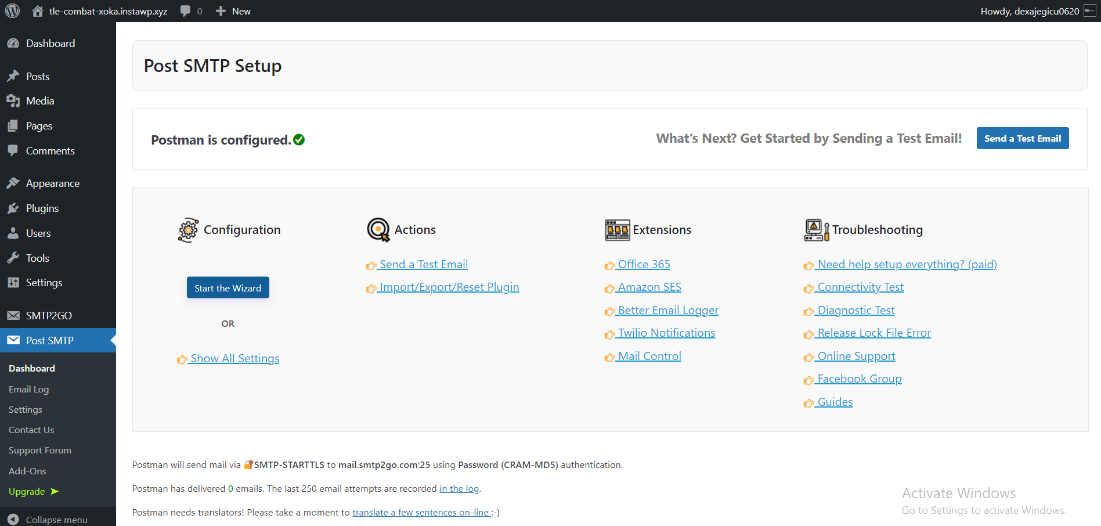
- Navigate to Post SMTP settings in your WordPress Dashboard and click the “Start the Wizard” option.
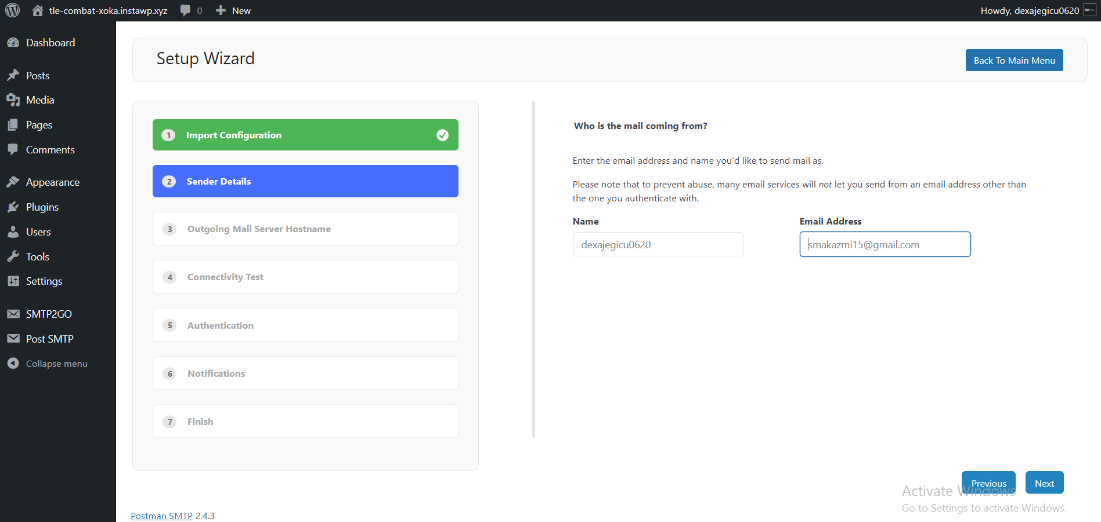
- Enter your Email address and click “Next.”
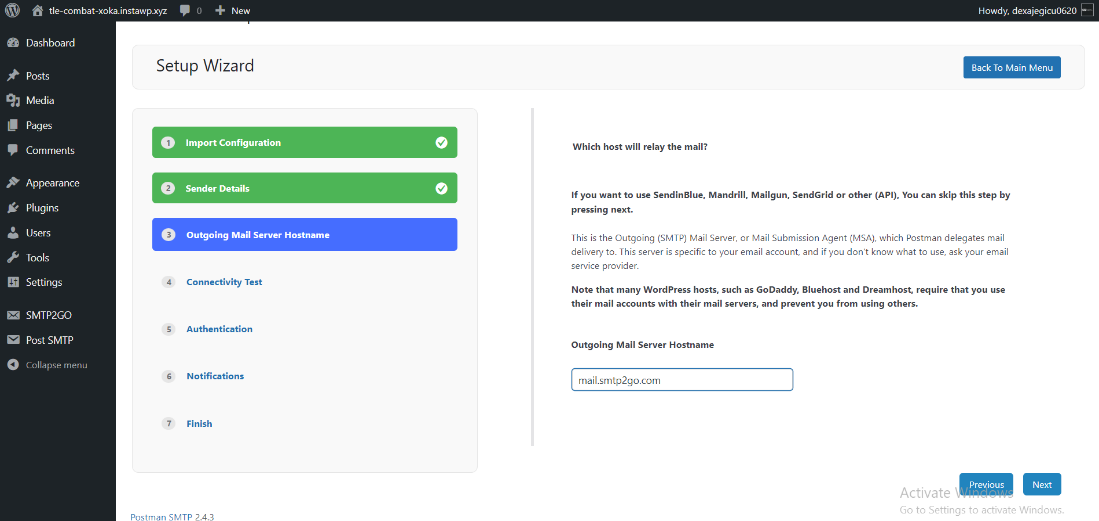
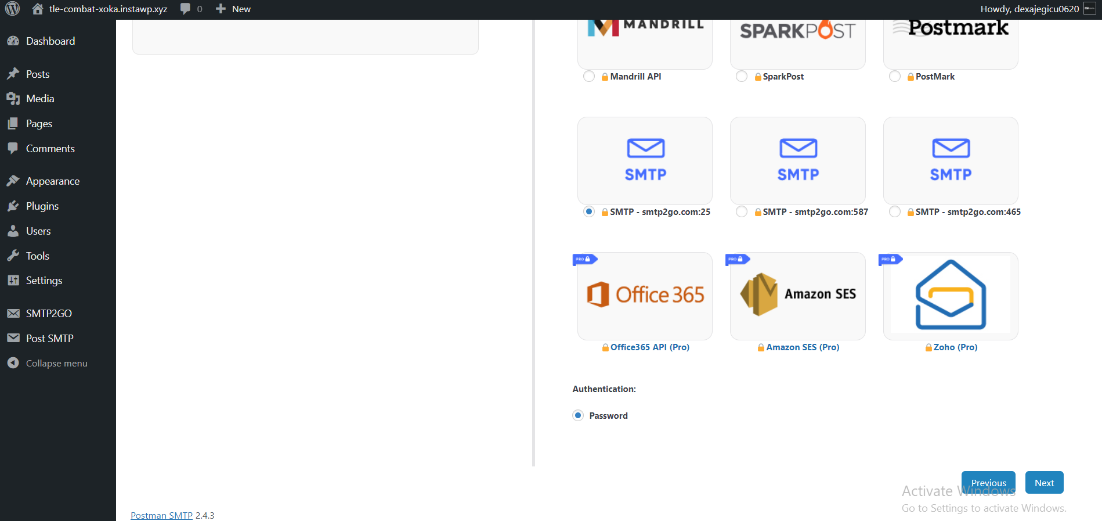
- In the outgoing mail server hostname, write “mail.smtp2go.com” and click “Next.”
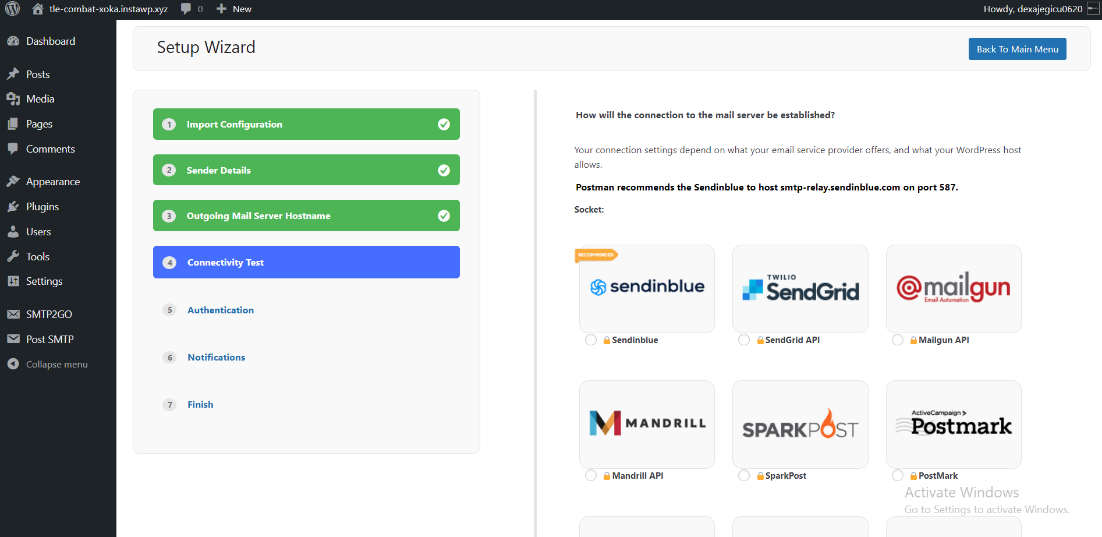
- After that, in the connectivity test option, select “SMTP-smtp2go.com:25” and click “Next.”
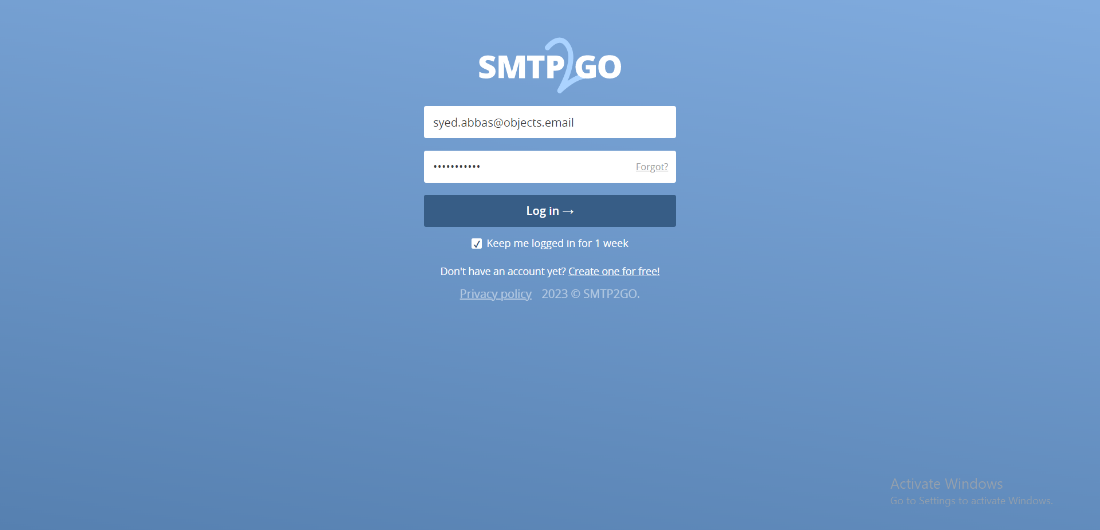
- Now, you can go to the SMTP2GO website. Log in with an existing account; otherwise, sign up to create one.
- Once logged in, navigate to Sending > SMTP Users. Click on “Add SMTP user.”
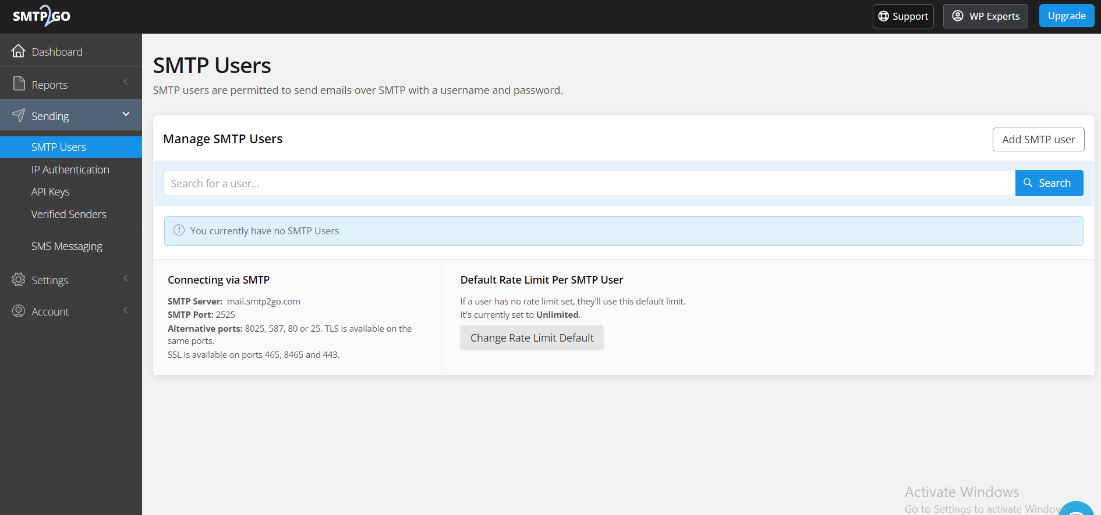
- Configure a new user and copy that username and password.
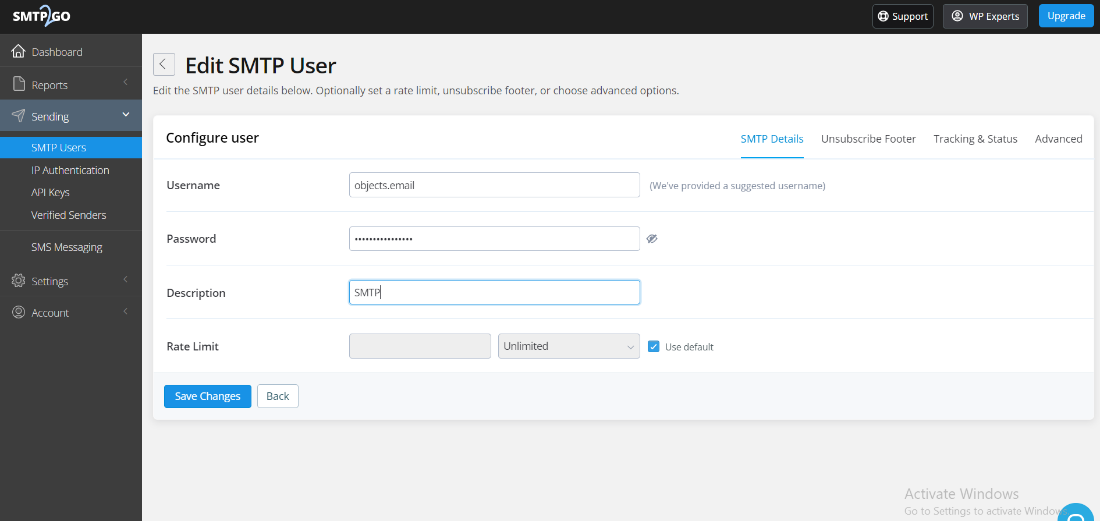
- Return to Post SMTP settings, paste the username and password you have recently configured, and click “Next.”
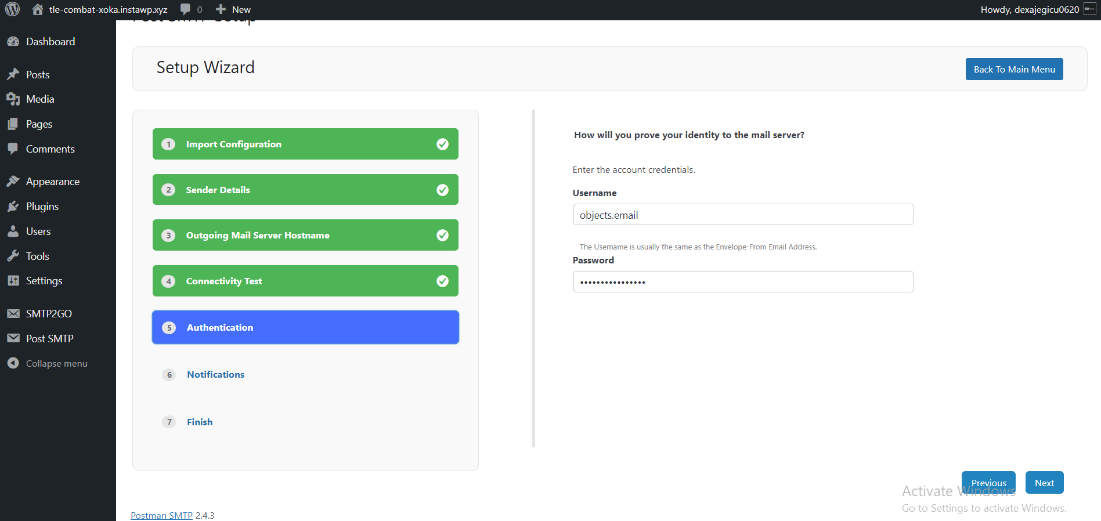
- Once again, click “Next” to finish the configuration.
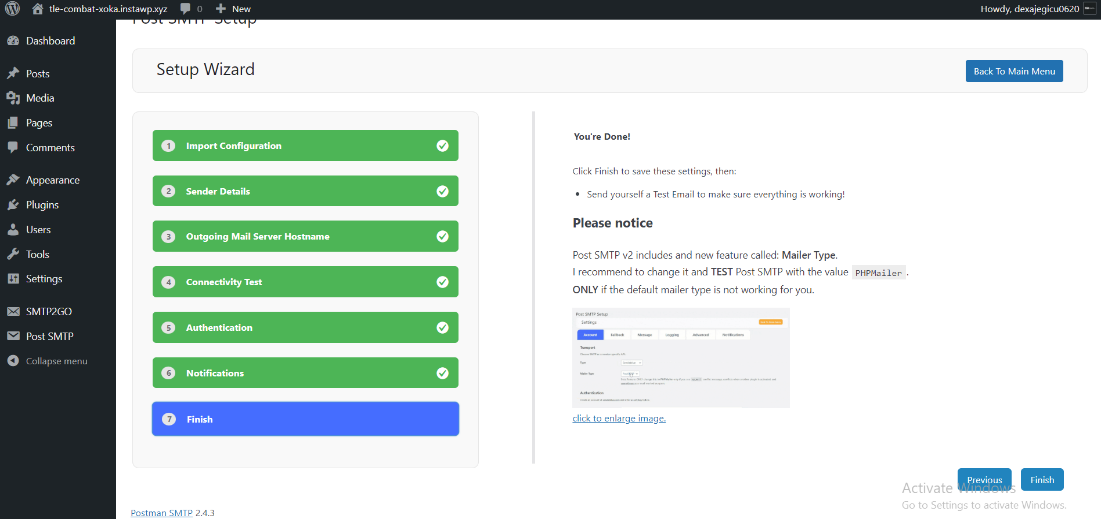
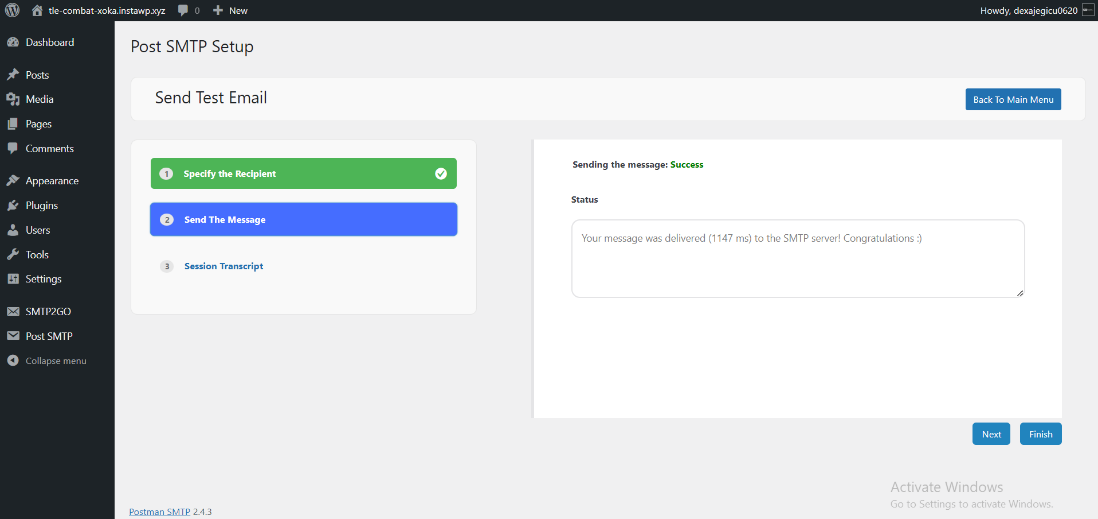
- Now you can send a test email to check if you’ve done everything right. Click on the “Send a Test Email” button.

- Enter the recipient’s email address and click “Next.”
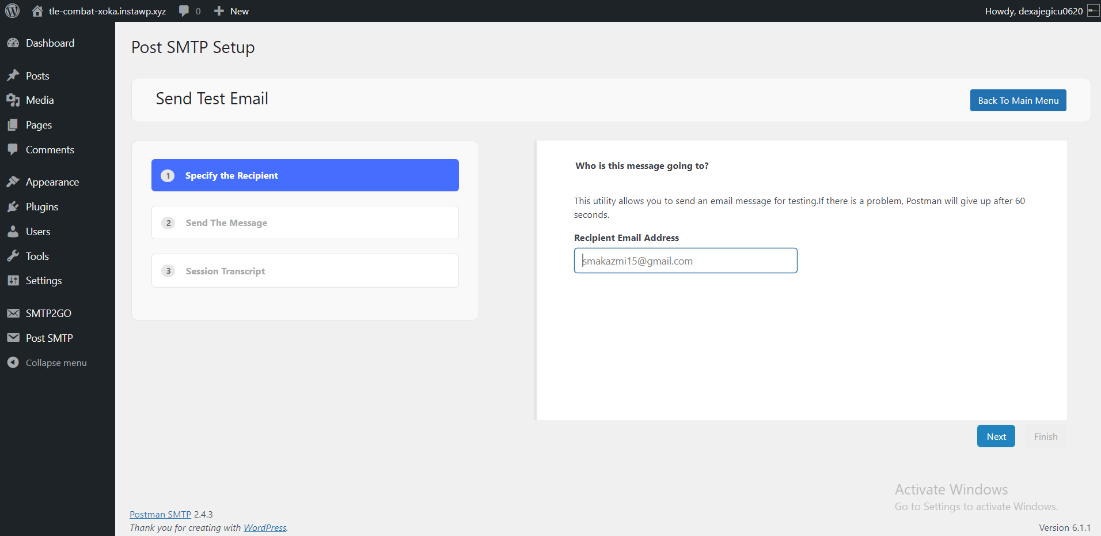
- If you receive a success message, that means you are good to go. Click “Finish” to complete the setup.
Final Words
Once you are done configuring SMTP2GO with Post SMTP, you’ll be able to witness better email deliverability during your next email marketing campaign. If you want all your emails to land in your user’s inbox, not the spam folder, this tutorial is just what you need!
