


Want to configure your Gmail SMTP server to send WordPress emails?
Setting up your Gmail SMTP server for WordPress emails is a good idea as it improves email deliverability and prevents them from ending up in spam.
In this blog, we will walk you through the step-by-step process of how to set up your Gmail SMTP server in WordPress emails using the Post SMTP plugin.
Are you ready? Let’s get started!
06 Easy Steps to Configure Gmail SMTP Server in WordPress
To set up Gmail SMTP in WordPress, follow the steps below:
Step #1: Install and Activate Post SMTP Plugin
- Log in to your WordPress dashboard and navigate to Plugins → Add New Plugin.
- Type “Post SMTP” in the search bar and then look for “POST SMTP – WordPress SMTP Plugin with…” by Saad Iqbal.

- Now, click on “Install” and then “Activate.”
Step #2: Start the Wizard
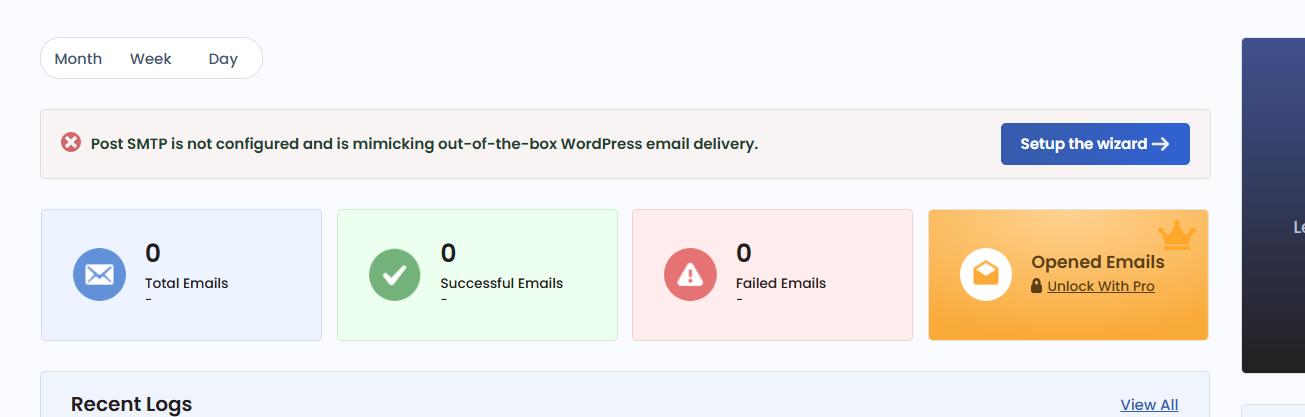
- Once you’ve activated the plugin, go to Post SMTP → Dashboard.
- On the dashboard screen, select “Start the Wizard” to launch Post SMTP configuration.
There are three easy steps in the setup wizard. We will explain each step in detail in the following sections.
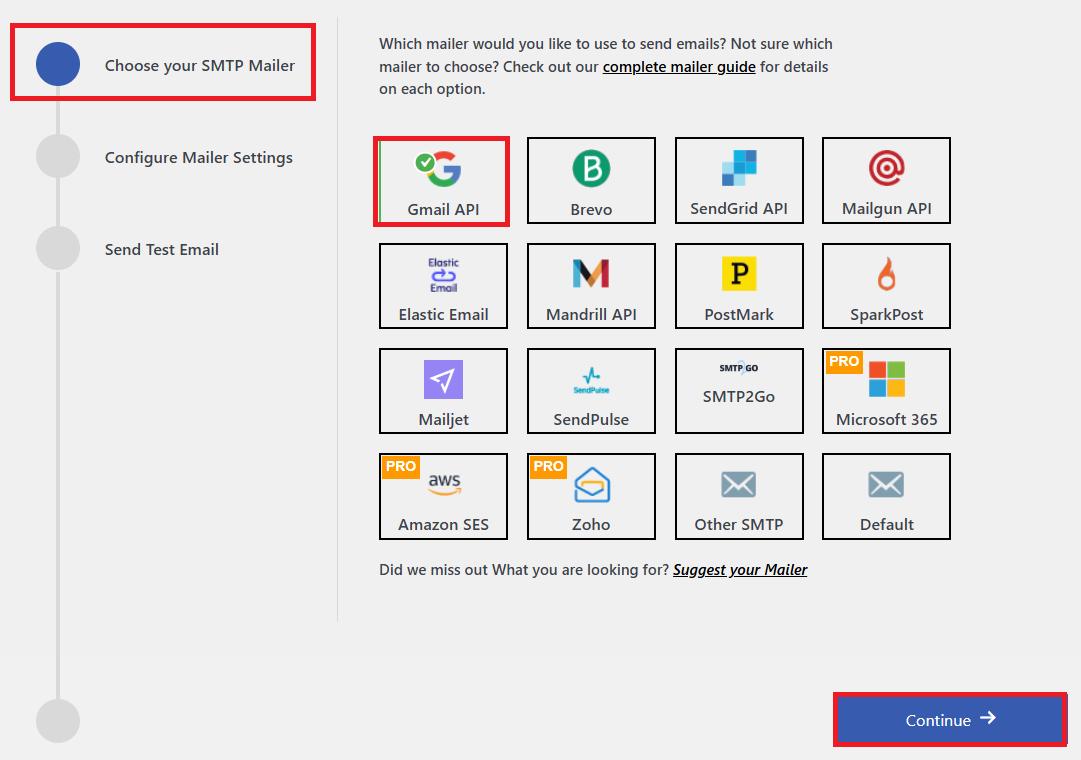
Step #3: Choose Your SMTP Mailer
In the first step of the 3-Step Setup Wizard, you need to select the SMTP mailer, which in this case is Gmail API. After that, hit Continue.
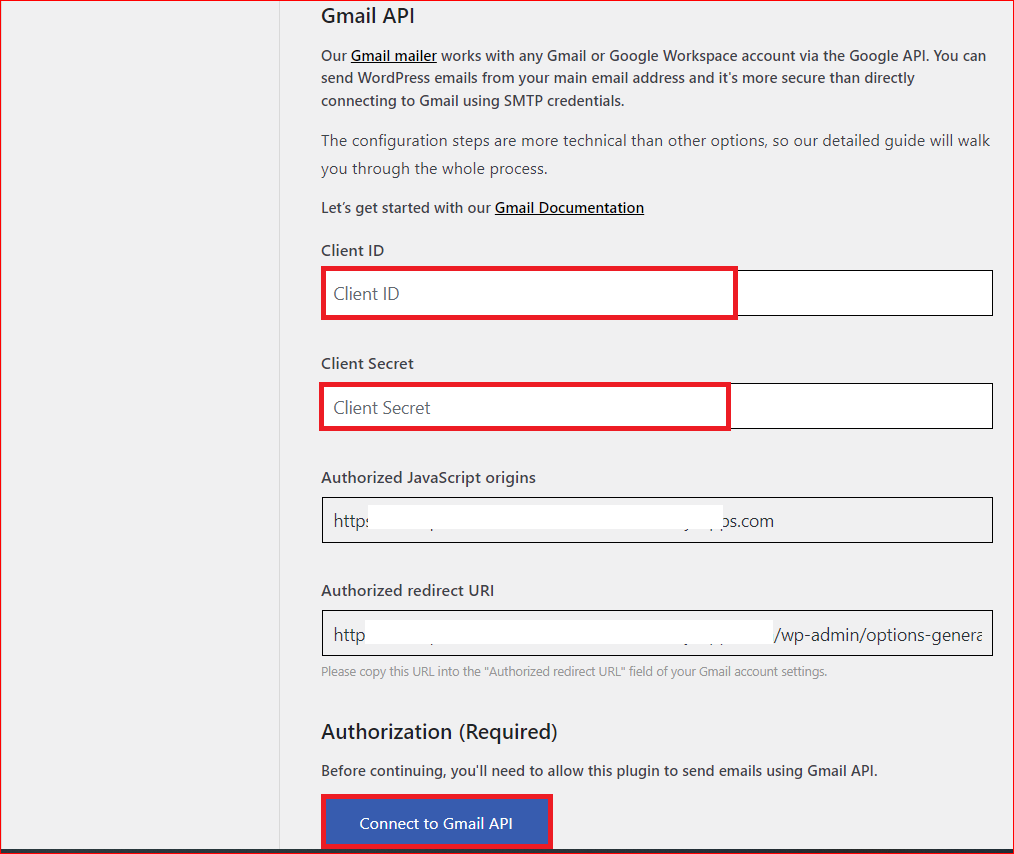
On the subsequent screen, you need a Client ID and Client Secret to connect Gmail API with your WordPress site, which you can get by creating a web app/project in your Google Cloud Console. To do so, follow the step#4.
Step #4: Create a Web App/Project in the Google Cloud Console
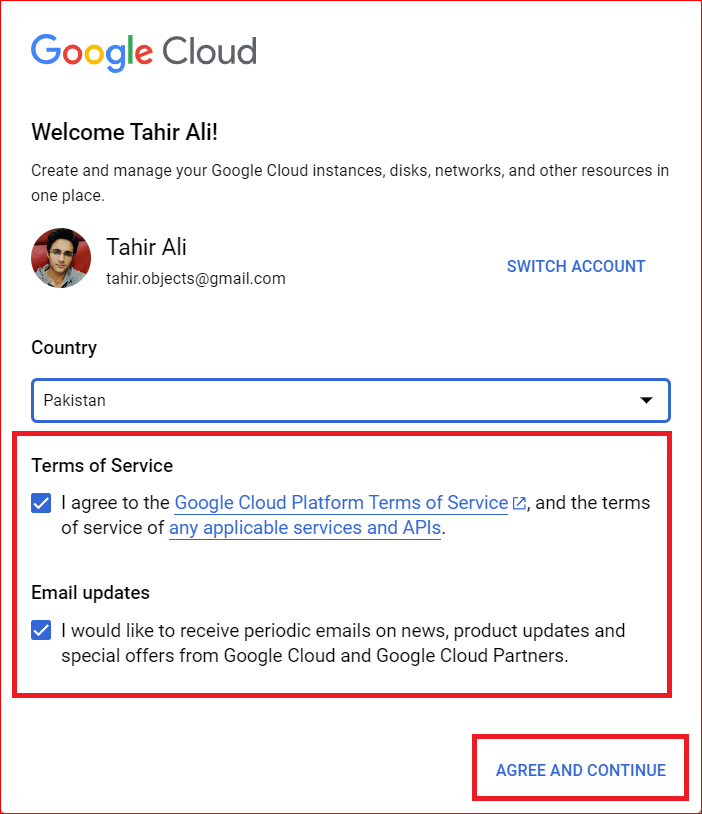
In the new tab, login to your Gmail account and then open your Google Cloud Console.
Note: If this is your first time using Google Cloud Console, then you’ll receive a popup similar to the following. Simply select your country, agree on the Terms of Service, and hit the AGREE AND CONTINUE.
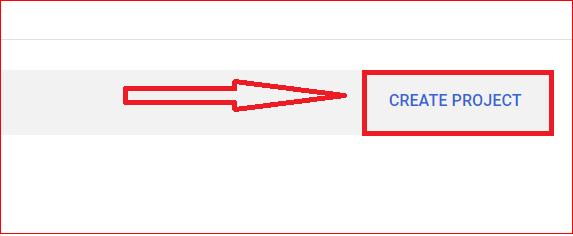
On the next screen, click on the CREATE PROJECT, which you can find on the right-hand side.
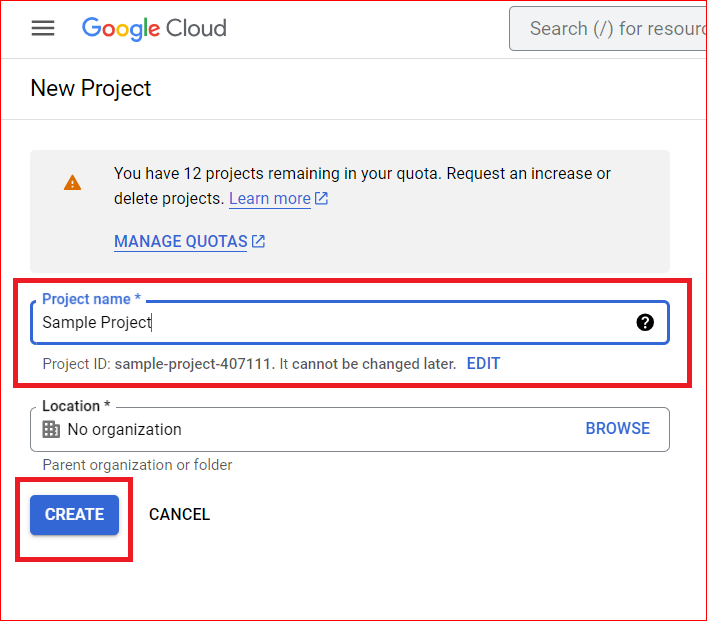
In the Project name field, type any name you want and leave the Location field as it is. Then click CREATE.
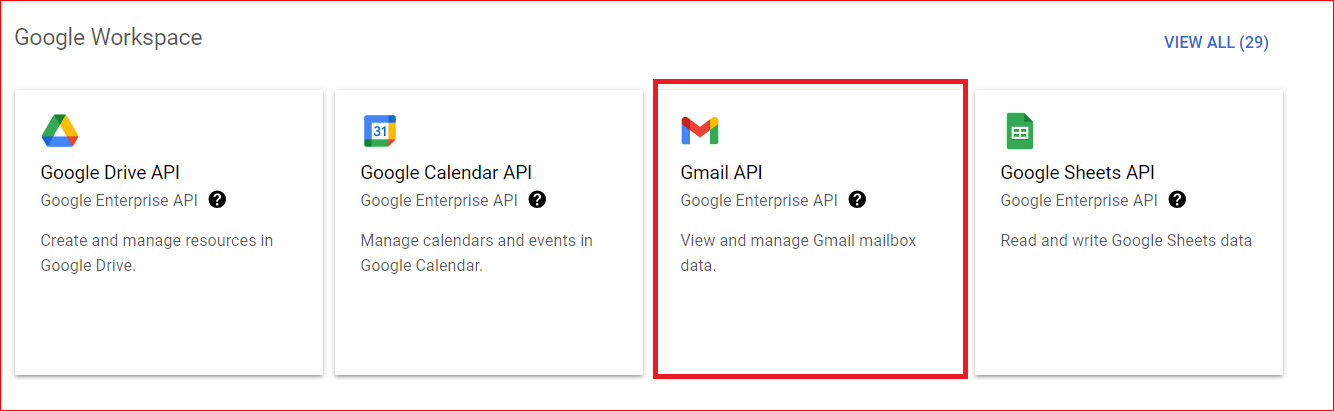
Next, you must enable the Gmail API. Go to the APIs & Services → Library in your Google Cloud Console sidebar and search for Gmail API.
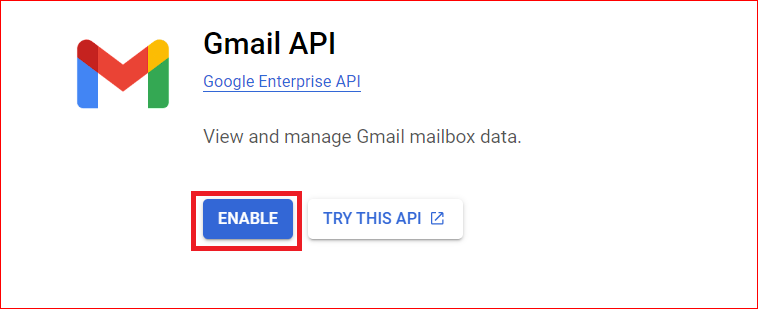
Click on the ENABLE button on the Gmail API page.
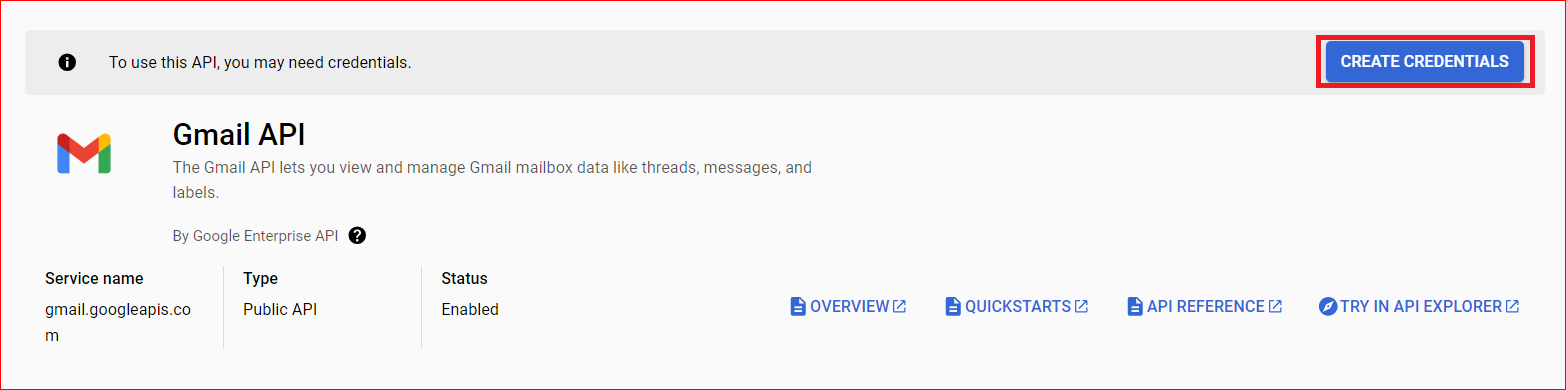
Upon enabling Gmail API, you’ll be directed to the Gmail API Overview page. On this page, click the CREATE CREDENTIALS button, as shown in the screenshot below.
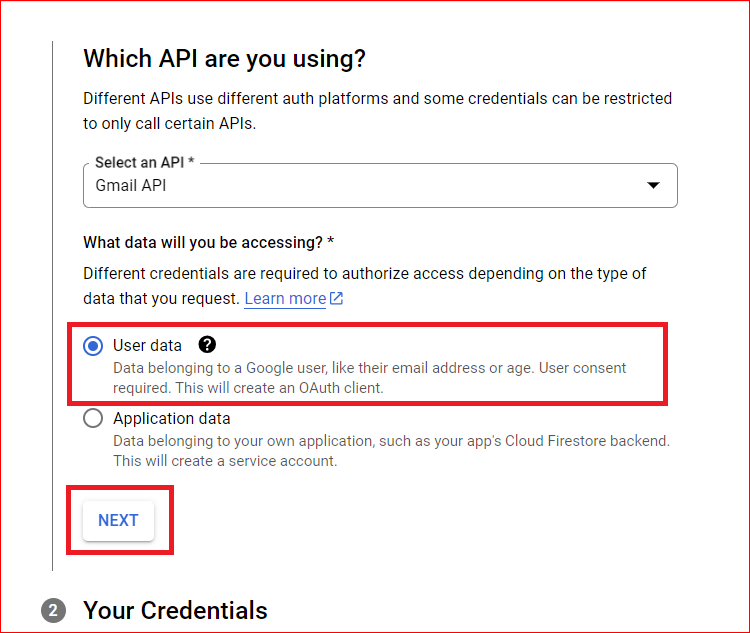
On the subsequent page, select Gmail API from the Select an API dropdown and choose the User data option under “What data will you be accessing?, then hit NEXT.
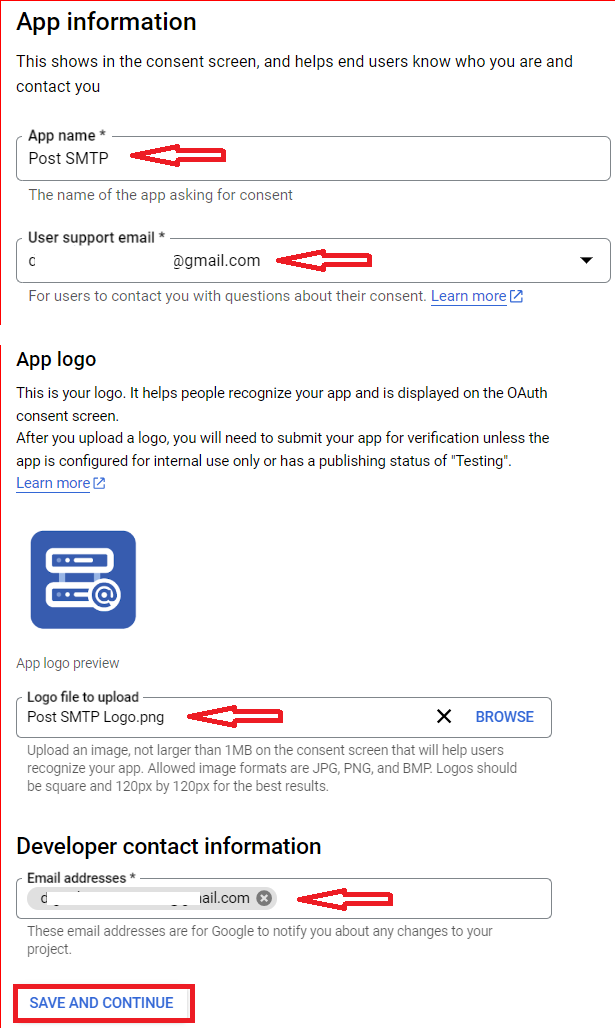
Now, you have to provide some basic information about your app, such as;
- App name: Type the name of your app (e.g., Post SMTP).
- User support email: Enter your Gmail ID.
- App logo: Upload your app’s logo (It’s optional)
Also, in the Developer contact information, enter your email address and then hit SAVE AND CONTINUE.
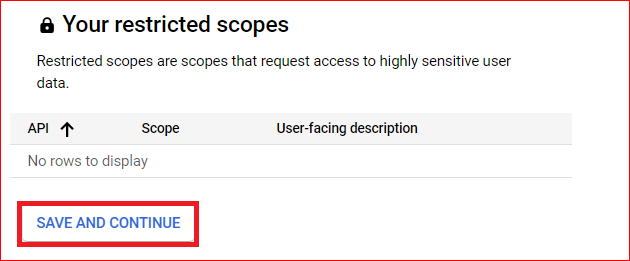
Now, skip the Configuring Scopes option, scroll down till the end of the section, and select the SAVE AND CONTINUE button to continue.
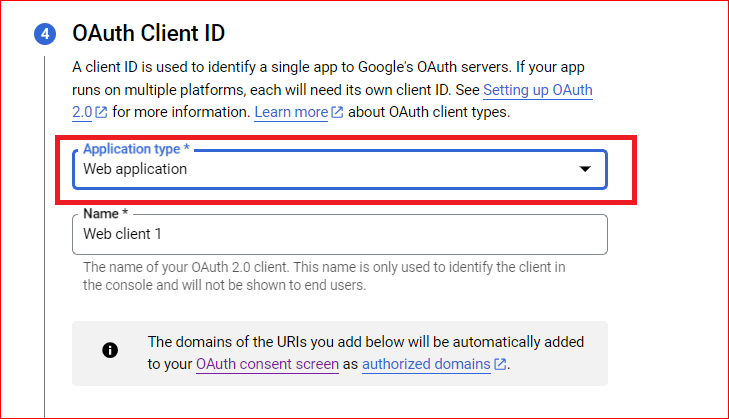
Next, provide information about your OAuth Client ID.
In the Application type, select Web application from the dropdown and leave the Name field as default.
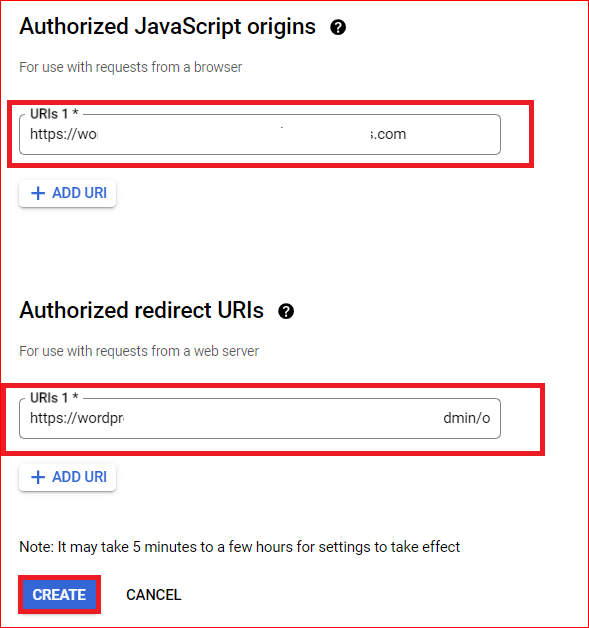
Next, scroll down and click + ADD URI under Authorized redirect URIs.
Now, input the URL that is mentioned in the similar field in your Post SMTP settings and hit CREATE.
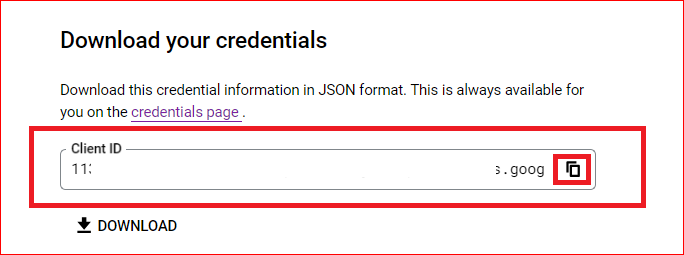
Upon your app creation, you’ll see your Client ID; simply copy it and save it on a Notepad or Sticky Note, as we will use it later.
After copying the Client ID, click DONE at the bottom of the page.
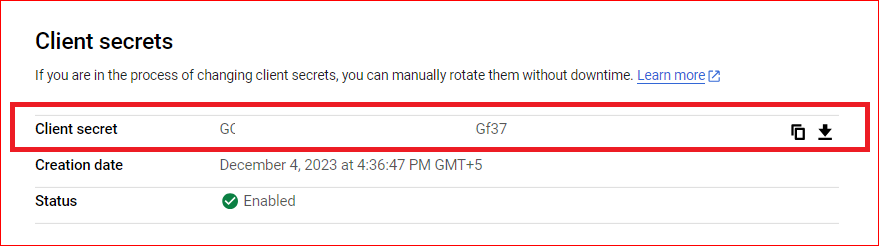
On the next screen, click on the pencil icon as shown in the screenshot below.
Now, copy the Client secret and save it on the same Notepad or Sticky Note where you’ve saved your Client ID.
Step #5: Connect Your Gmail API via Post SMTP
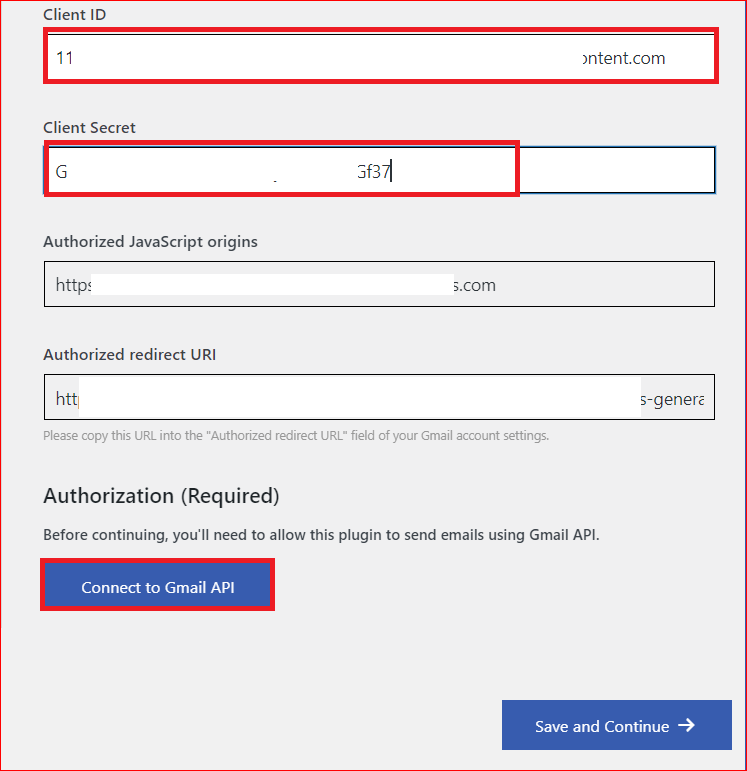
Get back to your WordPress screen where you are configuring the Gmail SMTP server via Post SMTP.
Here, enter the Client ID and Client Secret in the corresponding fields and hit Connect to Gmail API.
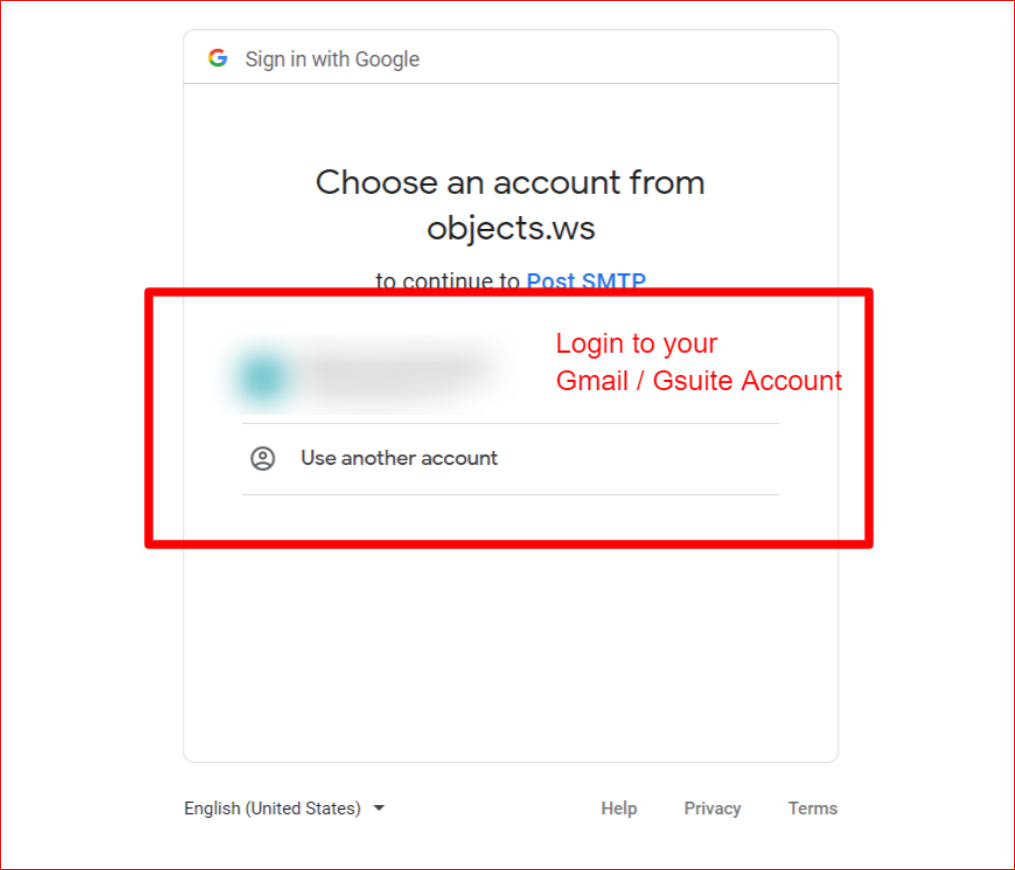
Next, log in to your Google account. Keep in mind that it must be the same account that you used to create the web app in the Google Cloud account.
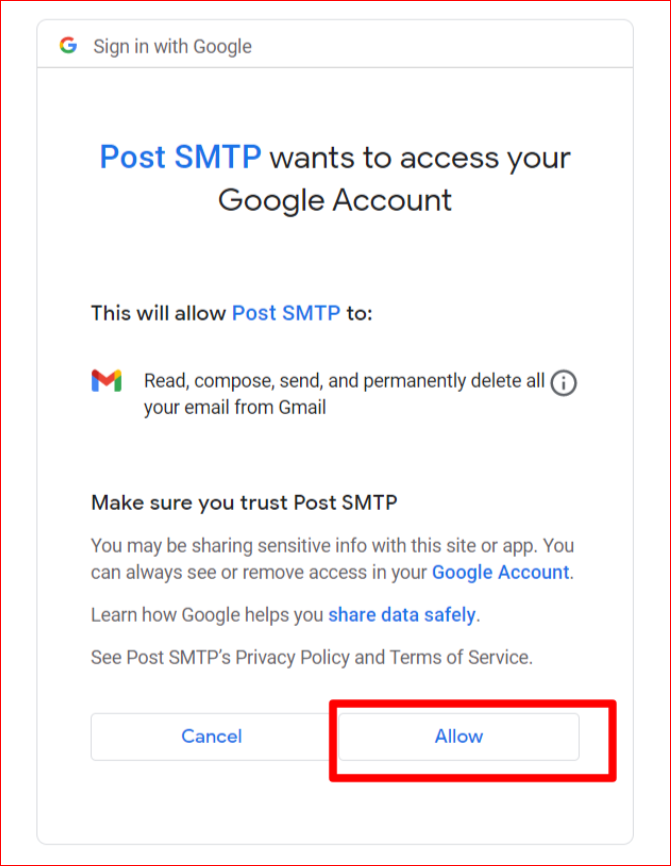
Grant access by clicking the Allow button, as shown in the screenshot below.
On successful connection with your Gmail SMTP server, you’ll get back to the Post SMTP configuration page. Here, simply hit the Save and Continue → button.
Step #6: Test Email Deliverability
Now it’s time to test your Gmail SMTP configuration. In the Recipient Email Address field, enter any email address you can access and click on the Send Test Email button.

After successful email delivery, you will see the green Congratulations status, as shown in the screenshot above.
That’s it, congratulations! You have now successfully configured the Gmail SMTP server with your WordPress site.
🚨 NEED HELP?
Are you struggling to set up the Gmail SMTP Server in WordPress? Don’t worry! Our expert configuration service is here to help! Our team of experienced WordPress professionals will handle the complete installation and setup of WordPress Gmail SMTP Server configuration for you and ensure your emails are reliably delivered.

With this service, we will:
✅ Install and configure Gmail SMTP Server on your WordPress website.
✅ Troubleshoot and resolve any email delivery issues.
✅ Optimize settings for your specific hosting environment.
✅ Test and verify that your emails are working correctly.
Don’t let email issues affect your business! Click here to request expert assistance and configure your Gmail SMTP server in WordPress.
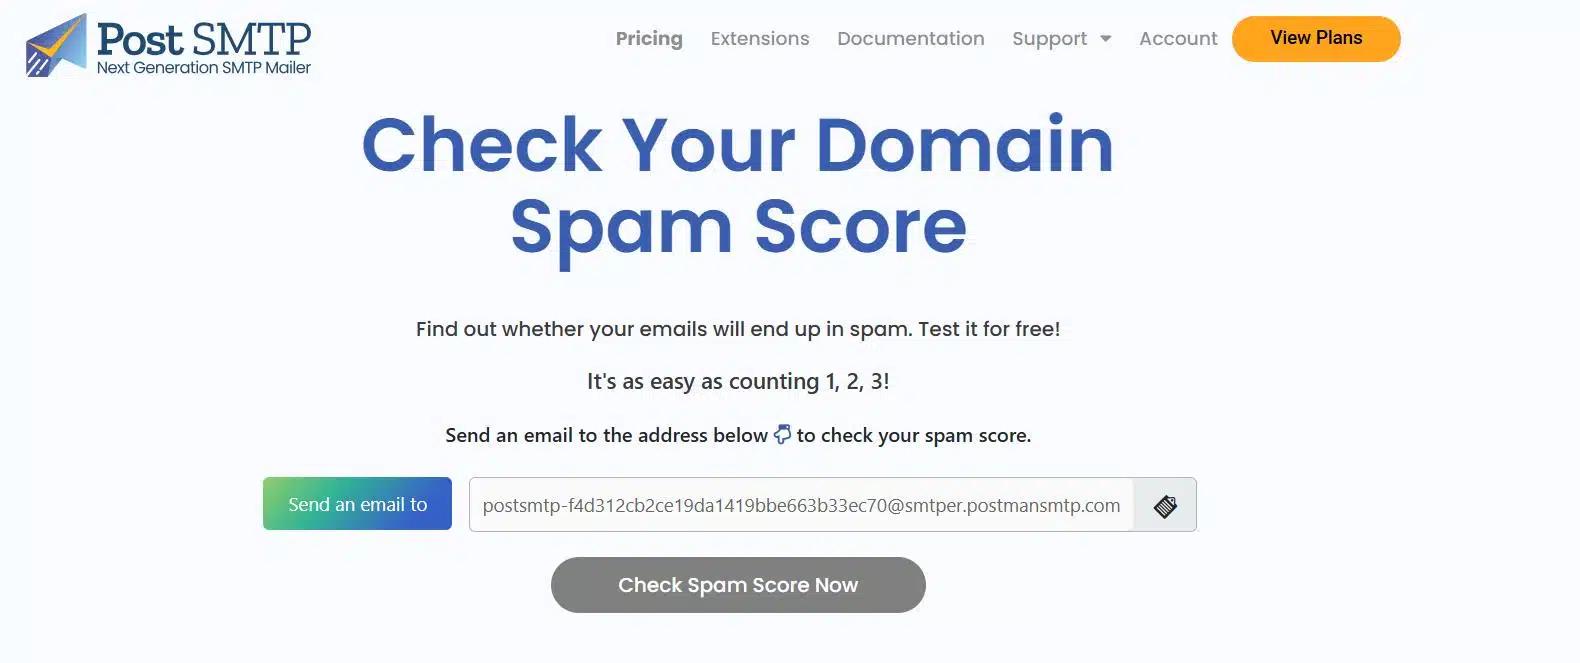
📌 Lastly, Don’t Forget to Check Your Domain Spam Score
If your WordPress emails still aren’t reaching inboxes, your domain’s spam score could be the issue. A high spam score increases the likelihood of email providers marking your messages as spam or blocking them altogether. This typically happens when key authentication protocols like SPF, DKIM, and DMARC are missing or incorrectly configured.
Use a Spam Score Checker tool to analyze your domain’s reputation. This tool helps identify potential problems and offers suggestions to improve your email deliverability.
If your domain has a high spam score, review your DNS settings and properly configure SPF, DKIM, and DMARC records. These authentication measures help verify your emails and reduce the chances of them being flagged as spam.
Need help fixing email authentication issues? Click here to book expert assistance. Our support team is ready to assist you in optimizing your email settings, improving inbox placement, and preventing email delivery failures.
🚨 You might want to read this 👉 How to Fix Gmail Blocking Emails Issue [6 Easy Ways]
Final Remarks – Install Post SMTP Plugin to Configure Gmail SMTP Server
If you are facing email delivery issues on your WordPress site, then configuring the Gmail SMTP server on your site is one of the best ways to improve email deliverability.
Fortunately, the Post SMTP plugin makes the whole Gmail SMTP WordPress configuration a breeze. All you need is to install the Post SMTP plugin on your WordPress site, provide GMAil API details, and viola, you are set!
Lastly, if you still find the process difficult or need any help regarding Gmail SMTP configuration, then feel free to contact us. Our team of WordPress experts is always ready to help you!
Happy Emailing!

