

 OpenAI
 Perplexity
Are you looking for a way to configure Microsoft Office 365 for WordPress emails? If so, you are at the right place!
Instead of using the default WordPress mail function, the Microsoft Office 365 SMTP server is a better option to improve WordPress email deliverability.

In this guide, we will show you how to set up Microsoft Office 365 for WordPress emails in three easy steps. Also, we’ll explain what the Microsoft Office 365 email service is, why you should use it with WordPress, and what prerequisites you have to meet to configure it.
Are you ready? Let’s get started!
What is Exactly the Microsoft Office 365 Email Service?
Microsoft Office 365 is a cloud-based suite of productivity tools that includes email, calendar, contacts, and more. You can use Office 365 to create and manage your professional email accounts with your own domain name. For example, you can have an email address like john@yourdomain.com instead of john@hotmail.com.
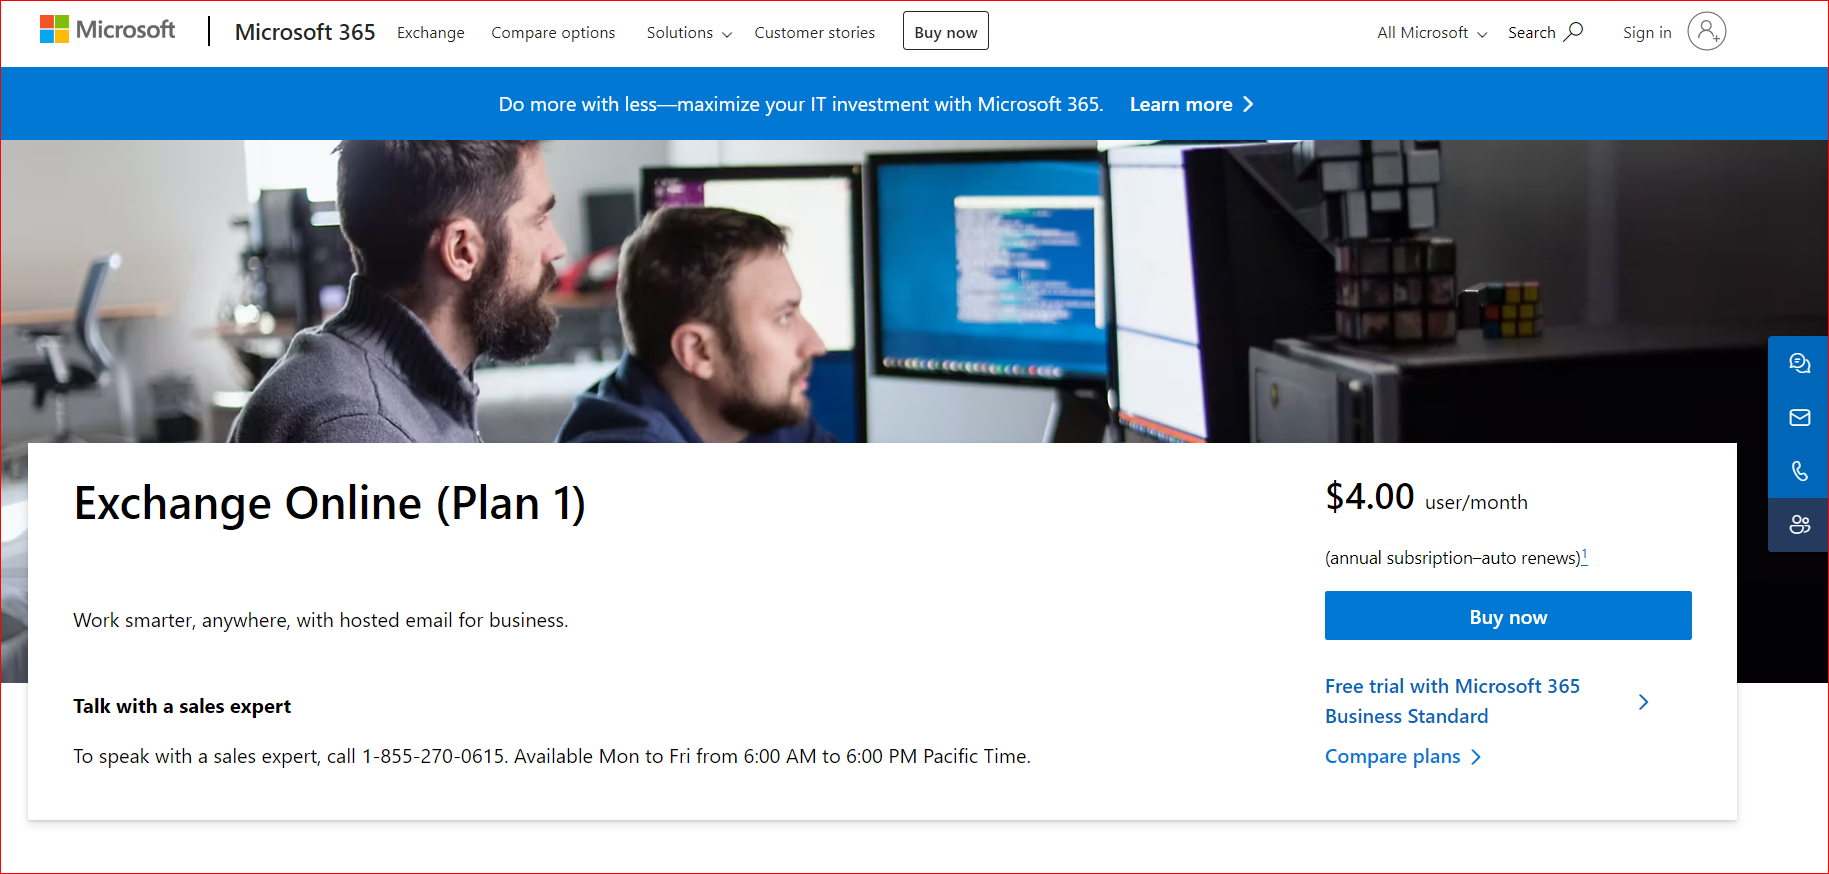
Office 365 uses Exchange Online as its email service, a hosted solution offering high availability, security, and compliance. Exchange Online supports SMTP (Simple Mail Transfer Protocol), the standard protocol for sending and receiving emails over the Internet.
You can connect your Office 365 account with WordPress via APIs. It means you do not need to enter passwords or login information in the WordPress settings (making it more secure than conventional SMTP configuration).
IMPORTANT: You have to set up the SPF and DKIM values if you use a paid account with a From email that has your own domain name. For more details, please refer to Microsoft’s SPF documentation and DKIM documentation.
Why Should You Use Microsoft Office 365 to Send WordPress Emails?
As we know, WordPress is a CMS (Content Management System), not an ESP (Email Service Provider). Thus, sending emails is not its main functionality.
That’s why most WordPress users face the lower email deliverability issue. The reason is that WordPress needs a proper email delivery system. In WordPress, the process of sending an email goes like this:
- WordPress plugins use the PHP-based wp mail() function for email transmission by default.
- Then, WordPress passes your email request on to your provider’s server using PHP mail().
- And finally, PHP commands/communicates your server’s email router and your hosting provider’s mail server to deliver emails.
The problem is that most hosting providers don’t have sufficient infrastructure to support email, and most hosting servers block PHP emails by default. Therefore, you should avoid sending emails using WordPress’s default mail function. Fortunately, the easiest solution to this problem is to install the Post SMTP plugin, which lets you route your emails through the SMTP server of your choice.
SMTP stands for Simple Mail Transfer Protocol, the global standard for email transmission over the Internet. In case your web hosting company does not offer email hosting, simply use the Post SMTP plugin to send WordPress emails via your preferred email service, such as Microsoft Office 365, Gmail, Amazon SES, Brevo (formerly Sendinblue), PostMark, MailGun, SparkPost, Mailgun, etc.
Post SMTP plugin is a very easy-to-use and reliable SMTP WordPress Plugin for improving WordPress email deliverability.
Prerequisites for Configuring Microsoft Office 365 for WordPress Emails
Before you set up Microsoft Office 365 for WordPress emails, there are a few things you need to consider, such as:
- SSL(HTTPS) Certificate Enabled: You must have HTTPS (SSL/TLS) enabled on your website.
- Office 365 subscription: An active Office 365 subscription that includes Exchange Online with administration rights to access SMTP. Also, make sure that the email address of your Office 365 account and WordPress must be the same; otherwise, you won’t be able to send emails.
- Post SMTP Plugin Installed: You need to install and activate the Post SMTP plugin on your WordPress site. It’s the best SMTP plugin for WordPress. If you don’t know how check out our Post SMTP installation guide. Don’t configure it. Only install and activate.
NOTE: Before moving forward, make sure you have everything ready because any incompatibility can cause problems with the configuration process and email deliverability.
Check Out How Post SMTP Makes 365 WordPress Integration a Breeze!
Set Up Microsoft Office 365 for WordPress Emails in 3 Easy Steps
Now that you have everything ready, let’s see how to configure Microsoft Office 365 for WordPress emails in just three easy steps:
Step #1: Install and Activate the Post SMTP Office 365 Extension
To connect Microsoft 365 SMTP server with your WordPress site, you need have the Post SMTP Pro version installed on your site. Follow the steps below to set up Micsotft 365 SMTP server for WordPress using the Post SMTP pro.
- Fist, go to the Post SMTP → Get Pro Bundle in your WordPress dashboard. It will take you to the Post SMTP Pro pricing page.


- On the pricing page, select your desired subscription plan and click Buy Now. Remember that the lifetime pricing option is the best value for your money.
- After completing the purchase, you will receive an email with your subscription details, the download link for the .zip file, and a license key.
- Go to your WordPress dashboard, navigate to Plugins → Add New Plugin, and click the Upload Plugin button.
- Select the Choose File button and select the zip file titled (i.e., post-smtp-extension-office365-premium.1.3) that you downloaded from the link in the email.


- Click on the Install Now button and wait for the installation process to finish.
- After installation, click the Activate Plugin button and enter your license key in the License Key field. Finally, hit the Activate License button to validate your license.

Now, go ahead and generate new APIs in your Azure portal by following the next step.
Step #2: Create New APIs in Your Azure Portal
For API generation, you need to register a new app in the Azure portal. This app will allow you to connect your WordPress site with your Office 365 account via APIs.
- Go to the Azure Portal and sign in with your Office 365 credentials.
- Click on the App Registrations button at the bottom of the page.

- To register, select the New Registration tab at the top of the page.

- Enter a name for your app in the Name field. For example, you can name it Post SMTP Office 365.
- Select the “Accounts in any organizational directory (Any Microsoft Entra ID tenant – Multitenant) and personal Microsoft accounts (e.g. Skype, Xbox)” option.
- Under Redirect URI, select the Web from the drop-down and then enter your WordPress site domain name, such as “https://yourdomainname.com/wp-admin,” as the redirect URI.
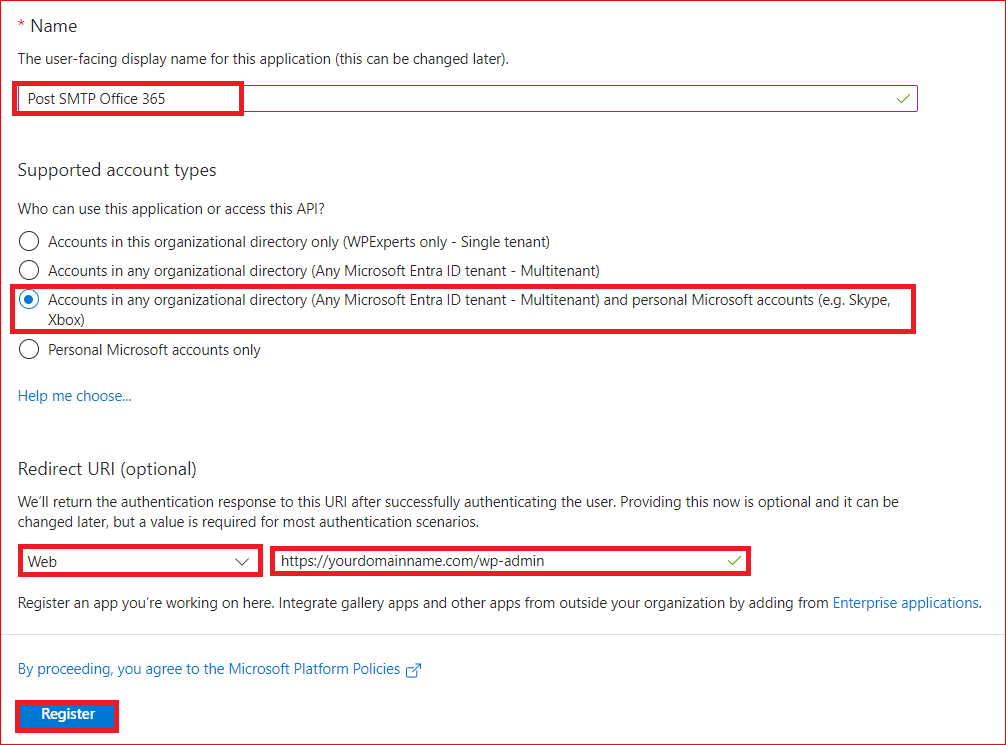
- Then, hit the Register button to create new APIs.
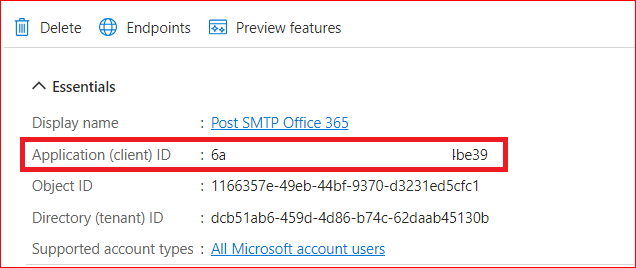
- Upon registration, don’t forget to copy the Application (client) ID and save it on a notepad or sticky note, which we will use later in the Post SMTP Office 365 configuration process.
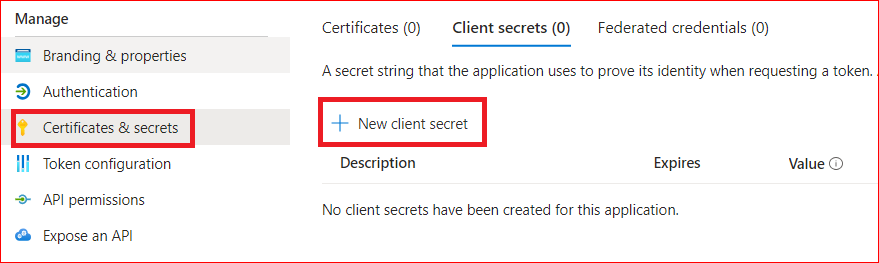
- Now, select the Certificates & Secrets option from the left sidebar.
- Click on the + New Client Secret button.
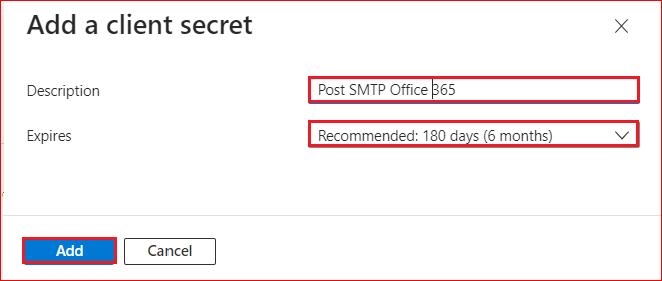
- Provide Description (i.e., Post SMTP Office 365) and Expiration Time, then hit Add.
- On the subsequent screen, copy the Client Secret Value under the Value column of Client Secrets.

Note: Remember, during the entire process above, you’ve copied two values, Application (client) ID and Client Secret Value, which we will use in the Post SMTP setup wizard while connecting the Office 365 SMTP mailer to WordPress.
Step #3: Add Office 365 Details in Your Post SMTP Setup Wizard
This is your final step to set up Office 365 to send WordPress emails:
- Go to your WordPress dashboard and navigate to Post SMTP → Start the Wizard.
- Select Office 365 API as your SMTP mailer and click the Continue button.


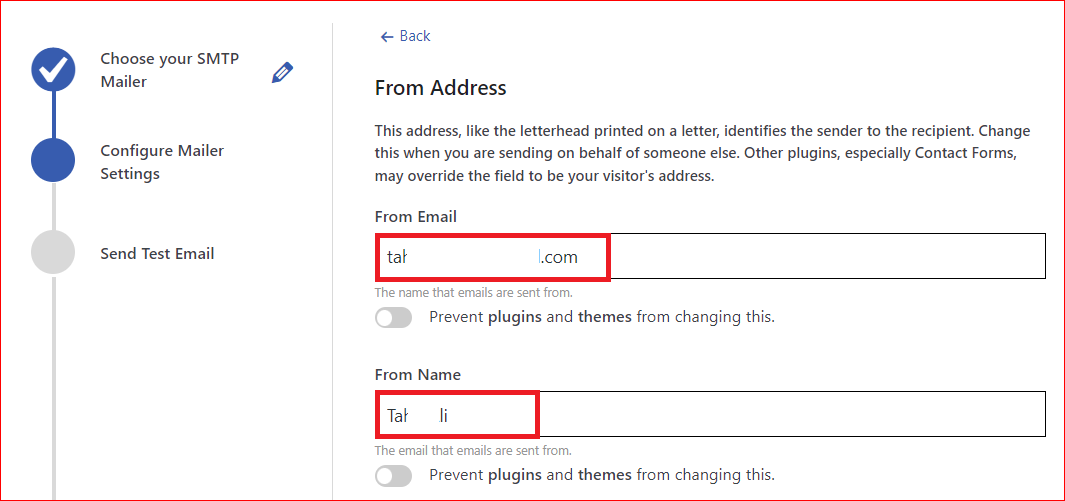
- Enter your email address and name in the From Email Address and From Name fields, respectively. These are the details that will appear in your outgoing emails.
- Paste the Application (client) ID and the Client Secret (Value) that you copied from the Azure portal.
- Also, enter the exact domain in the Redirect URI field that you’ve added in the API creation process in Azure Portal.
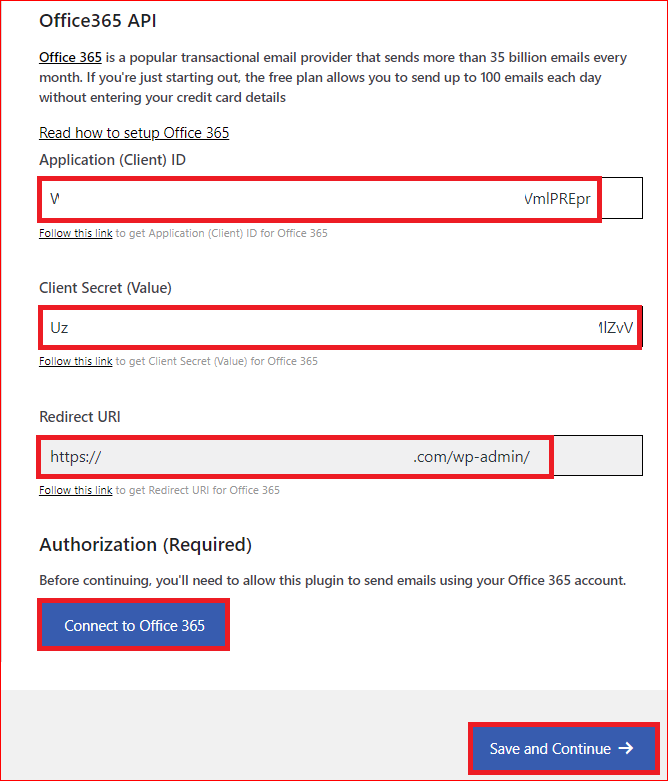
- Now, click on the Connect to Office 365 button to authorize Post SMTP to access your Office 365 account.
- After authorizing, you’ll be returned to the Post SMTP setup wizard. Click on Save and Continue to proceed.
Congratulations! You’ve now successfully set up Microsoft Office 365 for WordPress emails. Moving forward, simply send a test email to validate its delivery.
Test WordPress Email Deliverability
On the Send Test Email Screen, enter the email address of the recipient in the Recipient Email Address field and hit the Send Test Email button.
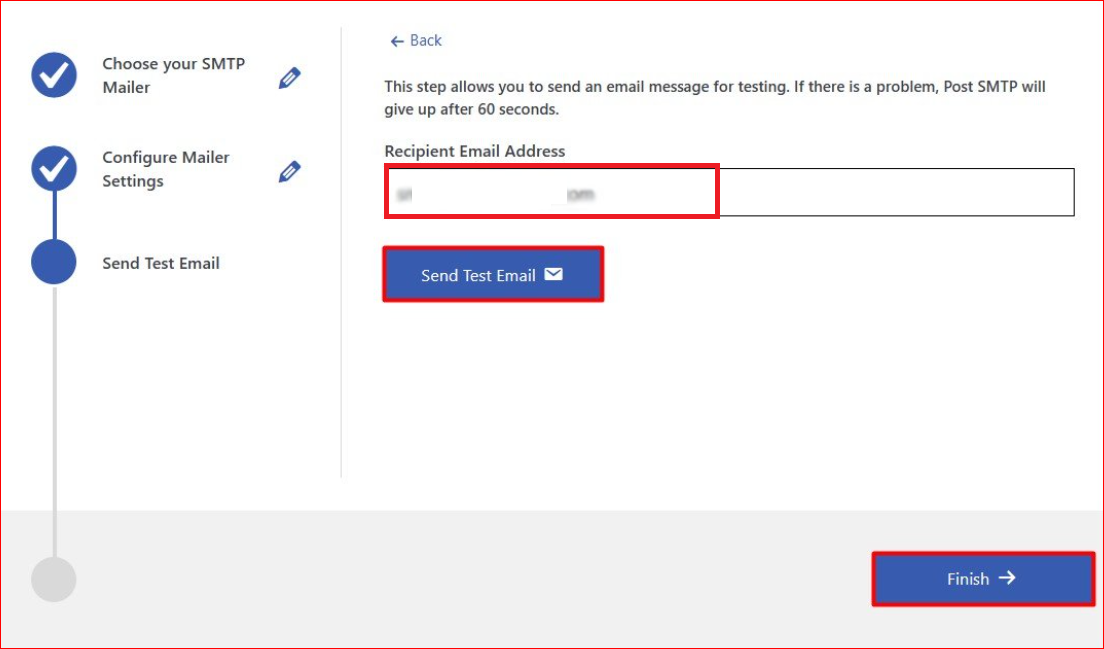
Upon successful completion, click on the Finish button, and you are good to go.
Don’t Forget to Set Up DNS Records for Your Domain
To maximize the chances that your emails reach the inbox and not the spam folder, you must also properly set up DNS records for your domain. These records, including SPF, DKIM, and DMARC, tell email servers that your emails are legitimate and have not been tampered with.
Here’s a quick explanation:
- SPF (Sender Policy Framework): SPF tells receiving servers which mail servers are authorized to send emails on behalf of your domain. You need to add an SPF record in your DNS settings that includes your SMTP provider’s servers.
- DKIM (DomainKeys Identified Mail): DKIM adds a digital signature to your emails, verifying that the email has not been altered after it was sent. Most SMTP providers, including SendGrid, offer DKIM configuration instructions on how to add the necessary records to your DNS.
- DMARC (Domain-based Message Authentication, Reporting, and Conformance): DMARC builds on SPF and DKIM by telling email servers what to do if an email fails these checks. Setting up DMARC helps protect your domain from email spoofing and phishing attacks.
If you are having difficulty setting up these DNS records, don’t hesitate to reach out to us for expert assistance. Our team of Technical Email Specialists is here to assist you with any email-related issues you may have.
Bottom Line – Install Post SMTP Office 365 Extension For Reliable WordPress Email Delivery
Microsoft Office 365 is an excellent choice for sending WordPress emails as it offers improved deliverability, enhanced security, seamless integration, and flexible pricing. However, you cannot configure Microsoft Office 365 for WordPress Emails without using Post SMTP Office 365 Extension.
To connect Post SMTP with Office 365, install and activate the Post SMTP Office 365 extension on your WordPress site. This extension enables you to use the OAuth 2.0 protocol for authentication and avoid storing your password in the WordPress database.
We hope this article helped you learn how to set up Microsoft Office 365 for WordPress emails quickly and easily. If you have any questions or technical difficulties, don’t hesitate to contact us for expert assistance with all your WordPress SMTP configurations.


