


Email communication has become an indispensable resource for businesses in today’s digital landscape. Whether you’re sharing personalized offers, important updates, or simply welcoming new subscribers, email provides a direct and impactful way to engage with your audience.
So, to get the most out of your WordPress email communication, you must understand how to configure SMTP for WordPress to send emails, which will improve your email deliverability.
Before diving into the WordPress SMTP configuration, let’s look at why you need to do so in the first place.
Why You Need To Configure SMTP For WordPress To Send Emails
By default, your WordPress website uses the PHP mail() function. But unfortunately, most major email clients might flag your emails as spam or junk if you send them through your website using the PHP mail() function.
On the other hand, if you choose Simple Mail Transfer Protocol (SMTP) instead. You can easily improve your email marketing deliverability. SMTP is a standard protocol that enables the transfer of emails between servers, allowing you to keep track of email status and manage email lists.
IMPORTANT: To use SMTP services in WordPress, you must install a reliable WordPress mail plugin, like Post SMTP, because it’s a great WordPress SMTP plugin with many compelling features, including Multiple SMTP Mailer Options (Microsoft 365, Amazon SES, Zoho, Mailgun, Brevo, SendGrid, etc.), Fallback Mailing, Instant Email Failure Alerts, Dedicated Post SMTP Mobile App, Chrome Extension, Push Notifications, OAuth 2.0 protocol and more.
Now, let’s get started with the process of setting up SMTP for WordPress.
How To Configure SMTP For WordPress – Step By Step
Following are the steps you can go through to Configure SMTP For WordPress.
Step#1: Install and Activate The Post SMTP WordPress Plugin
As we mentioned earlier, you have to install the Post SMTP plugin to use SMTP services in your WordPress to send emails, so to do that, follow the steps below.
- Log in to your WordPress website Dashboard by entering the login credentials. (i.e., https://yoursite.com/wp-login.php).
- Go to the “Plugins” section of the left-hand menu.
- Now click the “Add New” button in the top left corner.
- Type “Post SMTP” in the search bar and Click on “Install Now”
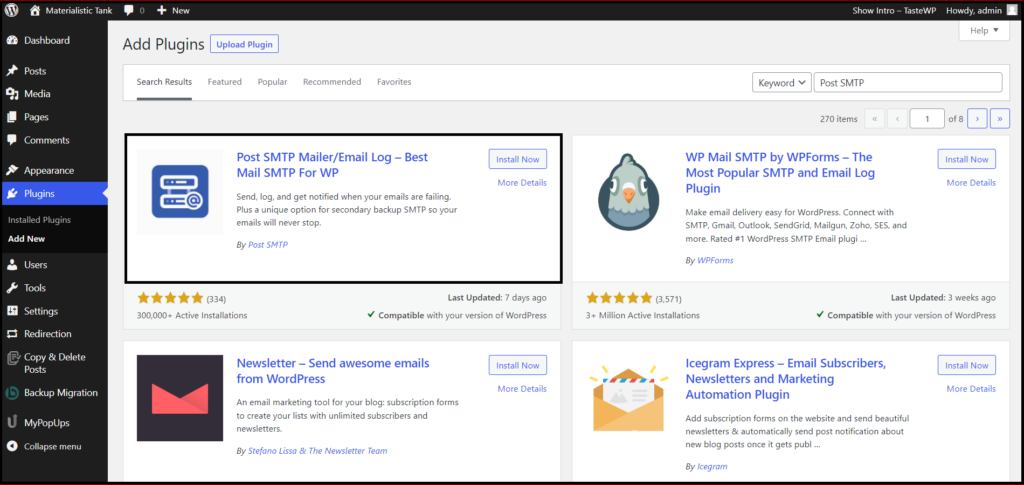
- Wait for a few seconds and then simply click on “Activate.”
That’s it; once activated, the below Post SMTP admin dashboard will appear.
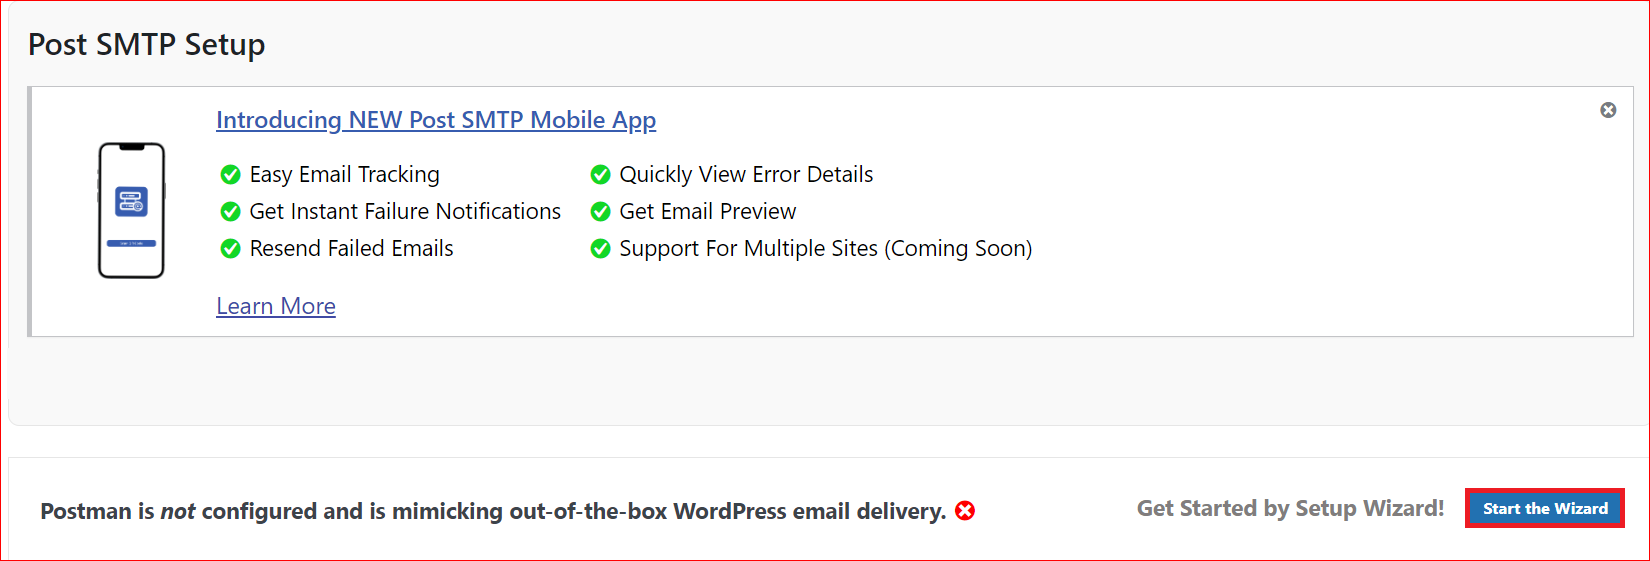
Next, click the “Start the Wizard” button to configure the SMTP settings.
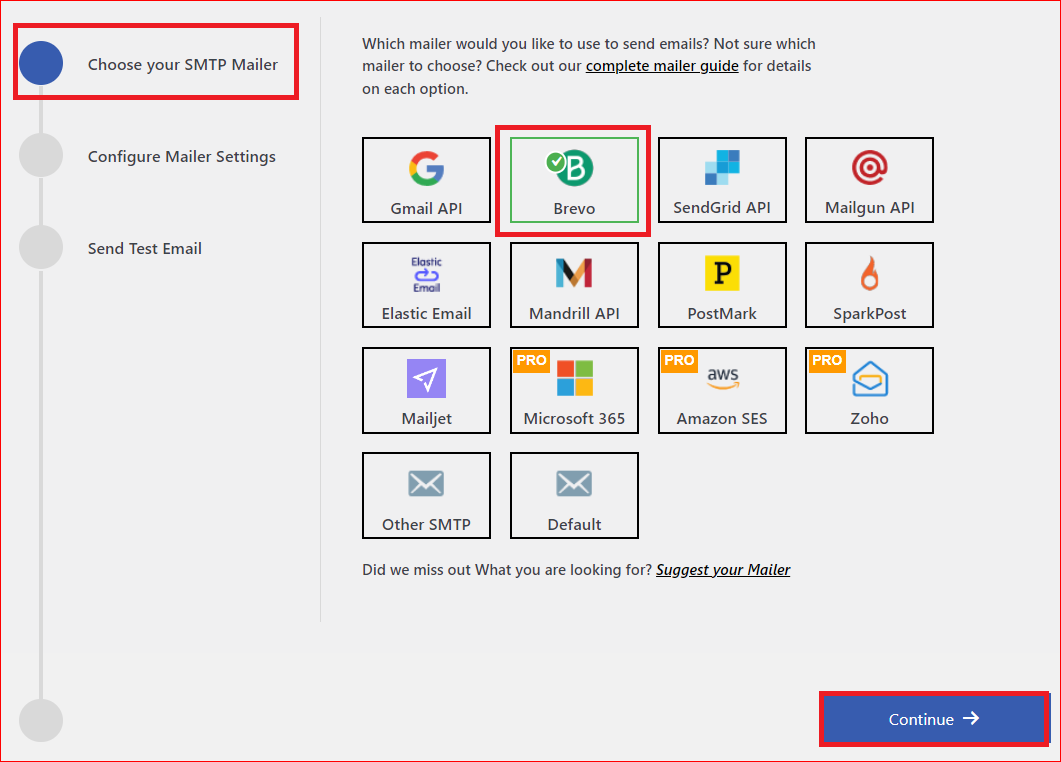
Step#2: Select and Enter SMTP Mailer Settings
The easy-to-follow 3-step setup wizard asks you for information about your SMTP mailer, email settings, and preferences.
- The first step is to choose the SMTP mailer of your choice and hit Continue. For those who haven’t found their SMTP provider, you can choose the “Other SMTP” option or use the Post SMTP Pro, which allows you to connect any SMTP service using OAuth 2.0 with additional features such as email tracking, advance email quota management, etc.
- At the moment, we are using Brevo (formerly Sendinblue).
- On the subsequent screen, fill out the From Email and From Name fields with the email address and name you want to use for your emails.
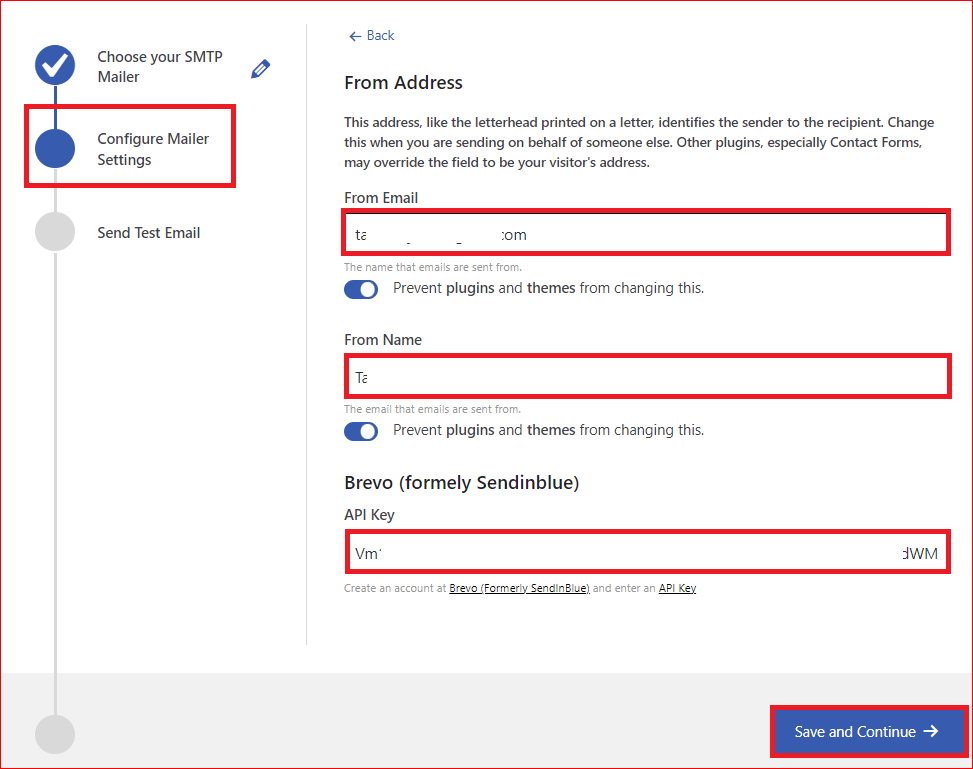
- The next step is to log into your Brevo account, get your API Key, and paste it into the appropriate field, as shown in the screenshot above. Then, click “Save and Continue.”
Step#3: Send a Test Email to Verify SMTP Configuration
- Finally, let’s test your SMTP configuration. Enter any email address you have access to in the Recipient Email Address field and click Send Test Email.
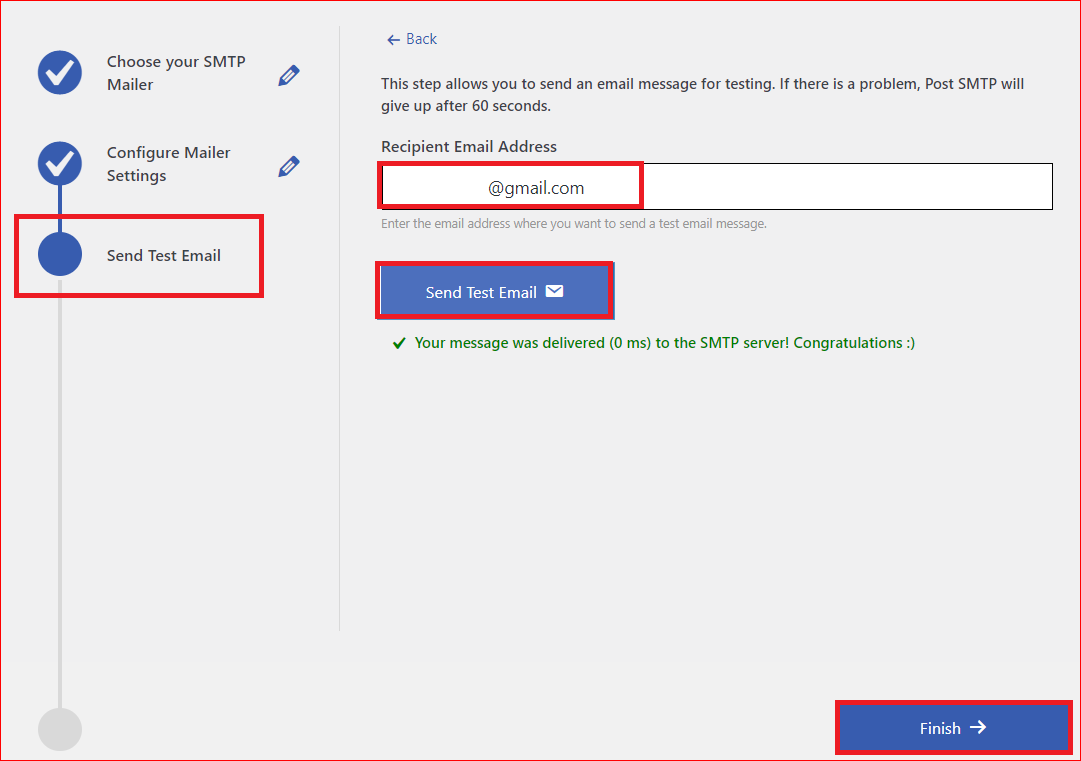
- Once the delivery has been successfully delivered, you’ll see the green Congratulations status. In that case, click on the Finish button to complete the process.
NOTE: If you still need help with the WordPress SMTP configuration process, feel free to contact us for expert assistance. Our team of WordPress experts is always available to solve all your WordPress email deliverability issues.
Wrapping Up
As a WordPress site owner, sending emails is an effective and powerful communication strategy. And switching from the default PHP mail() function to configure SMTP for WordPress to send emails can improve your email deliverability at scale.
That’s where the Post SMTP WordPress plugin can help you! It lets you configure any SMTP server with your WordPress site in less than a minute. Also, you can enjoy additional features such as email tracking, weekly email delivery stats, priority customer support, a dedicated Mobile App, and much more.
Lastly, if you still have questions regarding Post SMTP or the WordPress SMTP configuration process, you can contact us by submitting a request here.
We’ll be happy to help!

