
 OpenAI
 Perplexity
WordPress email logs act as a digital paper trail, recording every email your website sends so you can track email delivery, diagnose failures, and prevent missed notifications. For any business website, email communication plays a critical role in user experience and conversions.
From password reset emails and order confirmations to contact form notifications and admin alerts, these messages must reach the recipient’s inbox on time. Unfortunately, many site owners only realize there is a problem when customers stop receiving important emails, which often leads to lost leads, failed transactions, and frustrated users.
By default, WordPress does not offer a built-in way to track or log outgoing emails. When an email fails, WordPress does not display an error or provide delivery details, leaving you unaware of what went wrong.
The good news is that you can easily log, monitor, and fix WordPress email delivery issues using the right setup, and this step-by-step guide will show you exactly how to do it.
What Are WordPress Email Logs?
A WordPress email log is a detailed record of every email sent from your website. Think of WordPress email logs as a “Sent Items” folder for your entire website. It captures key details such as the sender, the recipient, the subject line, and the exact time the message was sent.
By default, WordPress sends emails using the PHP mail() function provided by your hosting server. This process happens in the background, and WordPress does not retain delivery or error information by default.
An email logging system captures this data and stores it in your WordPress database before the email is sent, allowing you to review delivery status, content, and errors later. When emails are sent via SMTP, logs can also record detailed error messages and server responses.
Why Set Up WordPress Email Logs?
Setting up logs is a proactive way to manage your site. According to data from various email deliverability studies, nearly 15% of business emails never reach the intended inbox due to server misconfigurations, spam filtering, or authentication issues.
Without a logging system, you are essentially flying blind. Here is why every WordPress site owner should enable this feature:
- Reliable Proof of Delivery: A customer might claim they never received their digital product or receipt. With logs, you can verify the exact second an email was sent, giving you concrete evidence to share with customers.
- Easily Debug Technical Errors: When WordPress fails to send an email, it usually happens silently. You won’t see an error message on your dashboard. When emails are sent via SMTP, the email log can capture detailed error messages and SMTP response codes provided by the mail server, helping you identify why a message failed.
- Maintain a Clear Audit Trail: Track who triggered emails such as password resets, account registrations, and admin alerts, especially important for membership sites and multi-author environments.
- Identify Potential Security Threats Early: By checking your logs, you can spot unusual spikes in outgoing mail. This allows you to catch a security breach before your site’s reputation is ruined.
- Verify Email Content and Accuracy: Sometimes an email is delivered, but the content is broken, or the formatting is incorrect. Logs allow you to view the actual body of the sent email. You can check whether links are working and whether dynamic data (such as a customer’s name) is being pulled into the email correctly.
How to Set Up WordPress Email Logs?
WordPress does not come with a built-in way to log or track your emails. This gap in the system leaves website owners in the dark, often unaware when critical business communications fail to reach their destination.
To solve this, you need a reliable SMTP plugin that handles email delivery and provides detailed logging and error reporting.
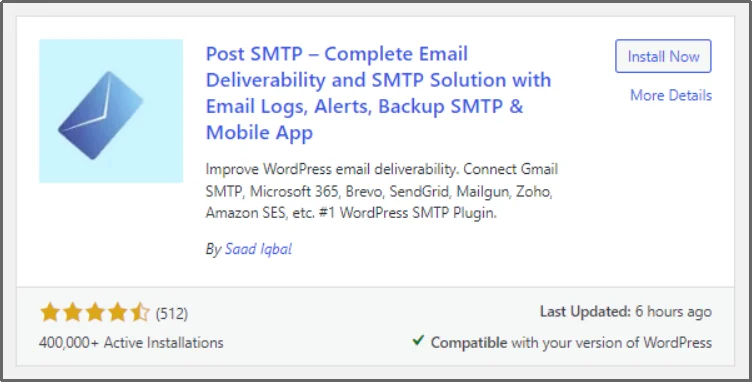
The perfect solution for this is the Post SMTP plugin.
Post SMTP is one of the most trusted WordPress SMTP plugins for email logging, delivery tracking, and error diagnostics. It is an innovative SMTP plugin that replaces the standard WordPress mailing method with a much more secure and stable process.
Trusted by over 300,000 WordPress sites worldwide, Post SMTP has earned a pristine reputation for being both powerful and easy to use. Whether you are a small blogger or a large agency managing hundreds of sites, the WordPress community relies on this plugin to keep its communication lines open and secure.
Key Features of Post SMTP
Post SMTP is packed with features designed to give you total control and peace of mind. Here are some of the standout highlights:
- Intelligent Setup Wizard: You don’t need to be a developer to get started. The wizard scans your server to find the best settings and helps you connect in just three simple steps.
- Detailed Email Logs: Keep a complete record of every email sent, including the status, time, recipient, and the full content of the message.
- Secure OAuth 2.0 Authentication: Unlike other plugins that store your passwords in the database, Post SMTP uses OAuth to connect to providers like Gmail and Microsoft 365, keeping your account 100% secure.
- Dedicated Mobile App: Monitor email logs, receive instant failure alerts, and resend emails directly from your mobile device.
- Connectivity Tester: This built-in tool checks your server for any firewall blocks or configuration issues that might be stopping your emails from sending.
- Backup SMTP Mailer: Never miss a delivery. You can set up a secondary “fallback” mailer that automatically kicks in if your primary service fails.
- Instant Failure Alerts: Get notified immediately via email, Slack, or the mobile app if an email fails to send, so you can fix the issue before it affects your business.
- And much more! 👉 Check out the complete features list here.
Set Up WordPress Email Logs in 3 Easy Steps
Now that you know why logging is vital and why Post SMTP is the top choice, let’s look at how to get everything running. Setting this up is quick and gives you instant visibility into your site’s emails.
Follow these three simple steps to start tracking your communications today.
Step 1: Install and Activate Post SMTP
Getting started is easy because you can find the core version of the plugin directly inside your website’s dashboard.
- Log in to your WordPress admin dashboard.
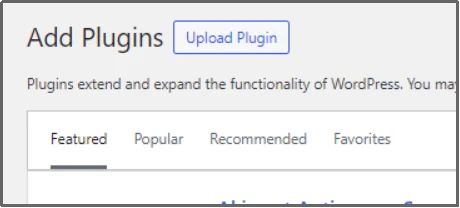
- Navigate to the Plugins menu on the left sidebar and click Add Plugin.
- In the search bar at the top right, type “Post SMTP”.
- Find the plugin in the results and click the Install Now button.
- Once the installation is finished, click the Activate button to turn it on.
Unlike many SMTP plugins, Post SMTP includes detailed email logging even in its free version. While the free version is excellent for basic tracking, many businesses prefer Post SMTP Pro for its advanced features. The Pro version unlocks advanced features such as automatic retries, extended reporting, mobile alerts, and backup SMTP routing.
If you decide to upgrade for more power, here is how to install the premium version:
- Visit the Post SMTP pricing page and purchase the plan that fits your needs.
- You will receive a Welcome Email containing your license key and a link to download the Pro ZIP file.
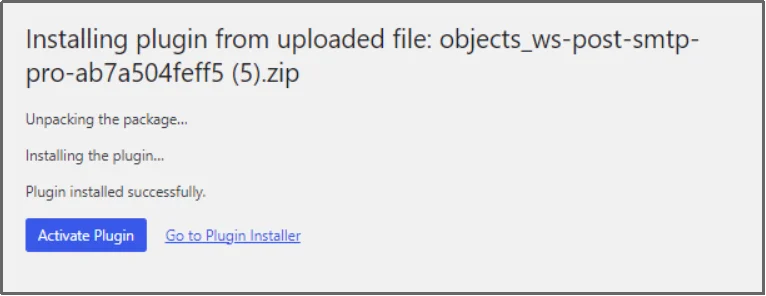
- Go back to your WordPress dashboard, click Plugins, then Add Plugin, and finally click the Upload Plugin button at the top.
- Choose the ZIP file you downloaded and click Install Now.
- Click Activate Plugin.
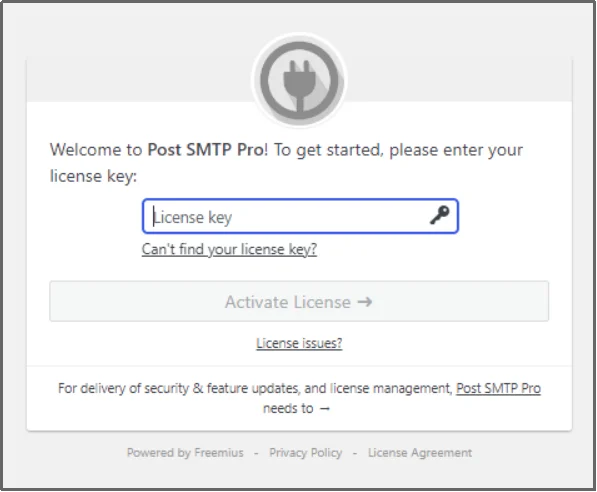
- Enter your license key when prompted to unlock all the premium features.
Step 2: Enable Necessary Extensions
As soon as the premium plugin is activated, you enter the license key. You will be redirected to the extension page, allowing you to enable and disable multiple helpful extensions. For this article, enable the Email Log Attachments, Reporting & Tracking, and Email Delivery & Logs extensions.
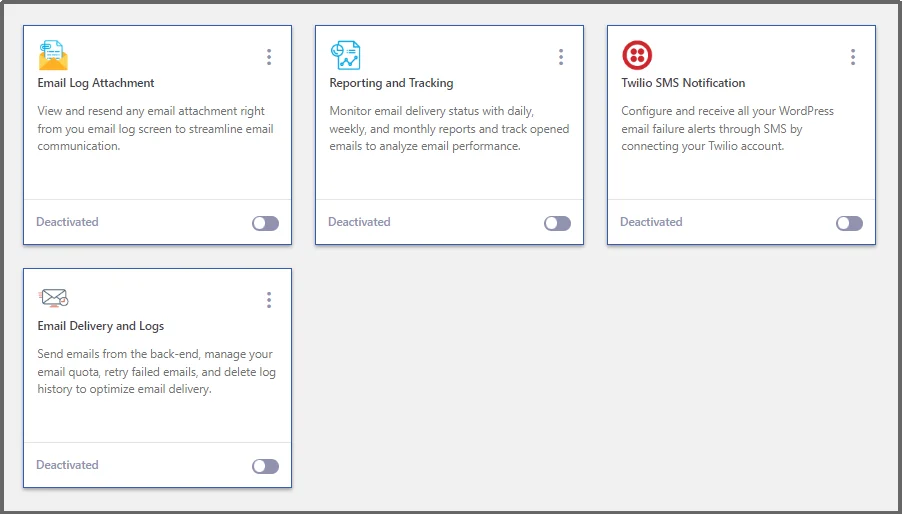
Once done, click Save and Continue.
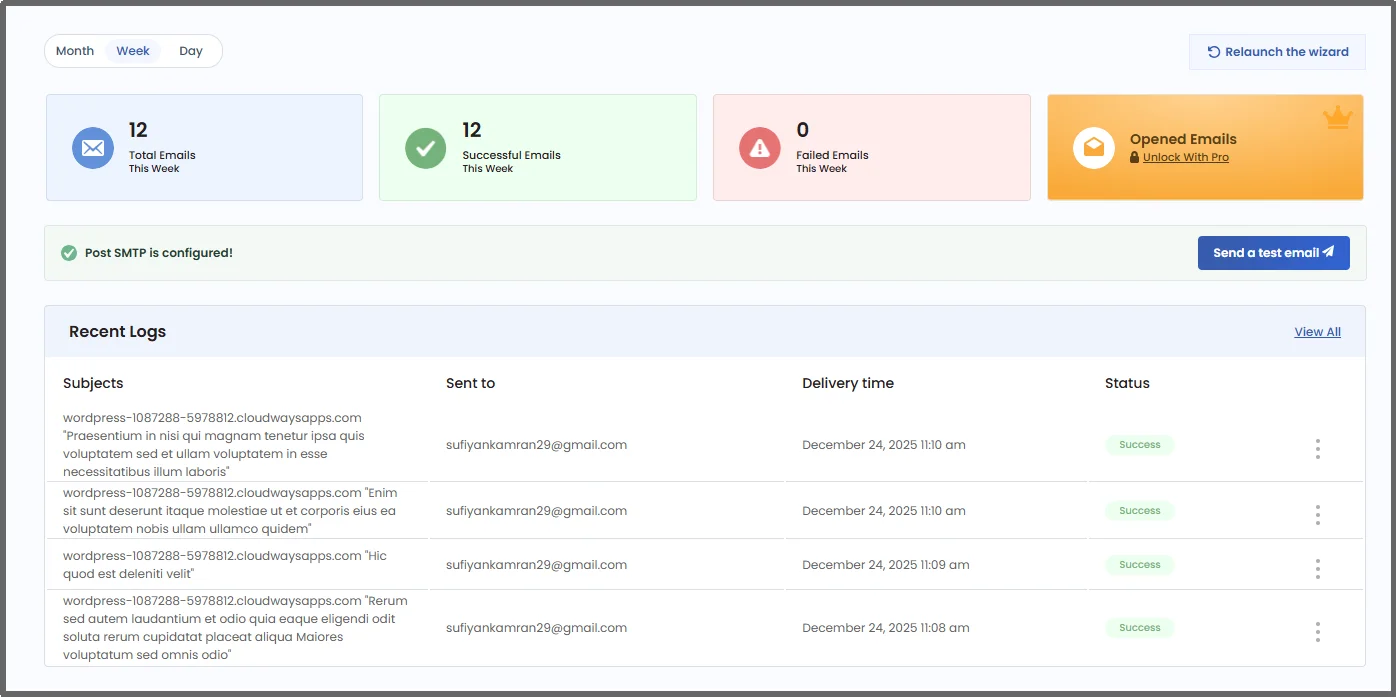
Step 3: Monitor WordPress Email Logs
Now that we have finally enabled the necessary extensions, we can monitor WordPress email logs.
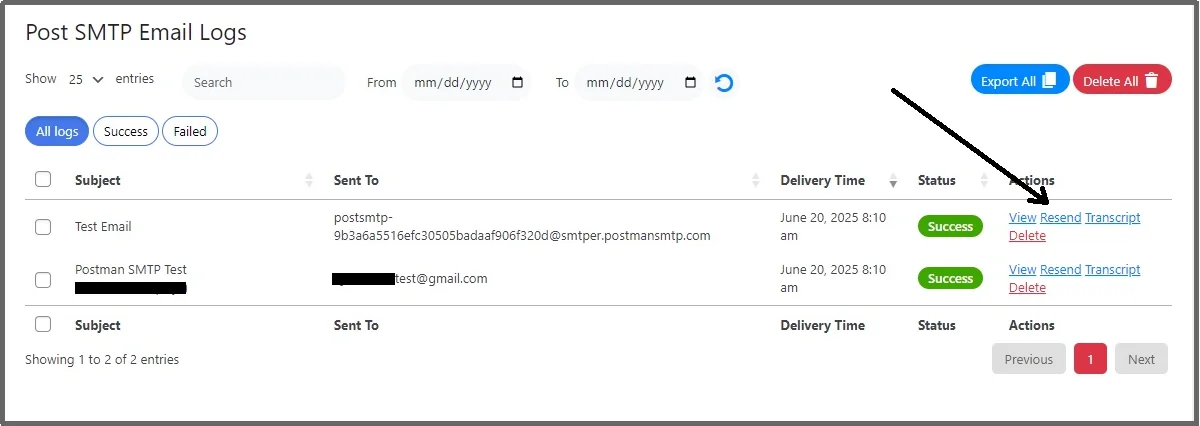
Navigate to Post SMTP, and on the dashboard, you can already see the Recent Logs showing the delivery status, timestamp, and recipient details.
For detailed reporting, navigate to Post SMTP, then Email Logs. And that’s where the magic happens.
You can see all the sent emails. You can filter by date, time, or whether it failed or succeeded.
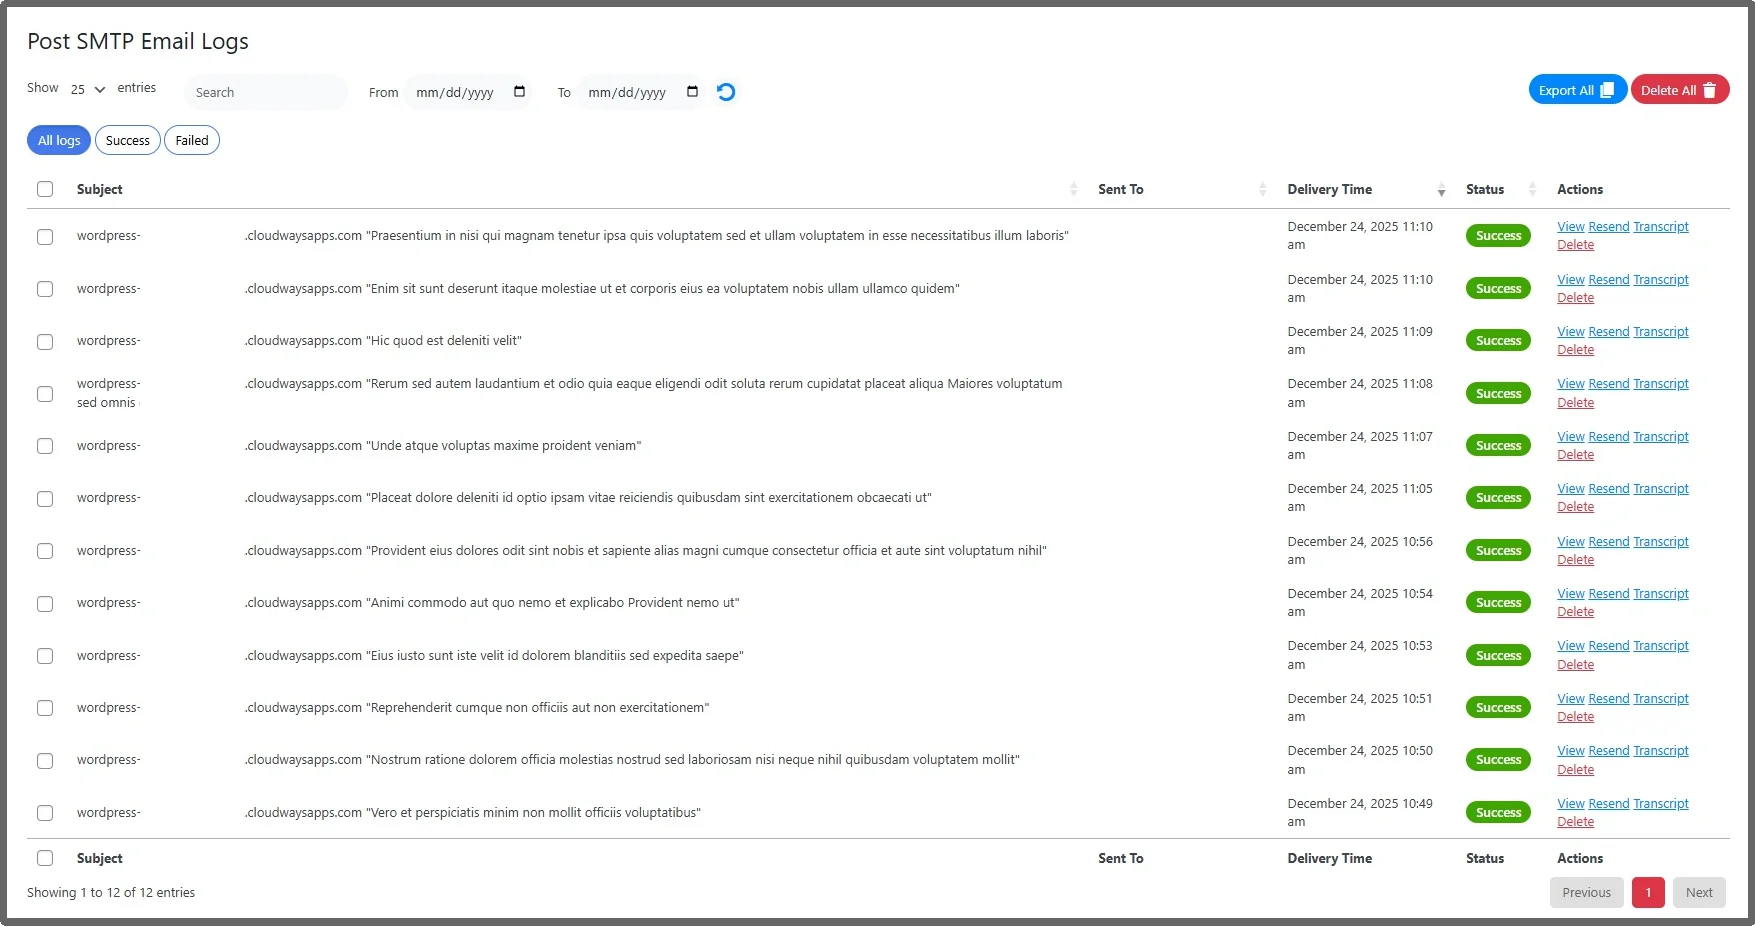
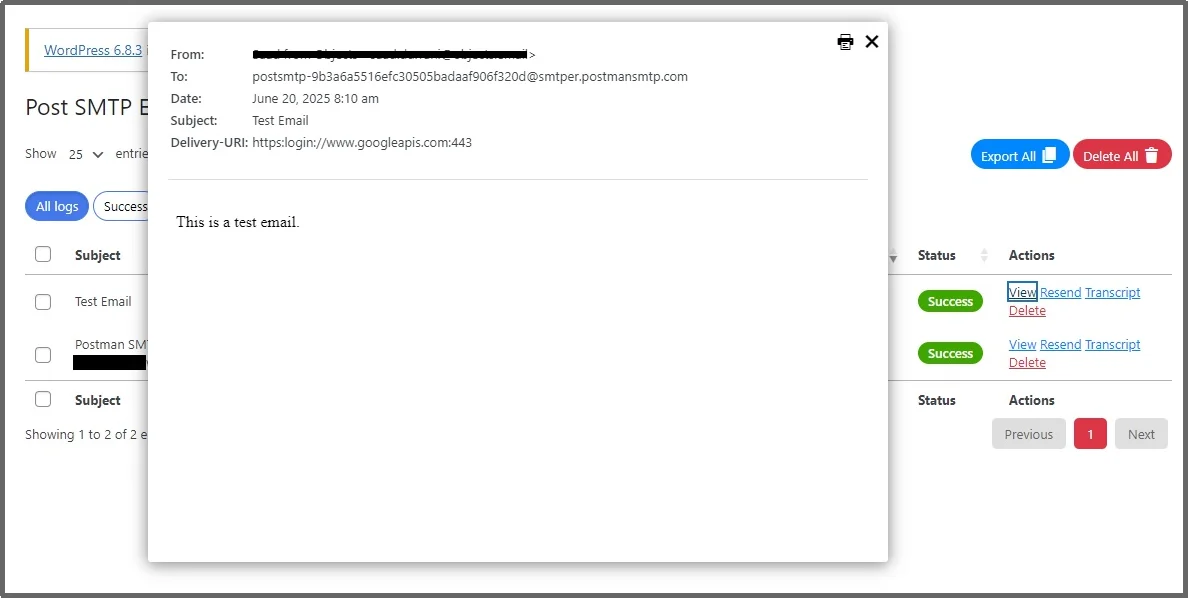
To learn more about the email, simply click the View button.
If there is a failed email, no worries! Just send it back with a single click. Click the Resend button to resend the email.
Step 4: Configure Email Logging Settings in Post SMTP
After installing and activating Post SMTP, you can fine-tune how email logs are stored from the plugin settings.
Go to Post SMTP → Settings → Logging.
Here, you will find the Email Log Settings section, which controls how delivery logs are recorded and retained.
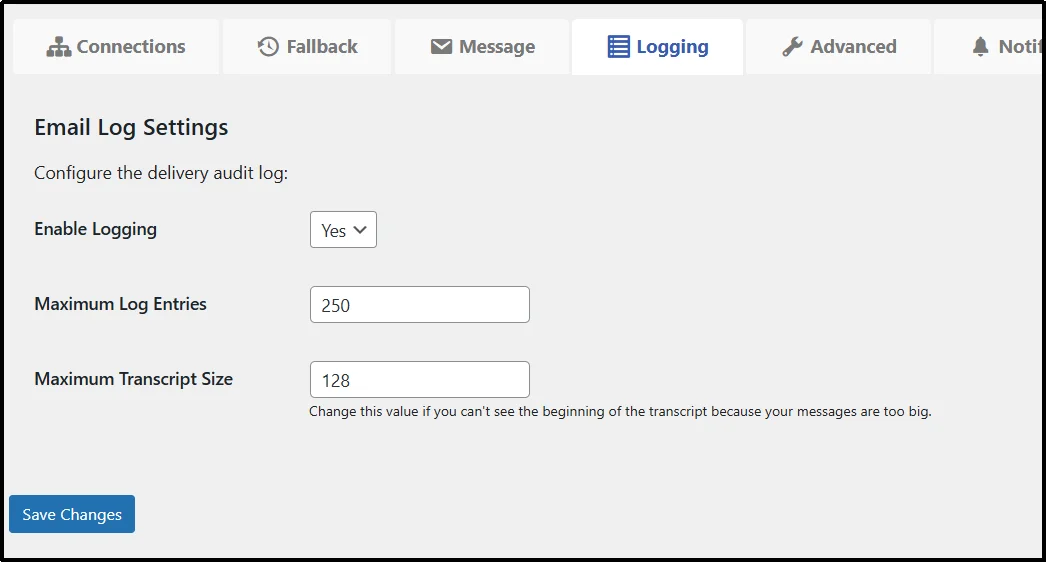
- Enable Logging: Set this to Yes to start recording all outgoing emails.
- Maximum Log Entries: Defines how many email logs WordPress keeps in the database. The default value is 250. Increase this if you need to retain logs for a longer period.
- Maximum Transcript Size: Sets the maximum size of the email transcript, measured in kilobytes. The default value is 128.
If you notice that email transcripts are truncated or you cannot see the beginning of long messages, increase the Maximum Transcript Size value to capture the full email content.
Automate Resending Emails (Recommended)
Manually clicking “Resend” is easy for a single failed message, but what happens if your server goes down overnight? If dozens or hundreds of emails fail while you are away, resending them one by one becomes a hectic and exhausting task.
For growing businesses, manually resending failed emails is inefficient and risks delayed communication with customers. This is where automatic resending becomes vital. It ensures your customers receive their emails without you lifting a finger.
Post SMTP includes a powerful Auto Resend feature that handles these hiccups for you. Instead of waiting for you to check the logs, the plugin automatically detects delivery failures and retries sending the email based on your configured retry limits.
To enable, go to Post SMTP → Settings → Advanced Delivery & Logs, then scroll down to the Auto Retry settings.

Enable the feature using the toggle button and enter the number of retries you want.
Save settings, and there you go!
Manage and Improve Email Delivery with Post SMTP
Managing a WordPress site is a big job, and you shouldn’t have to worry about whether your emails are actually reaching your customers.
With Post SMTP, you gain complete visibility into every email your WordPress site sends. From detailed logs to the peace of mind that comes with Auto Resend, Post SMTP takes the guesswork out of email.
Whether you are troubleshooting a technical error or providing proof of delivery to a customer, you will always have the data you need right at your fingertips.
Don’t wait for a critical email to go missing before you take action. Join the 300,000+ site owners who trust the most powerful mailer in the WordPress ecosystem.Ready to take full control of your WordPress email delivery and logs? Get started with Post SMTP today.


