

 OpenAI
 Perplexity
You are probably struggling to set up an SPF record for Office 365. If so, don’t worry—we’ve got you covered!
To increase your email domain reputation or sender score, you need to have an SPF record in place for your email domain.
On top of that, with an SPF record in place, email service providers are more likely to consider your emails as secure, which reduces their chances of being marked as spam.
But still, you are wondering, “How do I set up an SPF record for Office 365?”
Keep reading, as in this guide, we will explain what an SPF record is, how it works, and how to set it up for Office 365 with different web hosting providers.
Ready? Let’s get started!
What is an SPF Record and How Does it Work?
SPF Record —Brief Introduction
An SPF record, or Sender Policy Framework record, is an email domain authentication method. It helps email servers verify that emails that appear to come from your domain are actually sent by you. This DNS TXT record specifies which servers are permitted to send emails on behalf of your domain.
By setting up an SPF record, you can block phishing attempts and prevent scammers from sending fraudulent emails under your domain name.
Now, let’s understand the greater details.
How Does an SPF Record Work?
First of all, let’s make it clear that you can send emails without an SPF record.
But when you set up an SPF record for your domain, it adds a layer of security to your email campaigns. This makes your domain more trustworthy to internet service providers (ISPs) and improves your email deliverability.
An SPF record specifies the IP addresses and email servers allowed to send emails from your domain.
Example of an SPF Record
If your domain is example.com, you can specify that only emails sent from the IP address 192.168.123.123 are valid. When an email from a different IP address claims to be from example.com, the receiving server will check the SPF record and mark the email as spam if it doesn’t match.
An SPF record is a type of DNS TXT record that contains three main parts:
- Declaration: The record starts with “v=spf1,” indicating that it’s an SPF record.
- Specify IP Addresses and Domains: This part uses mechanisms like “include” to specify domains and “ip4” or “ip6” to mention allowed IP addresses.
- Enforcement Rule: The record ends with an enforcement rule, typically “~all,” which should be used only once at the end.
The “~all” part directs receiving servers on how to handle emails that fail authorization. Here are the primary settings for the “all” tag:
- + Pass (+all): Emails from unauthorized servers will still pass.
- – Hard Fail (-all): Emails from unauthorized servers will not pass SPF authentication.
- ~ Soft Fail (~all): Emails from unauthorized servers will be accepted but marked as SPF failures.
Here’s an example of an SPF record:
v=spf1 ip4:192.168.123.123 include:_spf.google.com ~all
This record states that emails sent from the IP address 192.168.123.123 using Google’s servers (as defined by _spf.google.com) are valid, while other emails should be treated as spam.
Without an SPF record, emails sent from your WordPress site might trigger spam filters, reducing your email deliverability. Even if WordPress successfully generates and sends emails, the absence of an SPF record can lead to their rejection by recipients.
Can We Have Multiple SPF Records?
No, you cannot have multiple SPF records for a single domain. Having more than one SPF record can generate an “SPF PermError” and harm your email deliverability. Before adding a new SPF record, always check for any existing ones for your domain.
If there are multiple SPF records, you will see something like this:
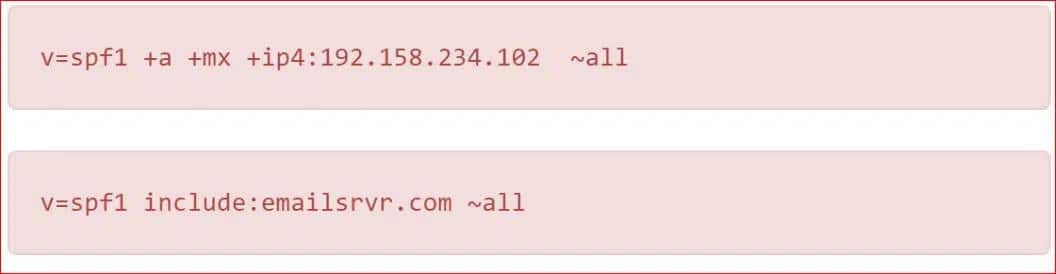
However, you can include multiple servers within the same SPF record. To do this, add the new server to your existing SPF record by copying and pasting it in front of the old one, separated by a single space.
For example, if you want to add Outlook to the SPF record mentioned earlier, it would look like this:
v=spf1 include:_spf.google.com include:spf.protection.outlook.com ~all
NOTE: To learn the step-by-step process, check out our detailed guide on how to merge multiple SPF records the right way.
3 Easy Ways to Set Up SPF Record for Office 365
If you use Microsoft Office 365 as your email provider, here are three simple methods to set up your SPF record for various domain providers.
We’ll start with a general process that works for any domain provider and then provide specific details for popular providers like Namecheap and Bluehost.
Method #1: Set Up SPF Record for Office 365 –For All Domains
No matter which domain hosting provider you use, you can follow these simple steps to set up an SPF record for Office 365:
- Access Your DNS Settings: Log in to your domain registrar’s website and navigate to the DNS settings section. This section might be labeled as “DNS Management,” “Name Server Management,” or “Advanced Settings.”
- Add a New Record: Look for the option to create a new record and select “TXT” as the record type.
- Enter Record Details:
- Name: Enter “@” to represent the root domain.
- Value: Enter the following SPF record value:
v=spf1 include:spf.protection.outlook.com -all
- Save Your Changes: Save the new record to apply the changes.

Method #2: Set Up SPF Record for Office 365 via Namecheap
If you are using Namecheap, follow these steps to set up your SPF record for Office 365:
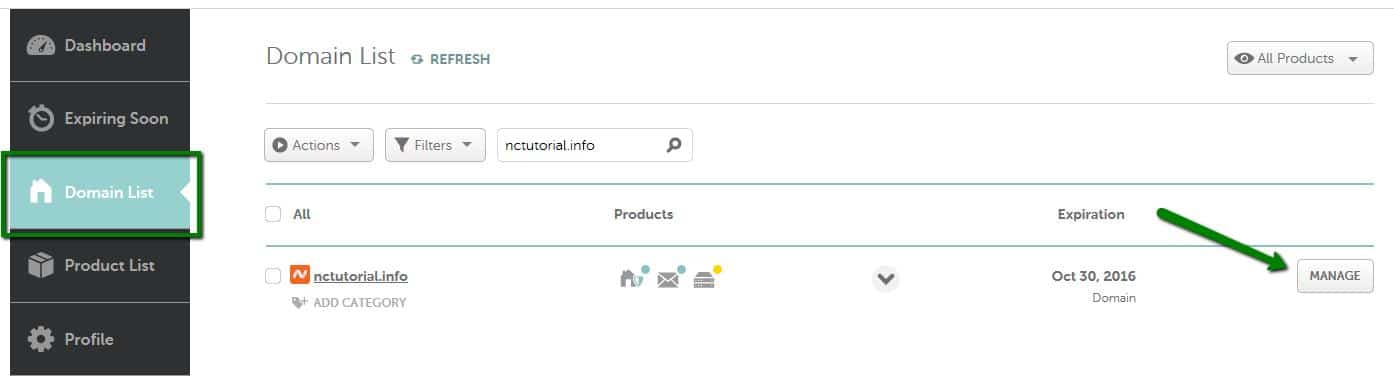
- Log into Your Namecheap Account: After logging in, select “Domain List” from the left sidebar and click on the “Manage” button next to your domain.
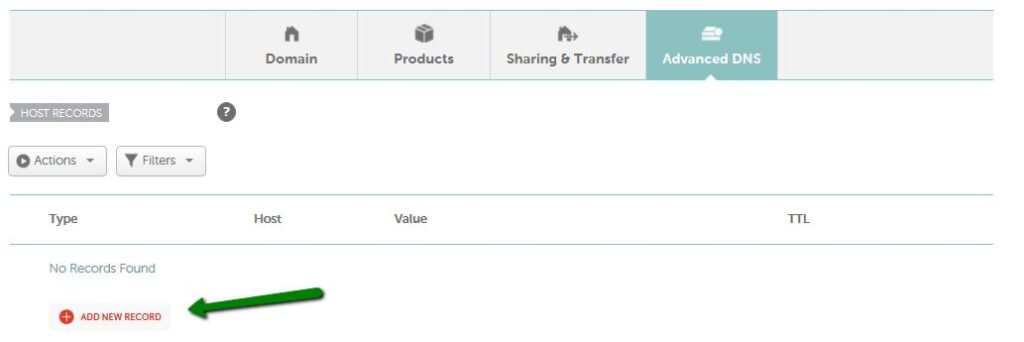
- Navigate to Advanced DNS: Click on the “Advanced DNS” tab from the top menu.
- Add a New Record: Click on the “Add New Record” button.
- Select TXT Record Type: Choose “TXT Record” as the type.
- Enter the Record Details:
- Host/Name: Enter “@” to represent the root domain.
- Value: Enter the SPF record value:
v=spf1 include:spf.protection.outlook.com -all
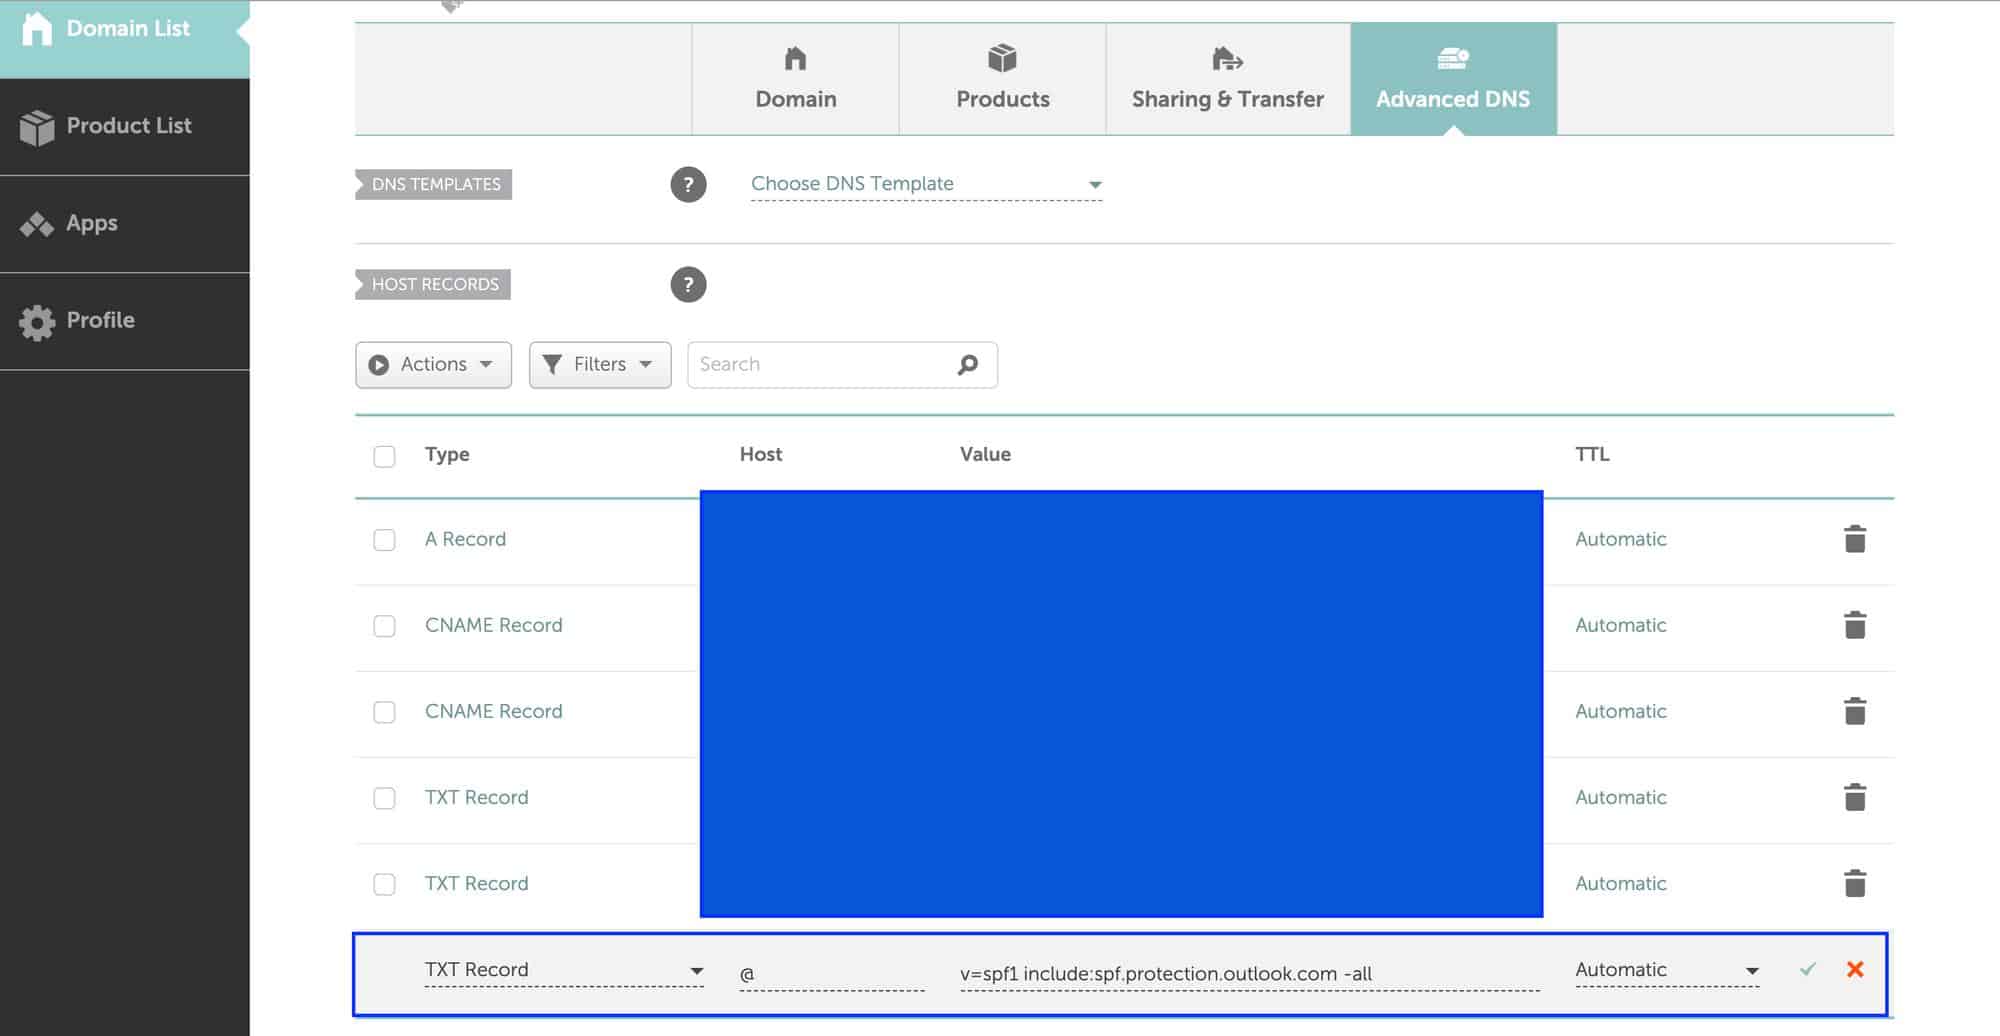
- Save Changes: Click on the “Save All Changes” button. It typically takes about 30 minutes for the new record to take effect.
If you follow these steps, you will ensure that your SPF record is correctly set up for Office 365 using Namecheap.
Method #3: Set Up SPF Record for Office 365 via Bluehost
If you use Bluehost, follow these steps to set up your SPF record for Office 365:
- Log in to Your Bluehost Account Manager: Access your account by logging in.
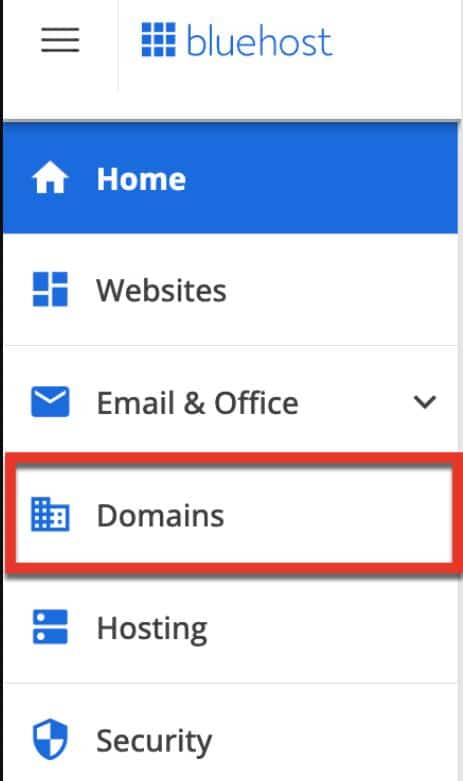
- Navigate to the Domains Tab: Use the left-hand side menu to find and click on the “Domains” tab.
- Open Advanced DNS Settings: Scroll down to the “Advanced Tools” section and click on the “Manage” button next to “Advanced DNS Records.”

- Add a New Record: Click on the “+ADD RECORD” button.
- Enter the Record Details:
- Type: Select “TXT.”
- Host/Name: Enter “@” to represent the root domain.
- TXT Value: Paste your SPF record (i.e, v=spf1 include:spf.protection.outlook.com -all)
- TTL: Set the Time To Live (TTL) to 4 hours.
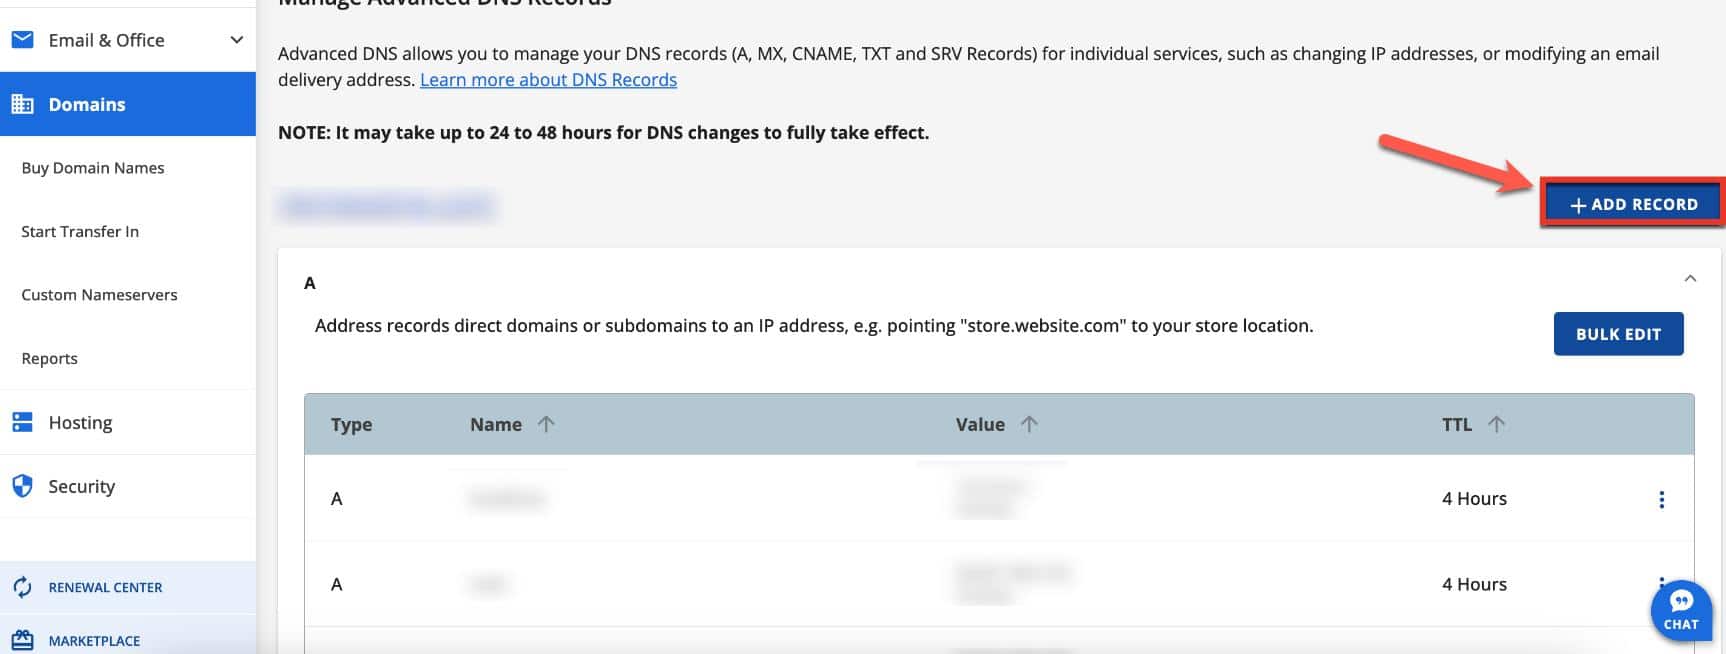
- Create the Record: Click on the “ADD” button to save the new record.
Congratulations! You have now successfully set up your SPF record for Office 365 on Bluehost.
Need Help? Let Our Experts Set Up Email Authentication for You!
Email authentication does not rely solely on an SPF record; it also includes other DNS TXT records, such as DKIM and DMARC, which verify the authenticity of the sender.
To set up these DNS TXT records, you have a few options. You can follow our comprehensive guide on SPF, DKIM, and DMARC, which offers detailed instructions for configuring these records yourself.
If you prefer hands-on assistance, our dedicated support team is here to help. Reach out to our on-demand support channel for personalized help with your DNS records configuration.
We will assist you in setting up these records to improve your email deliverability and ensure that your WordPress emails reach their intended recipients.
Final Remarks on Setting Up SPF Record for Office 365
According to the current email infrastructure and processes, you need to set up an SPF record for Office 365 so that your emails are authenticated and not considered spam.
By following the simple steps outlined in this guide, you can easily set up your SPF record for Office 365 with any web hosting provider to improve your email deliverability and protect your domain from phishing attempts.
Remember, whether you use a general domain provider, Namecheap, or Bluehost, the process is straightforward and can significantly improve your email security.
ATTENTION: For an even more robust email deliverability solution, consider using the Post SMTP plugin. It ensures your emails are correctly configured and delivered, providing detailed logs, a mobile app, and advanced options to keep your email communications secure and reliable.
If you need any help regarding WordPress email delivery or email authentication, feel free to contact us. We would love to help!


