
 OpenAI
 Perplexity
As phishing attacks, spam, and email spoofing are common nowadays, email security has become a top priority. Hackers constantly look for ways to exploit email systems, making it easier than ever for them to impersonate trusted domains and trick recipients.
That’s where the Sender Policy Framework (SPF) comes in. SPF is an email authentication protocol that helps prevent unauthorized servers from sending emails on behalf of your domain.
By using SPF records, domain owners can control who can send emails from their domain. This not only helps reduce the chances of spoofing and spam but also boosts the credibility of legitimate emails and improves the chances that they land in inboxes instead of junk folders.
Still confused? Don’t worry!
In this guide, we’ll break down what an SPF record is, how it works, and why adding it to your domain is a smart move for email security and deliverability.
What is an SPF Record? — Brief Introduction
SPF, short for Sender Policy Framework, is a standard for email authentication that helps protect domains from being used in phishing, spoofing, and spam attacks. When someone sends an email, the receiving mail server checks the SPF record of the sender’s domain to verify whether the email came from an authorized source.
Without this layer of verification, attackers can easily forge sender addresses and make it appear that messages are coming from trusted domains when they’re not.
To stop this, domain owners can add an SPF record in their Domain Name System (DNS). This TXT record contains a list of mail servers and IP addresses that are allowed to send emails on behalf of the domain. When an email reaches a recipient’s server, that server compares the sender’s IP address to the ones listed in the SPF record. If the IP isn’t on the list, the server can reject the email, mark it as spam, or flag it as suspicious.
Example of an SPF Record
Here’s an example of an SPF record:
v=spf1 ip4:192.0.2.10 include:_spf.google.com -all
Let’s break it down and see what each part means:
- v=spf1: Specifies the version of SPF being used (version 1).
- ip4:192.0.2.10: Allows this specific IPv4 address to send emails on behalf of the domain.
- include:_spf.google.com: Authorizes Google Workspace to send emails using your domain.
- -all: Tells recipient servers to reject all emails that do not match the authorized IPs or domains in this record.
How Does an SPF Record Work?
To understand how SPF protects your domain, you need to look at how mail servers verify sender identity using DNS records.
As we told you earlier, an SPF record exists as a TXT entry in your DNS settings that allows domain owners to specify which mail servers are authorized to send emails on their behalf.
So, when a message is sent, the receiving server performs a verification process using the domain’s SPF record before delivering the email to the recipient.
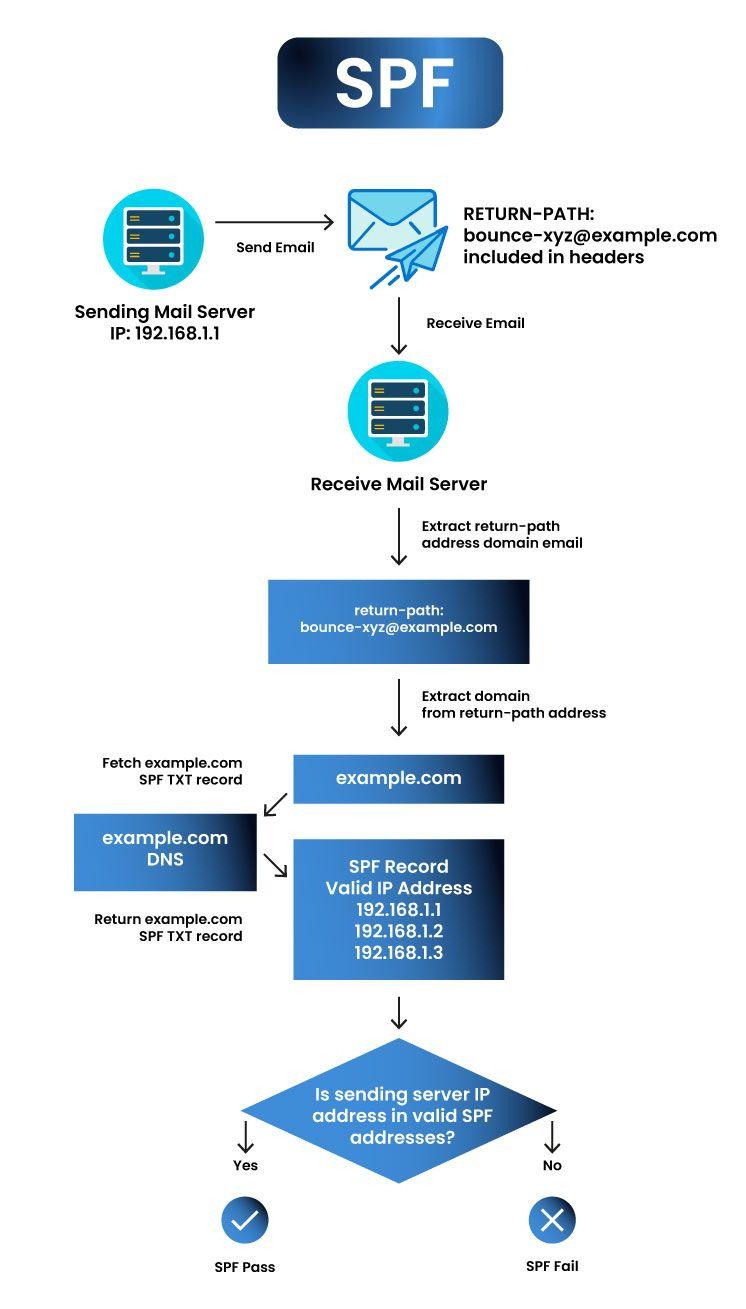
Here’s how that process unfolds step by step:
- A sending server (let’s say IP address 192.168.1.1) sends an email using bounce-xyz@example.com as the Return-Path (also known as the envelope-from address).
- The receiving server pulls the domain from the Return-Path—example.com—and queries its DNS records for an SPF record.
- Once it locates the SPF record, the server checks whether the sending IP address (192.168.1.1) appears in the list of authorized senders defined in that SPF record.
- If the IP address is listed, the SPF check passes, and the server proceeds with accepting the email.
- If the IP address is not listed, the SPF check fails, and the receiving server rejects the email or marks it as spam.
The rejection or spam marking of the email depends on how the domain owner configures the DMARC policy. If you are unfamiliar with the DMARC policy, check out our blog post 👉 What Is a DMARC Record?
Why Do You Need to Add an SPF Record to Your Domain?
If you want to protect your domain from spoofing, phishing, and email-based abuse, adding an SPF record is critical. Without it, cybercriminals can impersonate your domain and send fraudulent emails to your users, clients, or partners.
The following benefits highlight the importance of adding an SPF record to your domain.
Boosts Email Security
SPF adds a critical layer of email authentication. It allows the receiving mail server to verify that incoming messages actually come from a trusted sender. When a domain lacks SPF, attackers can easily forge the sender’s identity and bypass basic filters. With SPF in place, the receiving server can reject fake emails or flag them as suspicious, which ultimately helps reduce the chances of malware or phishing scams reaching your inbox.
Improves Email Deliverability
Your messages need to reach the inbox to have any impact. Without an SPF record, your emails may bounce or land in spam folders—especially if you use email marketing tools or send from different IP addresses. Over time, repeated delivery failures can hurt your domain’s reputation and reduce your email deliverability rate.
That’s why adding SPF tells email providers that your messages come from a verified source, which boosts the likelihood they land where they’re supposed to.
Protects Your Domain Reputation
Spoofing attacks can harm more than just the recipient—they can seriously damage your brand’s reputation. If scammers repeatedly use your domain to send fake messages, your customers and partners may lose trust in your communications. SPF helps protect your name by preventing unauthorized use of your domain for spam or scams. By limiting senders to only those you approve, you cut down on impersonation attempts and reinforce your domain’s credibility.
Helps You Align with DMARC Policies
DMARC is an email authentication protocol that relies on SPF and DKIM (DomainKeys Identified Mail) to check whether emails are legitimate. It also tells mail servers what to do with messages that fail authentication—reject, quarantine, or allow them through.
So, without SPF, you can’t implement a complete DMARC policy, and without DMARC, you miss out on valuable email activity reports and control over how unauthorized messages are handled.
Adds a Layer of Trust with ISPs
While SPF alone won’t solve every deliverability issue, it gives Internet Service Providers (ISPs) another reason to trust your emails. When used alongside DKIM and DMARC, it creates a more complete email authentication setup that reduces spam complaints and increases inbox placement. Even if you’re sending from a third-party service or different IPs, adding an SPF record helps you build trust and reach your audience more reliably.
In short, SPF strengthens your domain’s defenses, improves your delivery success rate, and helps protect your brand from the damaging effects of email fraud.
How to Check SPF Records for Your Domain
You can check your domain’s SPF record by running a simple DNS lookup. This process helps you confirm whether your SPF record exists, what it includes, and whether it’s set up correctly.
Here, we have outlined multiple methods; you can pick any method that is most convenient for you:
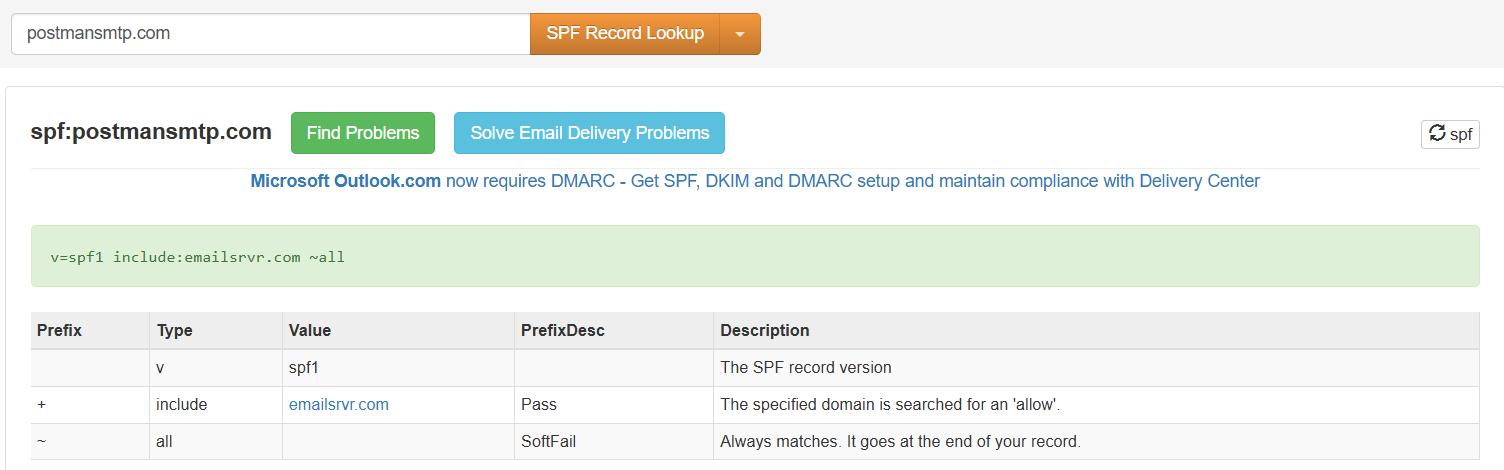
Method #1: Use Online SPF Lookup Tools
Start by using an SPF checker tool like:
Just enter your domain name into the tool’s search bar. The tool will query your domain’s DNS records and show you the SPF record along with any potential issues or syntax errors.
In the following screenshot, we have used the MXToolBox SPF Lookup tool:
Method #2: Use the Command Line (For Advanced Users)
If you prefer checking via terminal or command prompt, use the “nslookup” or “dig” command:
- On Windows (using Command Prompt):
Type this command “nslookup -type=TXT yourdomain.com” and hit Enter.

Above is the screenshot of “postmansmtp.com” SPF record via Windows Command Prompt.
- On Mac/Linux (using Terminal):
Use the following command for the Mac or Linux:
dig TXT yourdomain.com
In both cases, look for the SPF record in the response. It should start with “v=spf” followed by a list of IPs or include statements.
Method #3: Inspect DNS Settings in Your Hosting or Domain Provider Dashboard
Log in to your DNS management panel (like Cloudflare, GoDaddy, Namecheap, etc.). Look for the DNS Records section with SPF syntax—this is where you can view or edit your SPF configuration directly.
How to Add SPF Record for Your Domain Step-by-Step
Before setting up an SPF record, you need to verify whether your current email setup requires one. SPF works based on the Return-Path domain, not the “From” domain. So, your first step is to identify what domain appears in the Return-Path of your outgoing emails.
Step #1: Check Your Return-Path Domain
Some email service providers (ESPs) like Google use your domain in the Return-Path. In this case, you must set up an SPF record. Other ESPs, such as Postmark, use their own domain in the Return-Path, so they manage SPF on your behalf.
To find out what Return-Path your emails use, inspect the email headers of messages you’ve sent. If the Return-Path shows your domain, proceed with creating your SPF record.
Step #2: List All IP Addresses That Send Email
Gather every IP address or server that sends emails on behalf of your domain. These might include:
- Your web hosting server
- In-house mail servers (like Microsoft Exchange)
- Your ESP’s servers
- Email servers from third-party tools (like marketing platforms or support desks)
If you’re not sure which IPs are involved, your ESP can provide a complete list.
Step #3: Identify All Sending Domains
If your organization owns multiple domains, attackers might spoof even those domains you don’t use to send emails. To block that loophole, you should create an SPF record for every domain you own—even if it doesn’t actively send mail.
For unused domains (also known as “parked domains”), your SPF record should look like this:
v=spf1 -all
This tells receiving servers that no one is authorized to send email from that domain.
Step #4: Create Your SPF Record
To build your SPF record, start with the required version tag “v=spf1,” followed by the authorized IP addresses or include statements for third-party services. End the record with either “-all” or “~all”:
- -all indicates a hard fail for unauthorized IPs
- ~all indicates a soft fail—to put them into spam
Example SPF record:
v=spf1 ip4:192.0.2.1 include:spf.google.com -all
If you use multiple platforms for different types of emails, add their “include” statements in the same SPF record, which will look similar to the example below:
v=spf1 a mx include:spf.esp1.com include:_spf.esp2.com include:esp3.com ~all
Important: Only one SPF TXT record can exist per domain. Don’t create a new one for each sender—combine them in a single record, and for that, check our guide on How to Merge Multiple SPF Records [The Right Way]
Limit your SPF record to fewer than 255 characters and no more than 10 lookups (include, a, mx, etc.). Exceeding that can lead to failed checks.
Step #5: Publish the SPF Record in DNS
Now that your SPF record is ready, log into your DNS host’s dashboard (such as Cloudflare, GoDaddy, or Namecheap), and do the following:
- Navigate to your domain’s DNS management panel
- Select “TXT” as the record type
- Use @ as the host (or your domain name)
- Paste your SPF record in the value field
- Set TTL (Time to Live), usually 3600 seconds (1 hour)
- Save the record
Your DNS provider will apply the changes, and receiving servers can then query your SPF policy when checking incoming emails.
Step #6: Test the SPF Record
After publishing the SPF record, use SPF validation tools to test it. You can use any SPF Lookup tools we have shared earlier in the article, such as MXToolbox, SPF Record Checker by EasyDMARC, Kitterman’s SPF Record Testing Tool, etc. These tools will show if your record is valid and whether it contains all the correct IPs and domains.
If a sending IP is missing or misconfigured, update the SPF record and re-test it.
Common SPF Record Errors and How to Fix Them
Mistakes in your SPF record can disrupt email delivery and make your domain vulnerable to spoofing. Let’s go over the most common SPF record errors and how you can fix them effectively.
Creating Multiple SPF Records
One of the most frequent mistakes is adding more than one SPF record for the same domain. Mail servers only recognize a single SPF TXT record, so if you publish multiple, they’ll treat the entire configuration as invalid.
How to Fix It:
Merge all your SPF mechanisms into one TXT record. If you need to include multiple services, do it in a single line:
v=spf1 ip4:192.0.2.1 include:spf.mailprovider.com include:_spf.example.com -all
Exceeding the 10 Lookup Limit
SPF allows a maximum of 10 DNS lookups per check (includes include, a, mx, ptr, etc.). If you exceed this limit, your SPF check fails—even if the record itself is valid.
How to Fix It:
Minimize the number of include statements. If you work with multiple services, ask them if they offer SPF flattening or optimized records with fewer lookups. Some DNS providers also offer automatic flattening to help with this.
Incorrect IP Address Format
Another issue happens when you list IP addresses in the wrong format or add private/internal IPs that don’t make sense on public DNS.
How to Fix It:
Only include public IP addresses in proper CIDR notation. For example:
ip4:203.0.113.10
ip4:203.0.113.0/24
If you’re not sure which IPs to include, consult your ESP.
Missing the “all” Mechanism
Every SPF record should end with the all mechanism (-all, ~all, or +all). If it’s missing, receiving mail servers won’t know how to handle emails that don’t match your rules.
So, always include -all or ~all at the end of your record as we told you earlier that you can use -all for strict rejection or ~all if you prefer a softer policy during testing.
Not Updating SPF After Switching ESPs
When businesses switch email providers or add new tools to their tech stack, they often forget to update their SPF record. This oversight can block legitimate emails from reaching inboxes.
The easy solution to this is that you must review your SPF record every time you change your sending infrastructure. Add or update the appropriate include values based on your new provider’s documentation.
Incorrect TXT Record Setup in DNS
Sometimes the SPF record itself is valid, but it’s incorrectly set up in DNS—wrong hostname, wrong TTL, or incorrect record type.
To fix this issue, check your domain’s DNS zone and make sure:
- The record type is “TXT”
- The hostname is correct (usually “@” or your domain name)
- The full SPF record appears in the value field without line breaks or extra characters
That’s it! We hope now you have a better understanding of SPF records from technical details and how to create one and add it to your DNS records.
Still Need Help for Setting Up SPF Record Setup?
If setting up your SPF record feels overwhelming or you’re running into email delivery issues, we’ve got your back. With our on-demand service, one of our experienced Technical Media Specialists will personally assist you in adding the correct SPF record to your domain.
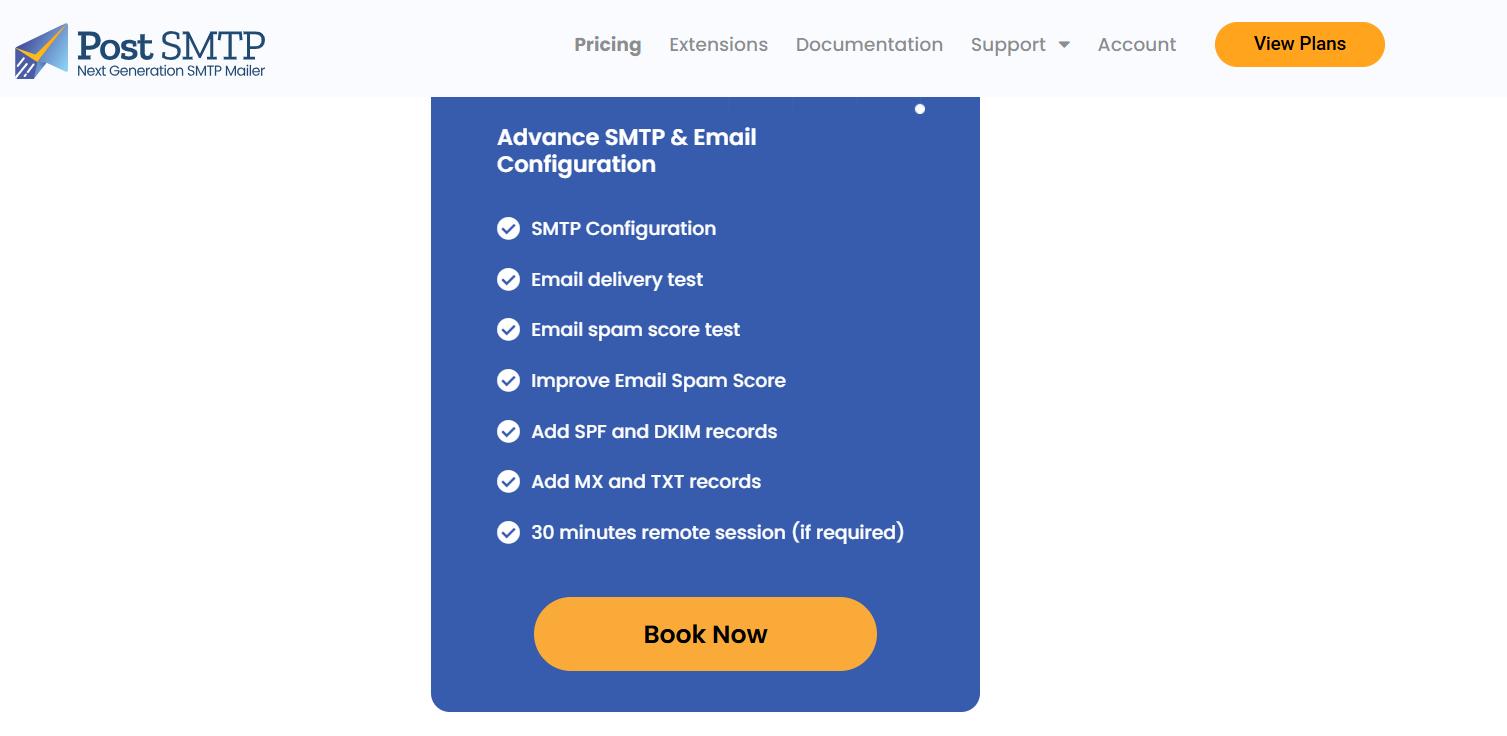
Our team doesn’t just help with SPF—we also troubleshoot and fix related issues like DKIM, DMARC, and general email deliverability problems. So if your emails are bouncing, landing in spam, or just not reaching inboxes like they should, we’ll help you get things back on track.
Reach out today, and let us improve your email deliverability.


