


When a WooCommerce order fails, it often slips through unnoticed. A customer might try to pay, face an error, and leave your store without completing the purchase.
You lose a sale, and they lose confidence in your checkout experience. That’s why having email alerts for failed WooCommerce orders is essential.
These alerts instantly notify you whenever a transaction doesn’t go through, allowing you to respond quickly.
In this article, we’ll explore why failed order email alerts are vital for WooCommerce stores, what typically causes an order to fail, and how you can set up a reliable alert system in just three simple steps to stay informed and in control.
Why Set up Email Alerts for Failed WooCommerce Orders?
Every order that fails is a potential customer lost. Many store owners assume WooCommerce handles all order notifications automatically, but failed transactions often go unreported unless alerts are manually configured.
Without email notifications, you might never know why a payment didn’t go through or how often it happens. Over time, these unnoticed failures can add up, impacting both revenue and customer satisfaction.
Failed order alerts keep you informed in real time. You can review what went wrong, reach out to the customer if needed, and offer additional assistance. That alone can help you retain customers and even turn them into repeat customers because 73% of customers are likely to switch to a different brand after a bad customer experience.
Simply put, setting up email alerts enhances the customer experience and prevents your business from being part of the group that loses $3.7 trillion annually due to poor customer experience.
Common Reasons Why WooCommerce Orders Fail
Before setting up alerts, it helps to understand why WooCommerce orders fail in the first place. Knowing the cause makes troubleshooting faster and prevents the same issue from happening again.
- Payment gateway errors: These occur when the payment processor, such as Square, is unable to complete a transaction due to connectivity issues, incorrect credentials, or API failures.
- Card declines: Customers may enter expired cards, insufficient funds, or incorrect CVV codes, resulting in instant payment failure.
- Session timeouts: If a customer spends too long on the checkout page or their session expires mid-payment, WooCommerce may mark the order as failed.
- SSL or mixed content issues: An insecure checkout page or misconfigured SSL certificate can block payment submissions.
- Plugin conflicts: Certain extensions that modify checkout, caching, or email behavior can interrupt the payment process.
- Server or hosting limits: Low memory or server timeouts can prevent WooCommerce from processing the order successfully.
Regardless of the reason behind the failure, an email alert enables you to contact the affected customer and offer any additional assistance you can provide.
How to Set up WooCommerce Failed Order Email Alerts in 3 Easy Steps
(add a bit to text)
Step 1. Spot WooCommerce Email Settings
To begin, let’s spot the settings where we can set up the WooCommerce failed order email alerts.
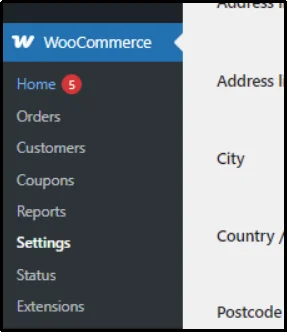
- For that, log in to your WordPress Admin.
- Navigate to your admin dashboard and go to WooCommerce ⇒ Settings from the left-hand side navigation.
- Go to the “Emails” tab.
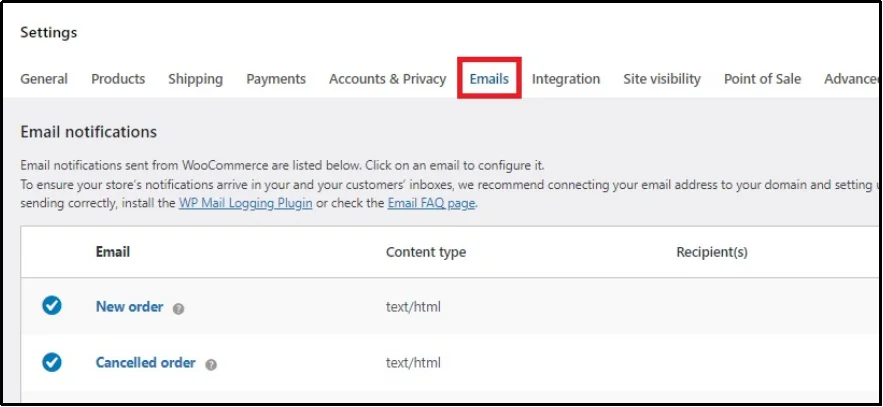
- Scroll down until you find the Failer order.

- You can see the failed orders, and not one, but two of them. The first one is intended for the admin, and the other one for the customer. Next to them, you will see the Manage button, as shown in the image. Click on the first one, and it will enable further options.

Step 2. Configure Email Settings
Once you click the manage button, you will be welcomed by a screen such as under:

Here’s what to do here:
- Enable/Disable: Check the checkbox labeled “Enable this email notification.” As the name suggests, this will enable the failed order email alert.
- Recipient(s): Enter the email(s) where you would like to receive the failed order emails.
- Subject: Define the subject line of the failed order email. You can also use placeholders for a touch of personalization.
- Additional content: Here goes the content of the email.
- CC: (Carbon Copy): The recipient in this box will also receive a copy of the email.
- BCC: (Blind Carbon Copy): Any email addresses you list here will also receive a copy of the email, but the email addresses are hidden from the other recipient and all other CC/BCC recipients. Only the sender knows who was on the BCC list.
Once done, scroll down to the preview section and ensure the email looks exactly how you want. You can also switch between mobiles and laptops to ensure consistency across devices.
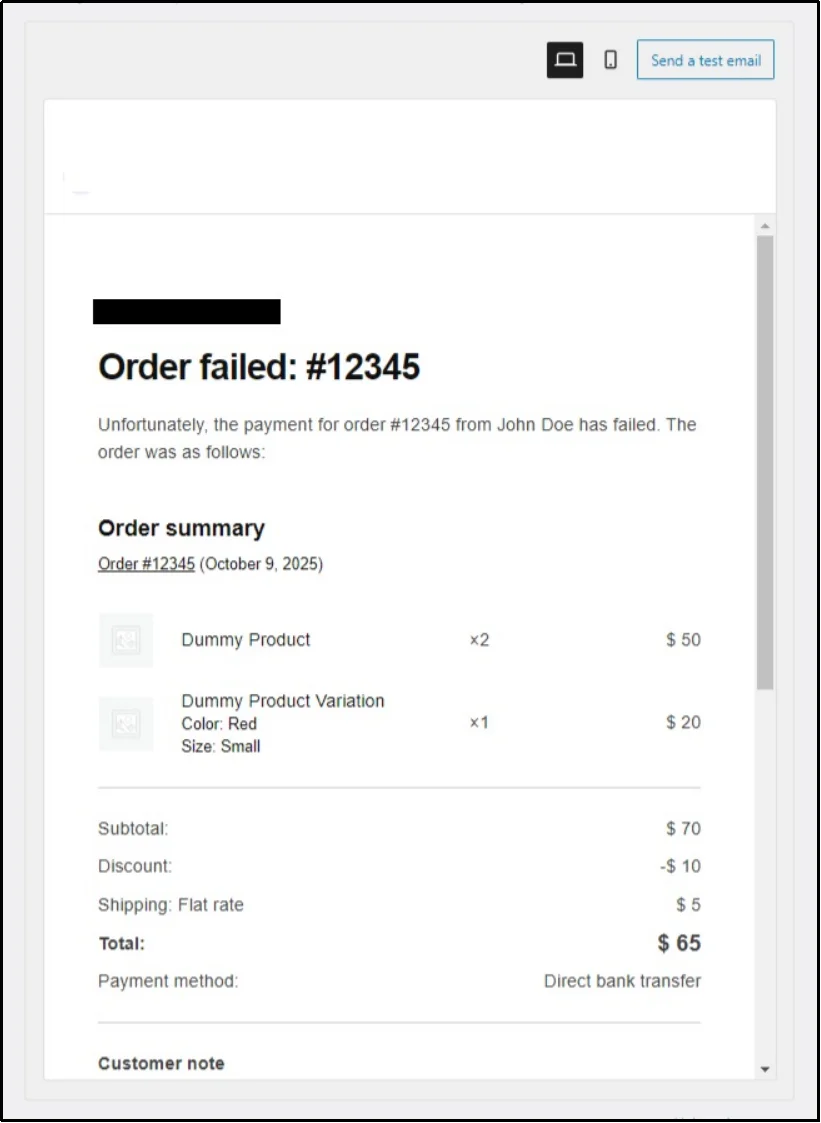
If you are satisfied with the outcome, click “Save Changes”, and let’s move on to the next step.
Step 3. Enhance Deliverability with Post SMTP
Before diving into the steps, it’s important to understand why WooCommerce sometimes fails to deliver these email alerts in the first place.
By default, WooCommerce uses WordPress’s built-in wp_mail() function to send emails. While simple, it’s not designed for reliable email delivery.
The problem lies in how it communicates with mail servers. Most modern servers require authentication protocols to verify the sender’s identity before allowing emails through. The wp_mail() function lacks these, which causes WooCommerce emails—like failed order notifications—to land in spam or never arrive at all.
To ensure successful delivery, your emails must pass three key authentication protocols:
- SPF (Sender Policy Framework): This protocol verifies that the email is being sent from an authorized server. It prevents spammers from forging your domain name to send fake emails.
- DKIM (DomainKeys Identified Mail): DKIM adds a digital signature to your emails, helping receiving mail servers confirm that the content hasn’t been tampered with during transmission.
- DMARC (Domain-based Message Authentication, Reporting, and Conformance): DMARC works with SPF and DKIM to tell email providers how to handle unauthenticated messages and provides reports on delivery performance.
When these protocols are missing, even legitimate WooCommerce notifications can get blocked by email providers like Gmail, Outlook, or Yahoo. That’s why improving deliverability is just as important as enabling the alerts themselves.
Ready for the steps?
Follow along as we improve the deliverability of your emails.
- First and foremost, you would need to install Post SMTP. To do so, log in to your admin dashboard.
- Navigate to Plugins ⇒ Add Plugin.
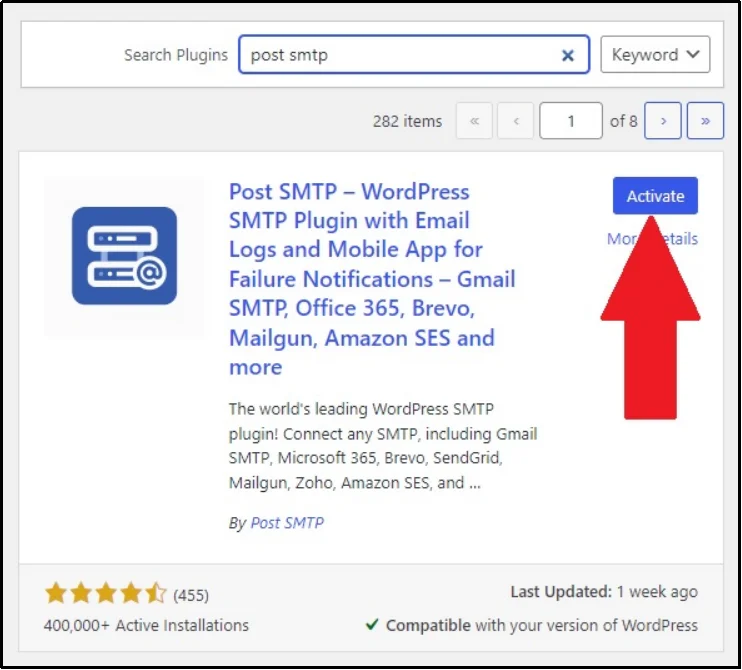
- Using the search plugin bar, search for Post SMTP.
- Install the Post SMTP plugin.
- Wait until the “Install” button turns into “Activate”. Once done, click it to turn on the plugin.
Now you have the plugin up and running. However, to get the most out of Post SMTP, we recommend opting for a premium plan. It offers multiple benefits such as:
- Open email tracking: Allows you to monitor how your emails are performing. This enables you to optimize your campaign according to your goals.
- Email quota scheduling: With this feature, you can schedule emails and specify the duration, number of emails to send per batch, and how often to send the emails (hourly, daily, weekly, or monthly).
- Multiple site support: Connect and manage multiple WordPress sites for easy monitoring.
- Resend emails in bulk: Select and resend multiple failed emails directly from the email logs screen.
There’s much more to it. Please refer to our features page to learn more about the capabilities of the plugin.
After a successful purchase, you will receive a welcome email with the zip file of the plugin and a license key, which is a string of random letters, numbers, and symbols.
Return to your Admin dashboard and go to Plugins ⇒ Add Plugin ⇒ click Upload Plugin from the top left corner, which will show additional options.
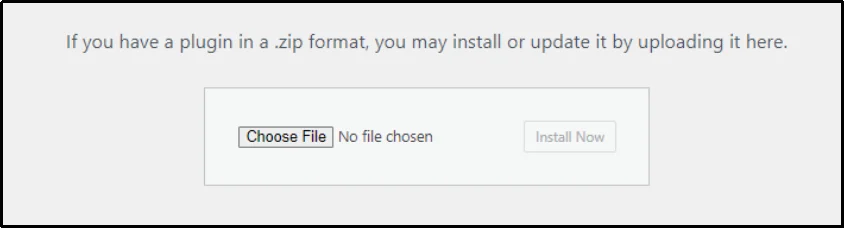
Click “Choose File”, select the zip file from the welcome email, and activate the plugin with your unique license key, which can also be found inside the welcome email.
Now that you have Post SMTP Pro, let’s quickly go over fixing WooCommerce’s deliverability issue:
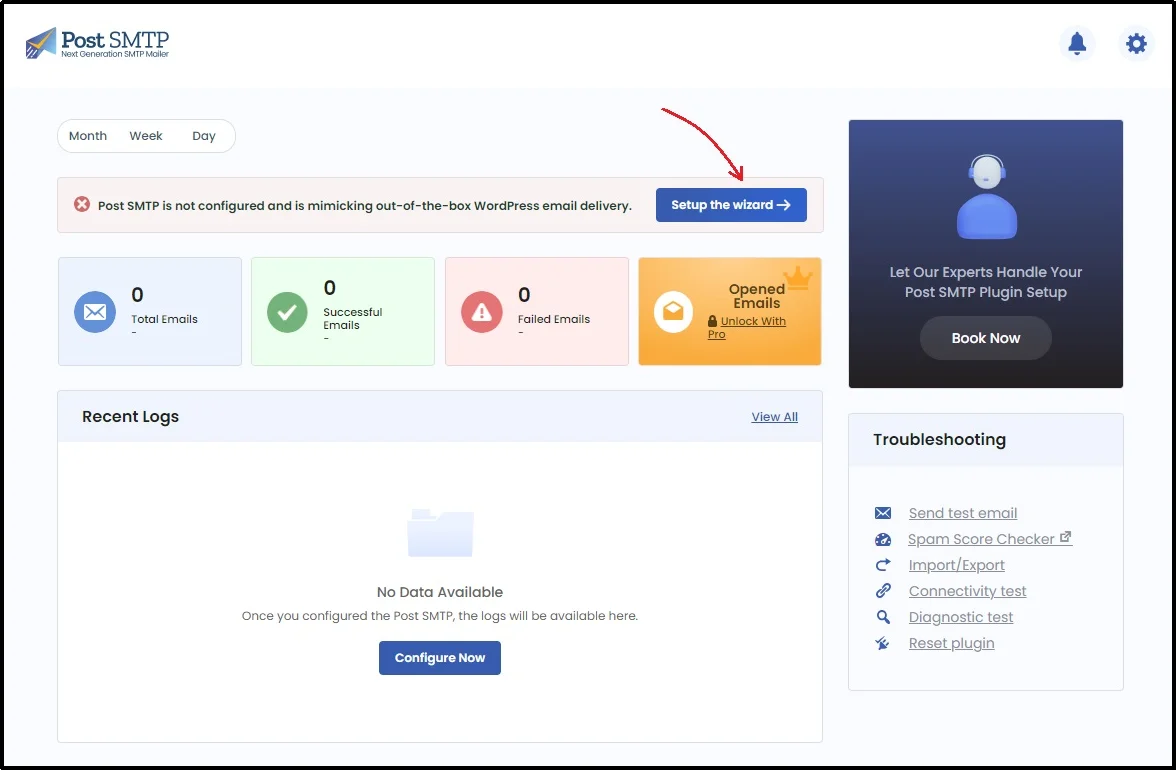
- Navigate to the Plugin’s settings and run the setup wizard.
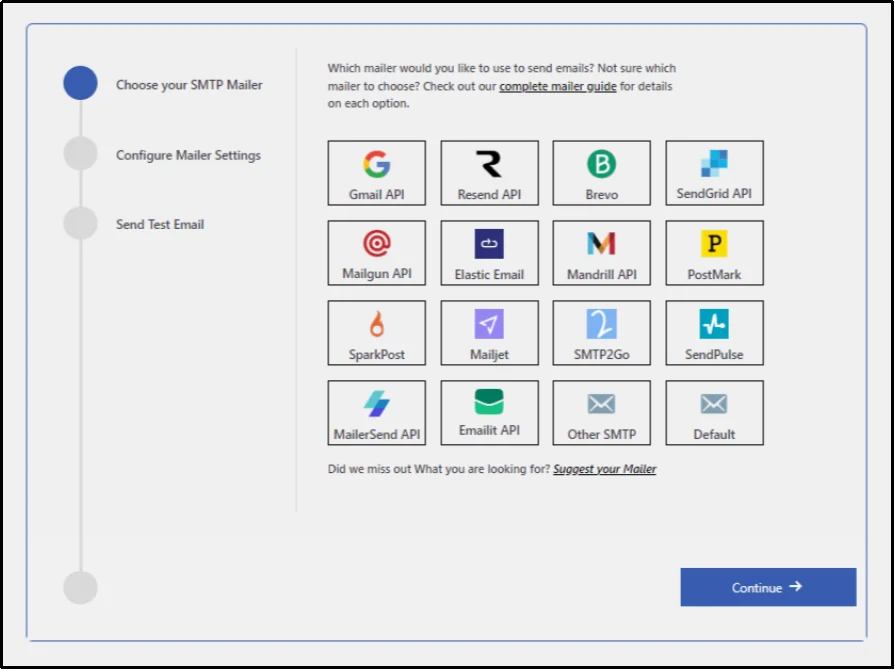
- You have multiple options here, or rather, you have limitless options because you can configure any email API service using the “Other SMTP” option.
If you are looking for reliability plus affordability, we recommend going with one of the premium mailers, such as Gmail API, Zoho, Amazon SES, or Microsoft 365. In our earlier article, we used these mailers, which enabled us to set up an SMTP server for less than $100/month.
- Configure the mailer of your choice. Our documentation page has separate detailed instructions for setting up your favorite mailer.
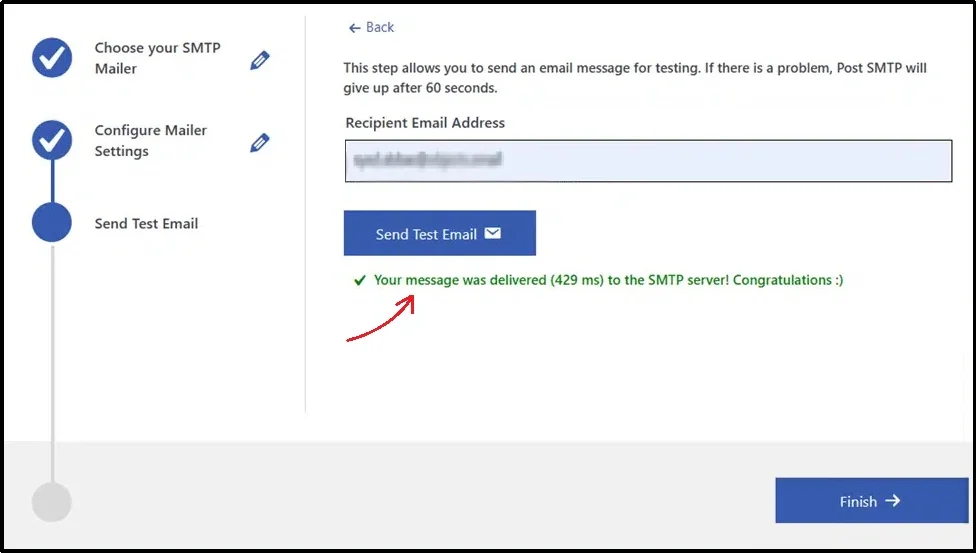
- After you are done setting up the mailer, send a test email to ensure the email lands. Once you see the success message, congratulations! The setup is exactly as it should be.
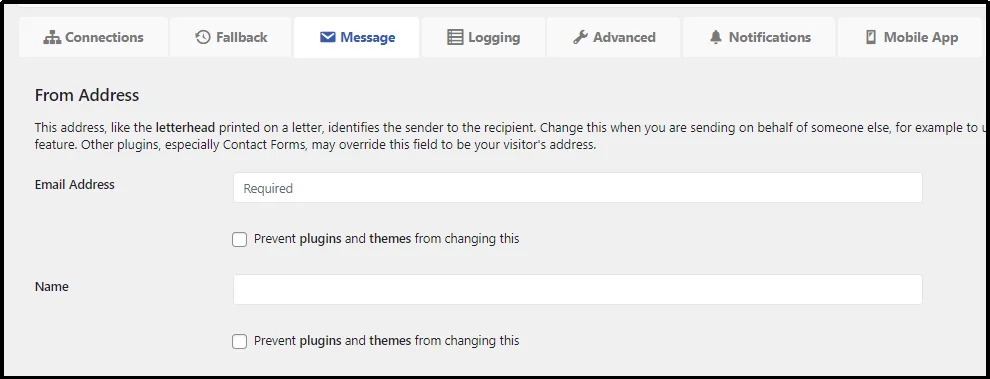
- Now, let’s lock the From Email and From Name to ensure it stays consistent across emails. Navigate to Post SMTP ⇒ Settings.
- Jump to the “Message” tab.
- You will see two input boxes, labeled Email Address and Name. Enter your name and email address in the respective boxes and check the “Prevent plugins and themes from changing this” box underneath them.
There you go! Now, nothing can stop your emails from reaching where they need to be.
Step 4: Set up a Fallback Server (Optional)
Even the most reliable mailers can experience temporary downtime or rate limits. When that happens, your important WooCommerce notifications might not be sent at all.
Therefore, setting up a fallback server is necessary. It acts as a backup delivery route for your emails.
If your primary mailer fails for any reason, Post SMTP automatically switches to the fallback connection and continues sending messages without interruption.
This feature is particularly valuable for stores that process a high volume of orders or rely on time-sensitive notifications. Instead of manually identifying and resending missed emails, your system quietly handles it in the background.
To put it to work:
- Go to Post SMTP ⇒ Settings.
- Fall back tab.
- Click “Yes” against Use Fallback?
- Define the further settings, including Security, Mail Server Port, From Email, etc.
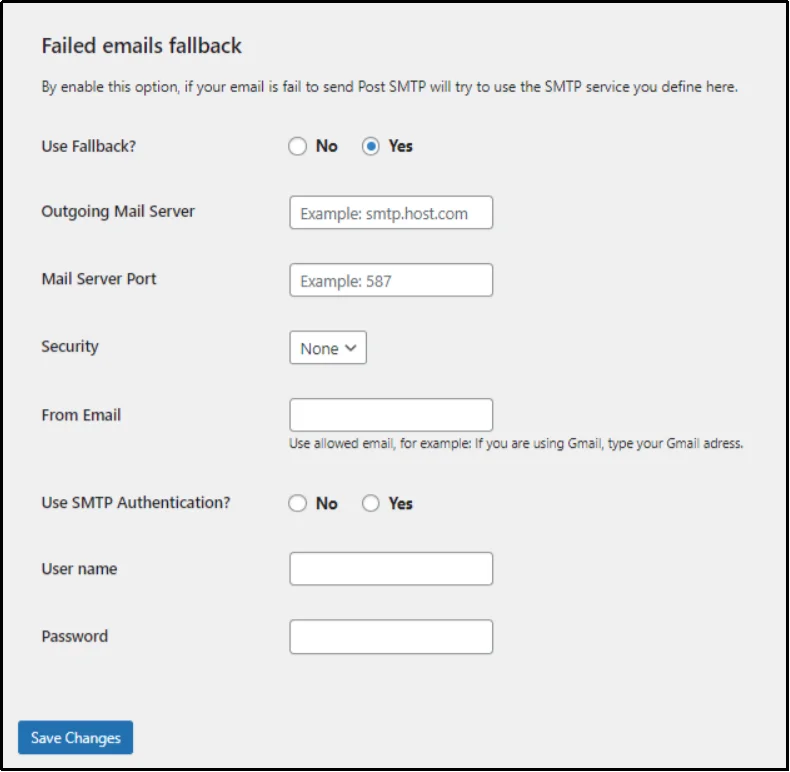
- Save Changes, and there you go!
Do More with Post SMTP
Post SMTP is a complete email delivery and monitoring system for WordPress. Once configured, it gives you visibility, control, and reliability far beyond what other SMTP plugins offer.
Here are some of its most prominent features:
- Email Logging: Keep a detailed log of every email sent from your website. You can see when it was sent, which plugin triggered it, and whether it was delivered or failed.
- Slack and Telegram Notifications: Get instant alerts about email delivery failures or critical site issues right inside your preferred communication channel.
- OAuth 2.0 Support: Securely connect to APIs like Gmail, Outlook, and Microsoft 365 without exposing your password or using less secure app settings.
- Delivery Status Alerts: Receive real-time alerts whenever your site struggles to deliver an email, helping you fix problems before they impact your customers.
- And much more!
In short, Post SMTP ensures your WooCommerce store never misses an important message. Reliable email delivery builds trust, improves customer satisfaction, and gives your business the stability it deserves. Post SMTP is trusted by over 400,000+ website owners to ensure their emails are delivered securely and reliably. Be one of them!

