

 OpenAI
 Perplexity
Every day, billions of emails flood inboxes worldwide, but according to email spam stats published in SQ Magazine, nearly half of all email traffic—around 47%—is spam and illegitimate. This constant flood of unwanted messages makes it hard for your important emails to stand out.
If your WordPress site sends crucial emails—like password resets, order confirmations, or newsletters—you need a way to prove they are from you. Without this proof, popular email services like Gmail and Outlook might mistakenly flag your messages as junk.
To solve this problem, you need to use email authentication protocols. What these are and why they are necessary will be explored in this article. At the end of it, you will also learn how you can easily send authenticated emails that actually land in your desired inbox.
But before that, let’s take a moment to understand email authentication in detail.
What is Email Authentication in WordPress?
Email authentication is the essential process of verifying an email’s sender.
It confirms that the message actually came from the domain it claims to be from, preventing others from impersonating your brand. This verification is crucial because the core email protocol, Simple Mail Transfer Protocol (SMTP), has a security flaw.
By default, the SMTP system allows anyone to put almost any address in the “From” field of an email. This makes it incredibly easy for spammers and phishers to send emails that appear to originate from any website they want.
Authentication is the technical solution to this lack of built-in sender verification.
The process involves publishing special records in your Domain Name System (DNS) settings. These records contain specific instructions that receiving mail servers can look up and use to check incoming email. If the checks pass, the email is considered authenticated and trustworthy.
In simple terms, email authentication acts as a digital ID for every message sent by your WordPress site. Setting up these methods signals that your emails are legitimate. This is the foundation for having your emails consistently land in the primary inbox, not the spam folder.
Why is Email Authentication Necessary?
Setting up email authentication is a fundamental security and deliverability strategy. Proper authentication gives your emails the best chance of reaching the inbox and protects your brand from major threats. Here are the key benefits:
- Improved Email Deliverability: When you authenticate your email, you send a signal to major Email Service Providers (ESPs) like Gmail and Outlook that your message is legitimate. This builds trust with their filtering systems; hence, it is far less likely to be mistakenly flagged as spam.
- Protection Against Email Spoofing and Phishing: Email spoofing is when a malicious actor fakes your “From” address to trick recipients. Authentication protocols actively prevent this. This prevents horrific cyberattacks aimed at stealing sensitive data.
- Stronger Sender Reputation: Your sender reputation is a score assigned by ESPs that determines the trustworthiness of your domain and sending IP address. Consistently authenticated emails prove you are a responsible sender. A good reputation leads to better email placement and protects your domain from being added to spam blacklists if another entity tries to impersonate you.
- Boosted Brand Trust and Recognition: Proper authentication verifies your brand’s identity, enhancing recipients’ confidence. When protocols like BIMI are enabled, your company’s logo can appear next to your email in the inbox. This visible proof of legitimacy builds greater trust and encourages higher open rates.
- Compliance with Digital Security Laws: Many modern digital security and privacy regulations require the protection of customer information. Authentication helps your business meet these standards.
What are Email Authentication Protocols?
You now know why email authentication is necessary for your WordPress site’s success. But what are the specific protocols that enable this verification?
There are four main authentication standards you need to implement.
These four protocols are SPF, DKIM, DMARC, and BIMI. They all work together to provide comprehensive email security.
Each one handles a different piece of the identity puzzle, but they are most effective when used as a complete system. Let’s explore each protocol individually, starting with the most foundational one.
Sender Policy Framework (SPF)
The Sender Policy Framework (SPF) is the most basic and widely used email authentication protocol. It allows a domain owner to specify which mail servers are authorized to send email on behalf of their domain.
To understand it better, let’s take an example: there is a house with a guard holding a guest list. They check every person who comes in or goes out against the list in their hands to ensure the person is indeed invited and not a gatecrasher.
Similarly, the SPF record, also known as a TXT record, is a text entry you publish in your domain’s Domain Name System (DNS). When a recipient’s mail server gets an email from your domain, it checks your SPF record.
If the sending server’s IP address isn’t on your authorized list, the email may be rejected or marked as spam.
An SPF record always begins with v=spf1, which tells the receiving server that this is an SPF record and what version it is. The rest of the record lists the authorized servers using mechanisms like include (to include third-party services) or ip4 (to list specific IP addresses).
Here is a real-world example:
v=spf1 include:_spf.google.com include:postsmtp.com -all
This record states that mail sent from the domain is allowed to come from Google’s servers (include:_spf.google.com) and a server authorized by the postsmtp.com domain (include:postsmtp.com). The -all part at the end means that any other server attempting to send mail from your domain should be rejected.
This vigorous enforcement is critical for security.
Alternatively, you can also merge multiple SPF records. The linked article can show you the correct way.
DomainKeys Identified Mail (DKIM)
DomainKeys Identified Mail (DKIM) is an authentication method that uses cryptography—a fancy word for secret codes—to prove that an email hasn’t been tampered with during transit. Unlike SPF, which only verifies the sender’s IP address, DKIM verifies the message’s actual content.
DKIM uses two special cryptographic keys: a private key and a public key. These keys work together like a lock and key system.
When your WordPress site sends an email, your mailer uses the private key to create a unique digital signature. This signature acts as a tamper-proof seal and is attached to the email’s hidden header.
The public key is stored in your domain’s DNS (Domain Name System) as a TXT record. Receiving email servers fetch this public key to verify that the signature matches the message content. This confirms the email is authentic and untouched.
A DKIM record is also a TXT record in your DNS, but it is much longer and more complex than an SPF record because it contains the encrypted public key. The record uses a selector (e.g., default._domainkey) to identify the correct key.
Here is a simplified example of how a DKIM record looks in your DNS:
Selector: default._domainkey.yourdomain.com
Value: v=DKIM1; k=rsa; p=MIGfMA0GCSqGSIb3DQEBAQUAA4GNADCBiQKBgQDn8uE9F6u7l5I1qX3y7p5g6j…
The most important part is the p=value, which contains the long string of characters that represents your public encryption key.
Also read: How To Split a DKIM Record.
Domain-based Message Authentication, Reporting, and Conformance (DMARC)
DMARC (Domain-based Message Authentication, Reporting, and Conformance) is the authentication policy layer that instructs receiving mail servers on what to do if an email fails both the SPF and DKIM checks.
It is the final judge and jury for your email’s authenticity.
The main job of DMARC is to achieve alignment. This means the visible “From” address must match the domain verified by SPF and the domain signed by DKIM. If an email passes this alignment check, the DMARC record tells the receiver to accept it.
If an email fails authentication, the DMARC record provides one of three instructions, called policies, to the receiving server:
- Monitor: Do nothing but report.
- Quarantine: Send the email to the spam folder or junk box.
- Reject: Block the email completely.
DMARC also sends reports back to the domain owner, giving valuable insight into who is trying to send emails using their domain.
A DMARC record is another TXT record published in your DNS, always starting with the subdomain _dmarc. It specifies the policy to be applied and often includes an email address for receiving failure reports.
Here is a common real-world example of a DMARC record set to strictly block unauthorized emails:
Subdomain: _dmarc.yourdomain.com
Value: v=DMARC1; p=reject; rua=mailto:reports@yourdomain.com; pct=100
In this record, v=DMARC1 defines the version, and p=reject is the policy telling servers to block any message that fails authentication. The rua (Reporting URI Aggregate) part specifies the email address where you will receive daily authentication reports. The pct=100 means the policy applies to 100% of your email traffic.
| Read: DMARC vs DKIM |
Brand Indicators for Message Identification (BIMI)
BIMI is the newest and most visual email authentication protocol. It allows you to display your company’s official, verified logo directly next to your email in the recipient’s inbox. This is a powerful tool for brand recognition and increasing recipient trust.
BIMI cannot work on its own; it requires that you have a strict DMARC policy—specifically, a p=quarantine or p=reject policy—already fully enforced. This requirement ensures that only highly secure and authenticated domains can display a logo, protecting users from having fake logos displayed in spam emails.
To use BIMI, your logo image must be placed on a secure server, and you must obtain a Verified Mark Certificate (VMC) from an approved certificate authority. The VMC is the official proof that you own the logo and the domain. Once you have the VMC, you publish another TXT record in your DNS that points to your logo file and VMC.
Like the other protocols, a BIMI record is a TXT record published in your DNS. The record includes the version number and the URL where your securely hosted logo file can be found.
Here is a common real-world example of a BIMI record:
Subdomain: default._bimi.yourdomain.com
Value: v=BIMI1; l=https://cdn.yourdomain.com/verified-logo.svg; a=https://cdn.yourdomain.com/vmc.pem
In this record, v=BIMI1 defines the version, and l= is the location of the Scalable Vector Graphics (SVG) logo file. The a=part is optional but highly recommended; it points to the location of your VMC (Verified Mark Certificate), which provides proof that the logo is legally owned by your organization.
How to Authenticate Emails Properly
Now that you understand the essential email authentication protocols—SPF, DKIM, DMARC, and BIMI—let’s see how you can ensure your emails are properly authenticated. The first step is to recognize the limitations of the default WordPress email system.
By default, WordPress uses a function called wp_mail() to handle all outgoing email. This function relies on your website’s server, or web host, to send the emails. This built-in system is old and, frankly, incompetent for modern email standards.
The major problem is that the default setup does not authenticate your emails properly with aforementioned protocols. Emails sent this way often look unverified to mail providers. This leads to extremely poor deliverability, meaning your emails frequently end up in the spam folder or are blocked entirely.
To send authenticated emails that actually land in the inbox, you must force your email through a reliable, third-party email service. Post SMTP makes this process super smooth. With just a few clicks, you can replace your default mail server with a reliable one. Let’s configure it together!
Sending Authenticated Emails in 3 Easy Steps
Step 1: Install and Activate Post SMTP
The first action is to get the Post SMTP plugin on your WordPress website. This is simple and can be done right from your site’s administration area.
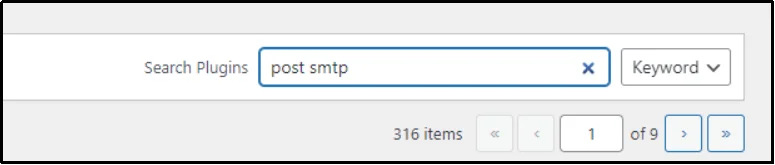
Log in to your WordPress dashboard and navigate to Plugins and then Add New.
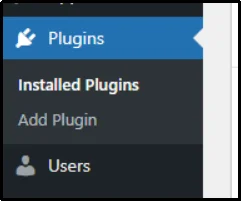
In the search bar, type “Post SMTP.” Once you find the plugin, click the Install Now button.
After the installation is complete, the button will change to Activate. Click this button to fully enable the plugin. Once activated, Post SMTP is ready to replace the unreliable default email system with a secure mailer of your choice.

To get the most out of the plugin, we recommend opting for the premium version of the plugin. It offers amazing benefits that are exclusive to the premium users, such as:
- Advanced Mailer Integrations: The Pro version unlocks access to specialized, one-click integrations with services like Gmail, Zoho, Microsoft 365, and Amazon SES. These dedicated extensions provide the highest level of security and deliverability for complex email environments.
- Automatic Retry for Failed Emails: This critical feature ensures that if a delivery fails the first time—perhaps due to a temporary network hiccup or any other reason—Post SMTP will automatically try again. This significantly boosts your overall email deliverability and ensures no crucial message is permanently lost.
- Email Open and Click Tracking: The premium version gives you deep insights into your email performance. You can see when recipients open your emails and when they click on links inside them, helping you understand how effective your communication truly is.
- Backup SMTP Mailer (Fallback Mailing): For businesses where email is critical, the Pro version allows you to set up a secondary, backup mailer connection. If your primary email service fails or goes down, Post SMTP automatically switches to the backup to ensure email delivery never stops.
- Dedicated Mobile App and Alerts: You gain access to the dedicated Post SMTP mobile application for iOS and Android. This provides instant push notifications for failed emails, allowing you to monitor and even resend emails directly from your phone.
Check out all the features.
To obtain your premium plan, go to our pricing page and purchase a plan of your choice.
Once done, you will get a welcome email along with the premium plugin’s ZIP file and a license key.
Upload that ZIP file using the Upload Plugin button in the Plugins tab and activate the plugin with your license key.

There you have it! Now you can enjoy Post SMTP to the fullest.
Step 2: Set up a Reliable Email Mailer
The next crucial step is to connect Post SMTP to a professional, third-party email service. This service, a mailer, handles the actual sending of your emails, ensuring they are properly authenticated with all the necessary email authentication protocols.
To begin the connection, navigate to the Post SMTP menu in your WordPress dashboard and launch the Setup Wizard.
Next, the wizard will ask you to choose a Mailer.
Here you will see a list of popular, reliable services like Gmail, Amazon SES, and others. Select one of these mailers to start configuration.
After selecting your mailer, you will need to provide the API Key required to establish a connection. You must obtain this secure key directly from your chosen mailer’s control panel. The process varies for each mailer; hence, for step-by-step guidance, our docs page can help.
Once you enter the API key and the connection is established, Post SMTP allows you to send a test email within the setup to ensure the email actually lands in the inbox.
A successful connection means your WordPress site is now routing all emails through the trusted, authenticated third-party service, dramatically improving your deliverability.
Step 3: Force From Emails
Every email needs two key identifiers to be trusted: the From Name and the From Address.
The From Name is the label that your recipient sees in their inbox, like “Support Team.” The From Address is the actual email address tied to your authenticated domain, such as support@yourdomain.com.
Both of these elements play a key role in how recipients recognize and trust your messages.
Consistency is vital because different themes or plugins on your WordPress site often try to use different “From” names or addresses. This inconsistency can confuse mail servers and activate spam filters, resulting in delivery failures.
By forcing all plugins and themes to use a similar From Name and From Address, you can create uniformity across every message sent from your site. This simple step eliminates potential conflicts and significantly improves the chances of passing authentication checks.
To do so:
- Navigate to the Post SMTP Settings in your WordPress dashboard.
- Go to the Email Settings tab and then select the Message sub-tab.
- Type your desired From Name and From Address into the respective boxes.
- Crucially, check the box labeled “Prevent themes and plugins from changing this.”
That’s how you force every email on your site to have a consistent name and address. With your third-party mailer set up and your sender details locked down, your WordPress emails are now properly authenticated and ready for reliable delivery.
How to Check Your Email Authentication Status
After setting up Post SMTP and connecting it to your reliable third-party mailer, you must verify that your authentication records are working correctly. Simply setting up the records in your DNS (Domain Name System) is not enough; you need to confirm that receiving mail servers can validate them.
The fastest way to verify your entire setup is by using a dedicated checker tool. Post SMTP offers a specialized utility called the Domain Health Checker to analyze your authentication records instantly.
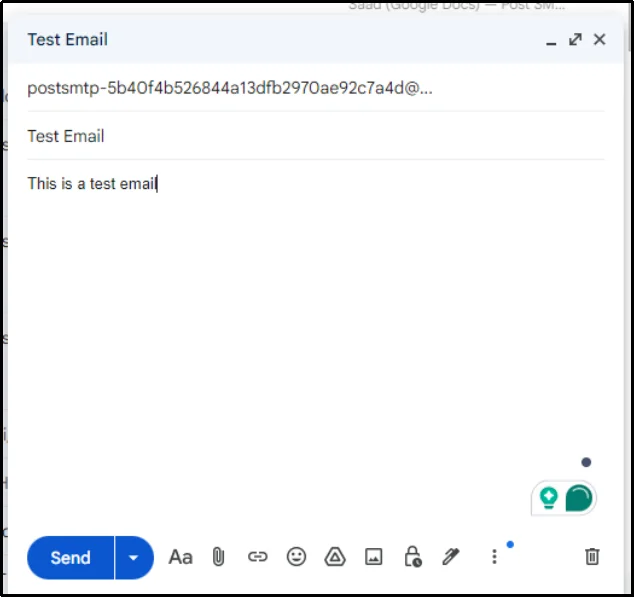
Copy the given email address.

Send an email to the said email address.
Go back to the tool and click Confirm email sent.
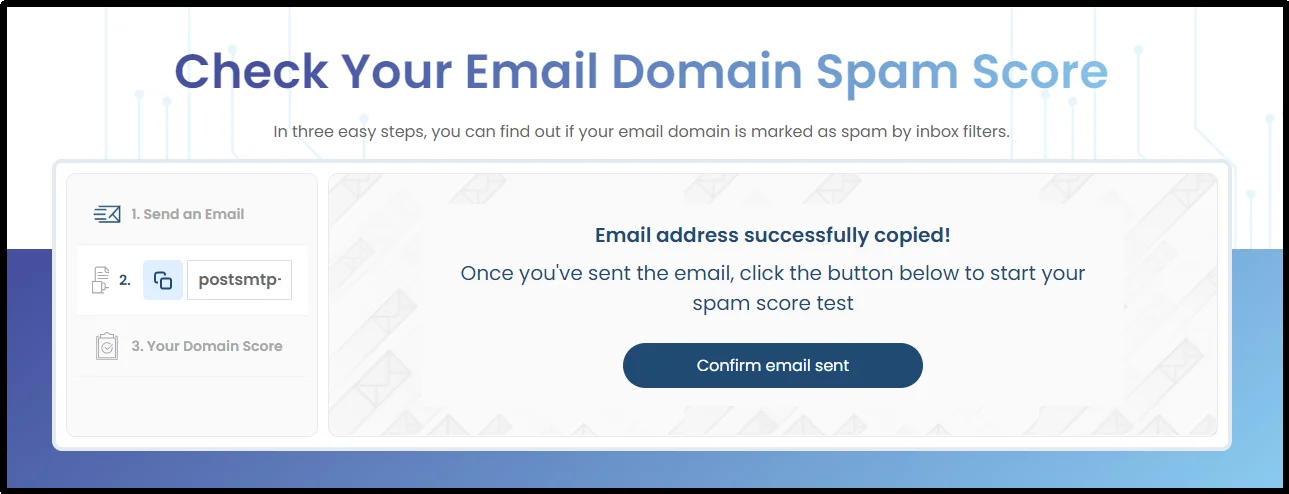
Wait a moment while the plugin finishes its work.
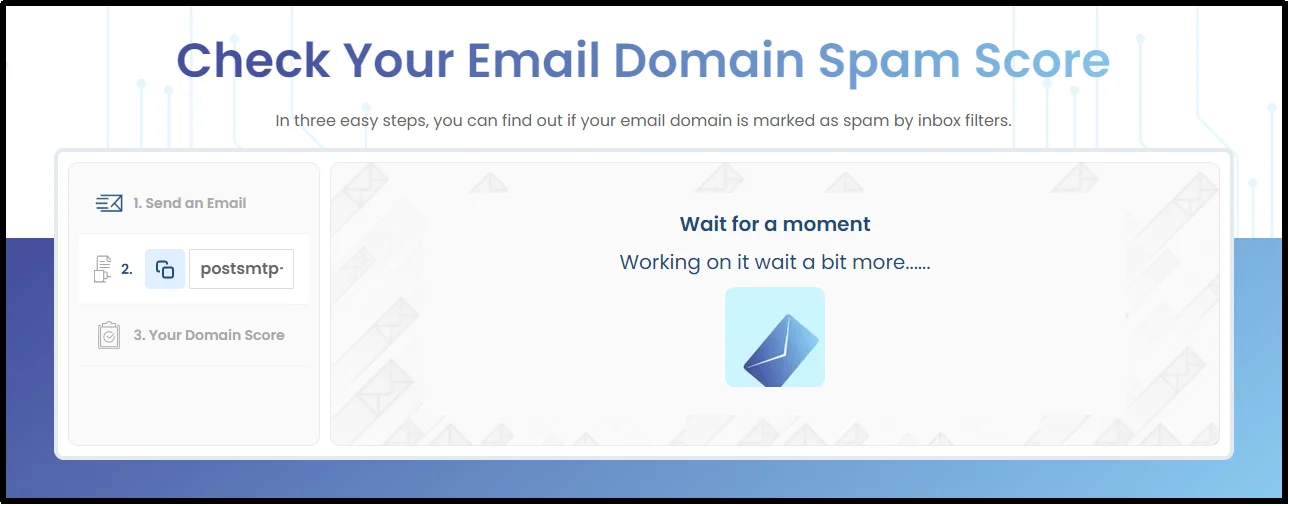
Finally, you will see your domain health on the screen.
Achieve True Email Authority
You now have the essential knowledge to regain control of your email deliverability. Understanding SPF, DKIM, DMARC, and BIMI is the key to ensuring your messages are trusted by every primary inbox provider.
By implementing these standards, you are investing directly in your brand’s credibility. Every order confirmation, password reset, or any email sent from your WordPress now has a verified digital identity that guarantees it reaches the recipient.
Don’t wait for your critical business emails to fail authentication and end up in the spam folder. Post SMTP is the powerful, easy-to-use solution that bridges the gap between the outdated WordPress email system and the strict demands of modern email security. Get Post SMTP today and enjoy the peace of mind that comes with industry-leading deliverability and security.


