


Is your Getwid contact form not sending email notifications? You are not alone! Many Getwid contact form users face the Getwid contact form block not sending emails from WordPress.
But don’t worry! We have the perfect solution to this problem.
Whenever the user submits the contact form, both you and the subscriber should receive an email notification. In any case, if your Getwid contact form is not working or is not sending email notifications, you’ll most likely lose subscribers and, ultimately, revenue.
To fix this issue, in this tutorial, we will walk you through the step-by-step process to resolve the Getwid contact form not sending email notifications.
Ready? Let’s get started!
Reasons Why Getwid Contact Form Not Sending Email?
Let’s explore the underlying reasons why your Getwid contact form is not sending emails. Typically, there are two primary causes for this:
- WordPress Default Mail Function
- Wrong Getwid contact form settings
Let’s see how each of these factors impacts your email delivery.
Reason #1: WordPress Default Mail Functionality
The issue lies in WordPress’ default mail functionality. By default, WordPress relies on the wp_mail() function to send emails, which is one of the most common reasons for WordPress not sending emails.
In addition, many web hosting providers also block emails sent via the PHP mail function to thwart potential fraudulent activities and spamming attempts.
Moreover, emails sent via wp_mail() lack proper authentication, which can cause email servers to flag them as suspicious. Consequently, these messages often end up in spam or junk folders rather than reaching their intended recipients.
Reason #2: Wrong Getwid Contact Form Settings
Another common reason your Getwid contact form fails to send emails is the misconfigured Google reCaptcha settings. Specifically, discrepancies in the Site Key and Secret Key can disrupt the functionality of the reCaptcha feature, consequently impeding the proper submission and processing of form data.
Google reCaptcha serves as a vital layer of security for your forms, safeguarding them against automated bot submissions and spam. However, for reCaptcha to function seamlessly, it necessitates accurate configuration of both the Site Key and Secret Key within the Getwid contact form settings.
Understanding these underlying issues is crucial in pinpointing the root cause of your email delivery woes. Now, let’s proceed to explore the simple yet effective solutions to rectify this issue.
2 Easy Steps to Fix Getwid Contact Form Not Sending Emails
Now that we know why the Getwid contact form isn’t sending emails, let’s look at what you can do to fix it. You will learn how to resolve the issue in two easy steps.
With each method, you will be able to resolve a specific issue that could be preventing your Getwid contact form from sending out email notifications.
Step #1: Review and Update Getwid Contact Form Settings
As a first step, it’s crucial to ensure that your Getwid contact form is configured accurately. Although there aren’t many settings to adjust, reviewing the form fields is essential.
Typically, Getwid forms include fields such as Name, Email, Message, and Text, along with Google reCAPTCHA for added security.
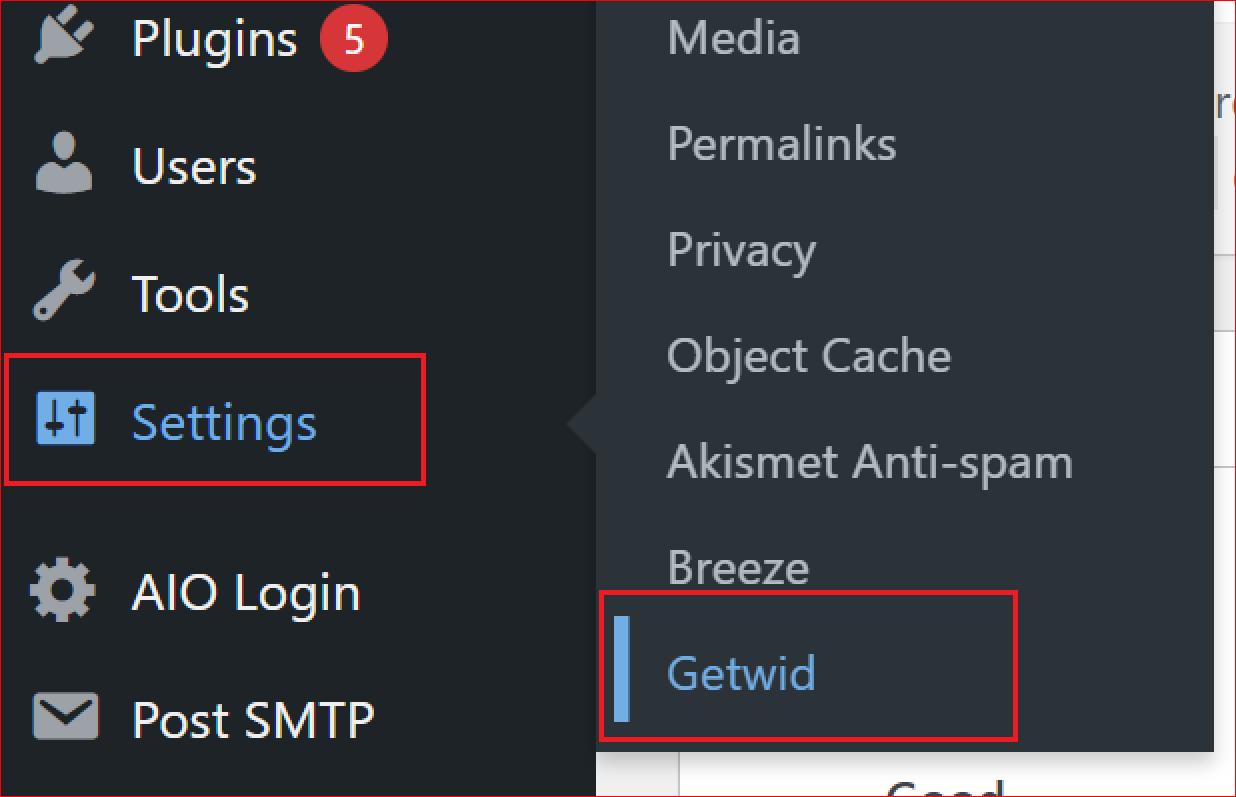
To begin, navigate to Settings → Getwid from the WordPress dashboard.
When you are on the General tab, verify that the Site Key and Secret Key for Google reCAPTCHA are entered correctly.
Misconfigured reCAPTCHA settings can lead to submission failures, so it’s vital to double-check this aspect.

Once you’ve confirmed the integrity of your reCAPTCHA settings, we can proceed to address any potential issues with wp_mail().
Let’s move forward with resolving the wp_mail() issue to ensure seamless email delivery from your Getwid contact form WordPress plugin.
Step #2: Install and Configure Post SMTP Plugin
Now that we’ve addressed the root cause of the email delivery issue by addressing the limitations of the default wp_mail function, it’s time to replace the wp_mail function with the SMTP using the Post SMTP plugin.
This powerful WordPress SMTP plugin improves email delivery by seamlessly integrating with popular SMTP service providers, such as Gmail (Gmail SMTP Server), Microsoft 365, Amazon SES, Mailgun SMTP, and more.
Here’s a step-by-step guide to installing and configuring the Post SMTP plugin:
- Access your WordPress dashboard.
- Proceed to the “Plugins” section and select “Add New Plugin.”
- Search for “Post SMTP” in the plugin directory and locate the “Post SMTP – The #1 WordPress…” plugin.
- Click on “Install Now” to initiate the installation process.
- After installation, activate the plugin.
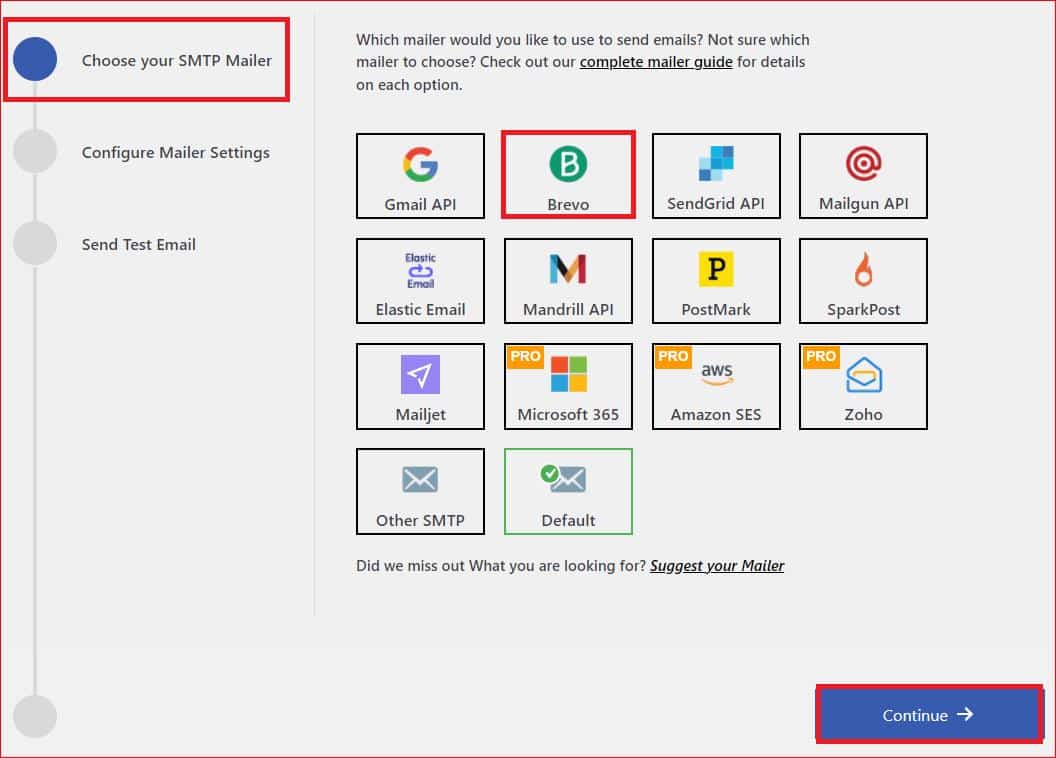
- On activation, the following 3-Step Setup Wizard will appear.
- Select your desired SMTP service and proceed by clicking on the “Continue.”
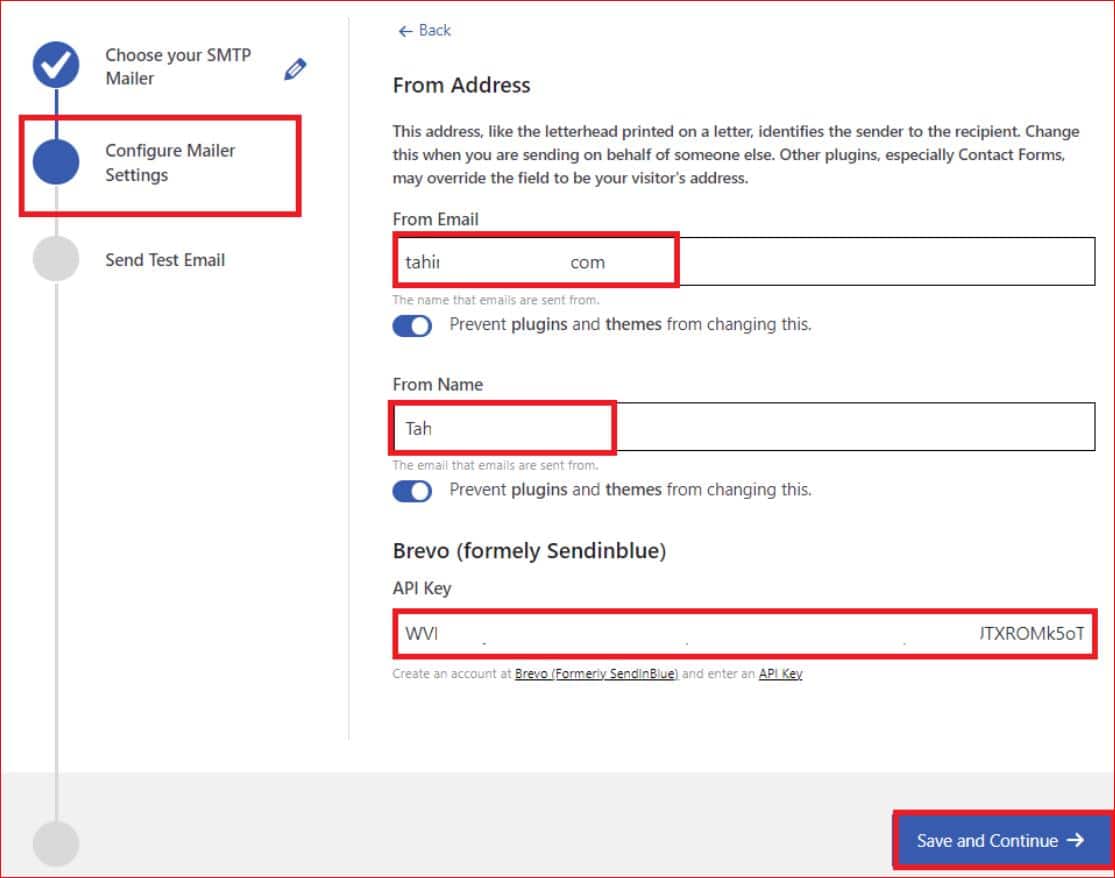
- Provide your email address and name in the designated “From Email” and “From Name” fields.
- To authenticate your SMTP service account, enter the API Key. Then click “Save and Continue.”
- Authenticate your SMTP service account by entering the API Key and then hit “Save and Continue.”
Once you have authenticated your SMTP account, test your SMTP configuration by sending a test email to a valid recipient address.
- For the “Recipient Email Address” field, enter a valid address and click “Send Test Email.”
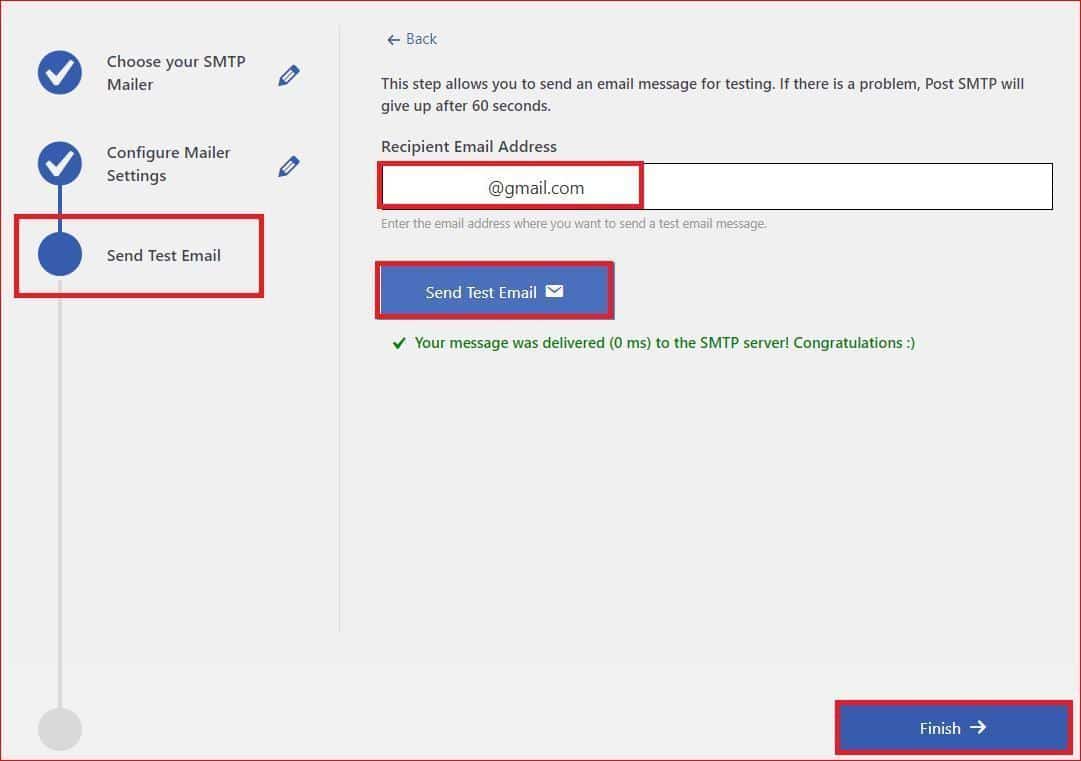
If the configuration is successful, you’ll receive a confirmation email.
- Complete the setup process by clicking “Finish.”
With the Post SMTP plugin set up, your Getwid contact form will reliably send email notifications. However, if you encounter any issues, consider reviewing the DNS records for your email domain.
IMPORTANT: Remember that you can configure multiple SMTP mailers in the Post SMTP settings under the “Fallback” tab, offering flexibility and redundancy in email delivery.
Lastly, Set Up DNS Records for Your Email Domain
You might need to check your DNS records if your Getwid contact form isn’t sending emails. Email authentication relies heavily on DNS records such as SPF, DKIM, and DMARC, which verify the sender’s legitimacy and minimize the likelihood that the email server will mark the email as spam.
To configure DNS TXT records for your email domain, you have a couple of options. Firstly, you should refer to our detailed article on SPF, DKIM, and DMARC, which provides step-by-step instructions for their setup.
Alternatively, if you prefer personalized assistance, don’t hesitate to reach out to our dedicated on-demand support channel.
We can help you configure these DNS records, thus enhancing your email deliverability and guaranteeing that emails sent through Getwid reach their intended recipients.
Final Remarks
On every successful submission, your contact form should send an email notification to both you and the user. However, if you’re experiencing the Getwid contact form not sending emails, it would negatively affect your business by causing you to miss out on inquiries, leads, and feedback.
To address this issue effectively, follow these steps:
- Review and update the settings of your Getwid contact form to ensure accuracy and functionality.
- Install and configure the Post SMTP plugin to ensure consistent and reliable email delivery.
By implementing these measures, you can significantly enhance the performance of your Getwid contact form, giving you and your users reliable email notifications.
Last but not least, if this issue persists or you need help with any other WordPress email delivery issues, feel free to open a support ticket here. We are always available to assist you with email delivery issues.

