
 OpenAI
 Perplexity
If you’re not getting email alerts from iThemes Security (now called Solid Security), you’re flying blind when it comes to protecting your WordPress site.
Thousands of users encounter this issue every day, and it’s not always clear what’s causing the problem. Some think their web host is blocking the emails. Others blame the plugin. However, in most cases, it’s simply a configuration issue, or the default WordPress mailing system isn’t working properly.
In this step-by-step guide, we’ll walk you through the process of fixing Solid Security email not sending issues the right way. From configuring notification settings to routing emails through a reliable SMTP server, we’ll cover everything you need to start receiving essential security alerts without delays.
Ready? Let’s get started!
What Emails Does iThemes (Solid Security) Send?
Solid Security (formerly known as iThemes Security) is a comprehensive security plugin for WordPress. It monitors suspicious activity, prevents brute force attacks, and sends you alerts right to your email address when it detects any suspicious activity.
Here’s a quick rundown of the types of emails Solid Security sends:
- Login Lockout Alerts: When someone attempts to brute-force their way into your website by repeatedly guessing passwords, Solid Security blocks them. It then sends you a lockout alert, so you’re instantly aware of the attempted breach. This email often includes details such as the IP address, the username used, and the number of attempts made.
- File Change Notifications: If any core WordPress files, plugin files, or theme files change unexpectedly, Solid Security notifies you immediately. This is especially helpful in detecting unauthorized access or hidden malware.
- Database Backup Emails: If you’ve scheduled database backups through Solid Security, it sends a copy of the backup to your inbox. That way, even if something goes wrong on your server, you still have access to your site’s core data.
- Two-Factor Authentication Codes: If you have set up two-factor authentication (2FA) using the email method. Then, whenever you log in, you get a unique code in your inbox.
- Passwordless Login Emails (Magic Links): Solid Security Pro includes a passwordless login feature. When enabled, users receive a secure “magic link” via email that logs them in with one click. It’s convenient, but only if the email actually arrives.
- Security Digest Emails: These digest emails offer a quick summary of all the activity on your site: lockouts, file changes, user logins, and more. You can schedule these to be sent daily, weekly, or monthly. Think of it like a security report card for your site.
Generally, if these emails are missing, it’s because your email settings are misconfigured. Also, if you use the WordPress default email delivery mechanism, you will experience this issue.
You can fix the iThemes Security Email Not Sending issue by simply following these four steps.
Step 1: Check & Configure Solid Security Notification Settings
Before jumping into SMTP plugins or server configurations, let’s first make sure you’ve set up Solid Security correctly for sending emails. Sometimes, the issue isn’t technical, but rather a plugin misconfiguration.
Here’s how to check your notification settings step by step:
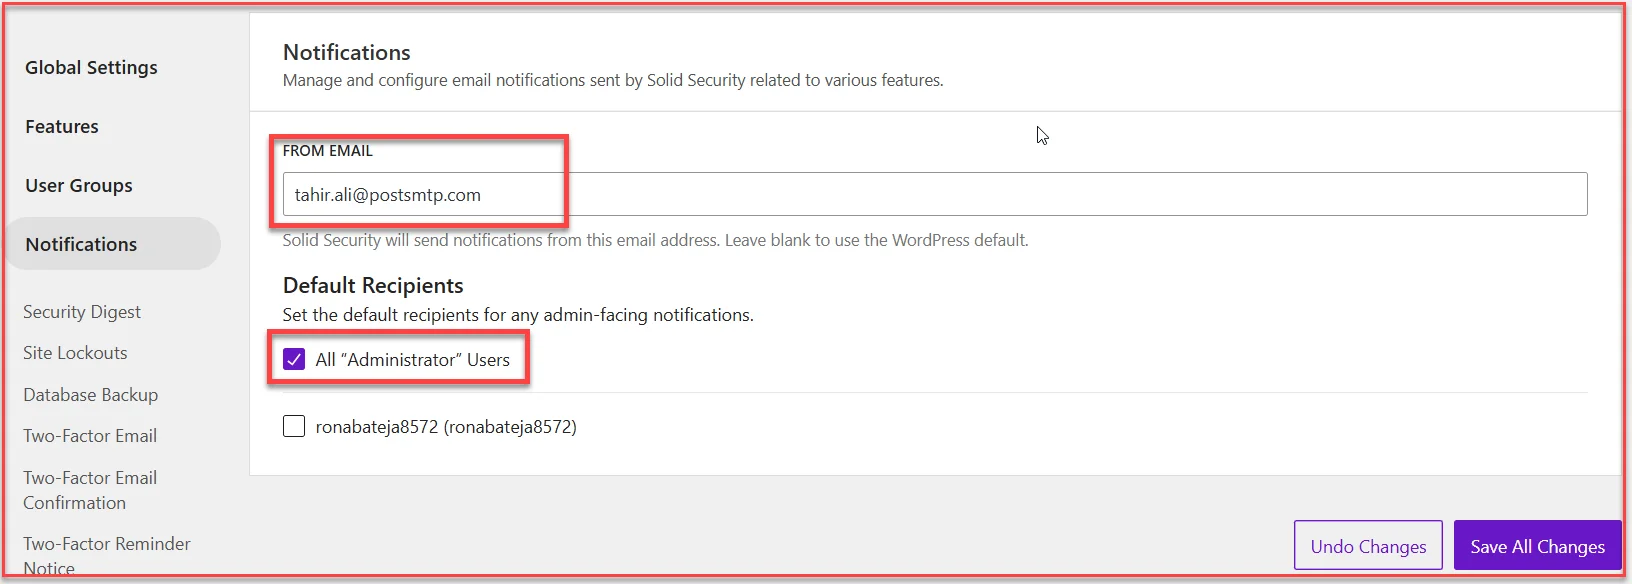
- Log in to your WordPress dashboard and go to Security → Settings.
- Select the Notification option from the sidebar.
In this section, you’ll see options to enter the ‘From’ email address and set the default recipient.
- For the ‘FROM EMAIL’ option, use a domain-based email address like alerts@yourdomain.com instead of something generic like @gmail.com.
- The ‘Default Recipients’ option is often set to the site admin by default. If your site has multiple administrators or a separate security team, it’s a good idea to customize who receives what.
Pro tip: If you’re the only one managing the site, keep the default. But if you have a team, select their usernames individually.
- Don’t forget to save the changes by clicking ‘Save All Changes.’
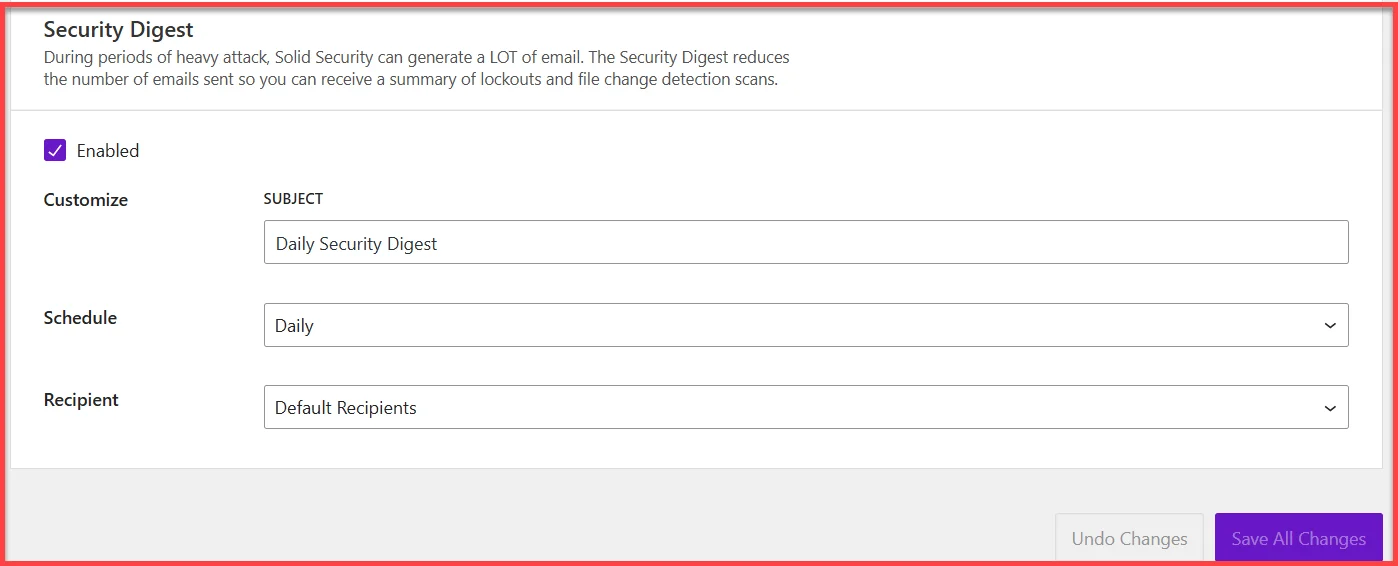
Now, let’s review the configuration of each notification type, as shown in the screenshot above.
Security Digest
You can schedule this to send a daily or weekly summary of all site activity. It’s a great way to monitor your site’s overall security trends.
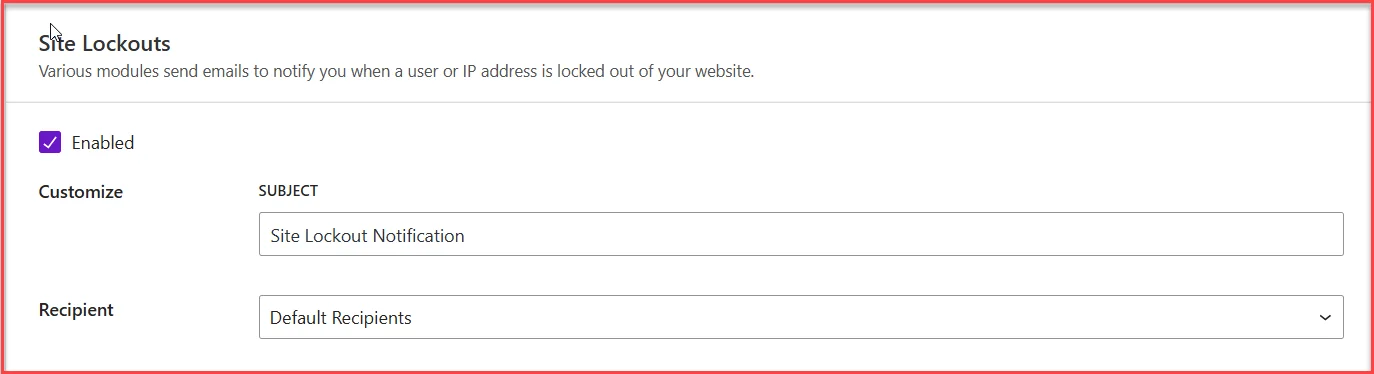
Site Lockouts
If someone’s IP or username is blocked, you’ll want to know. Make sure this is enabled and that the Recipient field includes the correct user(s).
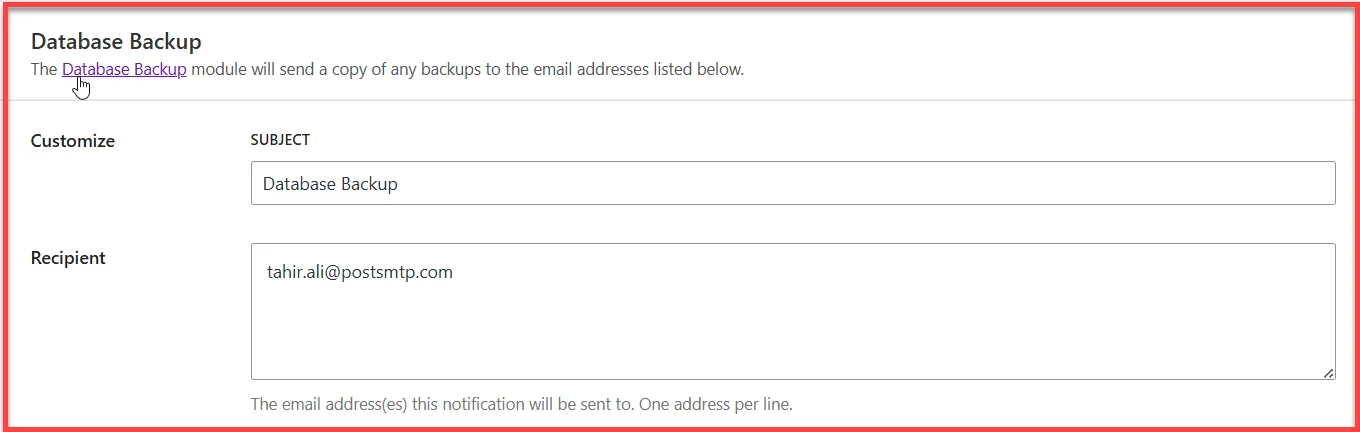
Database Backups
Here, you can enter one or more email addresses (one per line) that should receive the backup file. Double-check that the subject line is filled and the recipient’s email address is correct.
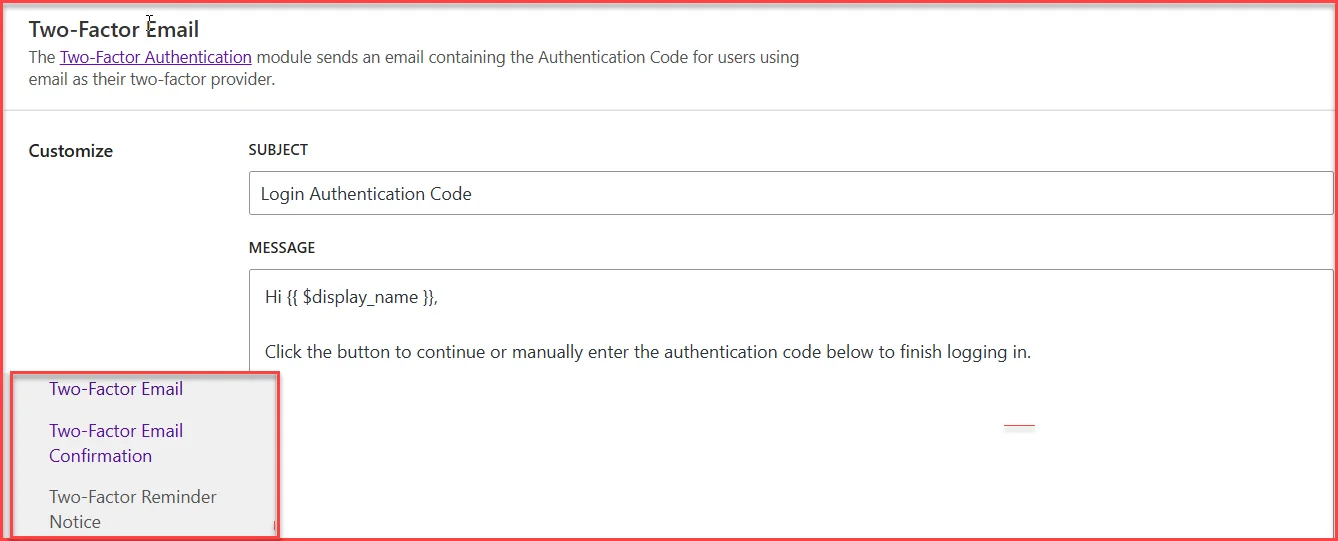
Emails related to Two-Factor Authentication
These emails are sent when a user attempts to log in with two-factor authentication enabled. You can customize the subject and message content for the authentication code, confirmation, and reminder emails in the notification settings.
Quick Checklist Before Moving On
- Notifications are enabled
- “From” email is domain-based
- Recipients are correctly assigned
- No subject and message fields are blank
Once you’ve correctly set up the Notification Center, it’s time to go beyond the plugin and fix the actual delivery of emails. That’s where the Post SMTP plugin comes into play—and we’ll cover that next.
Step 2: Install the Post SMTP Plugin to Improve Email Deliverability
Even with Solid Security set up correctly, WordPress’s built-in email function [wp_mail()] is often the reason behind WordPress not sending emails. That’s because it sends emails using PHPMailer, which many web hosts block or throttle due to spam risks.
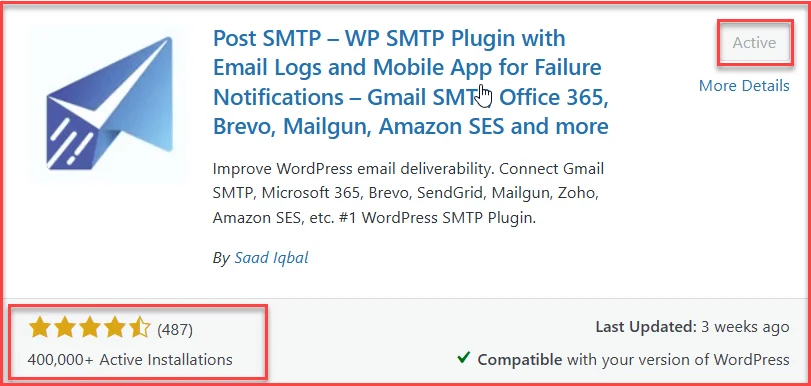
The easy fix is to use a dedicated SMTP plugin to send your emails through a verified and authenticated server. When it comes to WordPress SMTP solutions, Post SMTP is among the best SMTP plugins.
Why Post SMTP?
Post SMTP is more than just an SMTP plugin; it’s an email monitoring system. Here’s why over 400,000+ WordPress users and developers trust it:
- Real-time Email Logs: Know exactly when an email was sent, to whom, and whether it failed.
- OAuth 2.0 Authentication: A safer alternative to plain-text passwords.
- Fallback SMTP Option: If your main SMTP fails, Post SMTP can attempt to use an alternative provider.
- Mobile App Integration: Get instant alerts for failed emails on your phone.
- Failure Notifications: Choose alerts via email, Slack, webhook, or even SMS.
- Email Health Report: Get email delivery reports on your email (daily, weekly, monthly).
It doesn’t just send emails—it makes sure they actually arrive.
How to Install Post SMTP
Follow these steps to get started:
- Go to your WordPress dashboard.
- Click on Plugins → Add Plugin.
- Search for “Post SMTP”.
- Click Install Now, then hit Activate.
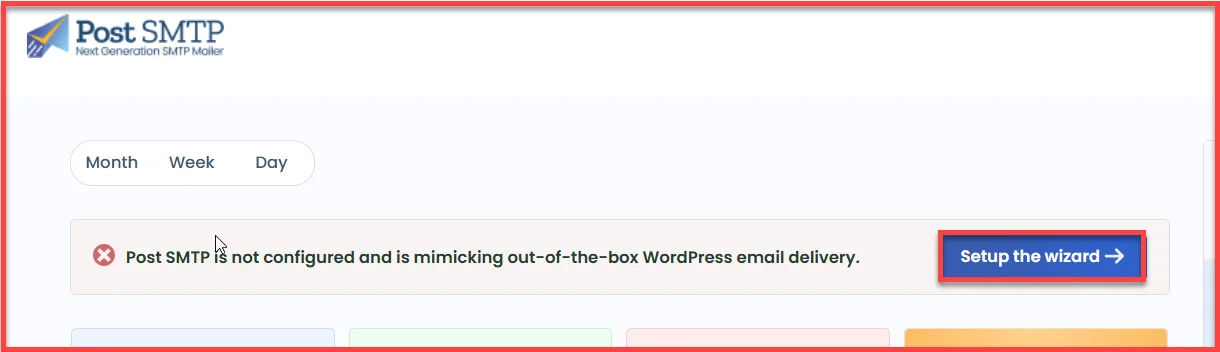
- After activating the plugin, go to Post SMTP → Dashboard and click “Start the Wizard.”
- Next, pick the email service provider you use to send email and click ‘Continue.’ Post SMTP supports all the major ones:
- Gmail / Google Workspace
- Microsoft 365 / Outlook
- Amazon SES
- Brevo (formerly Sendinblue)
- Mailgun
- Zoho Mail
- …and many more
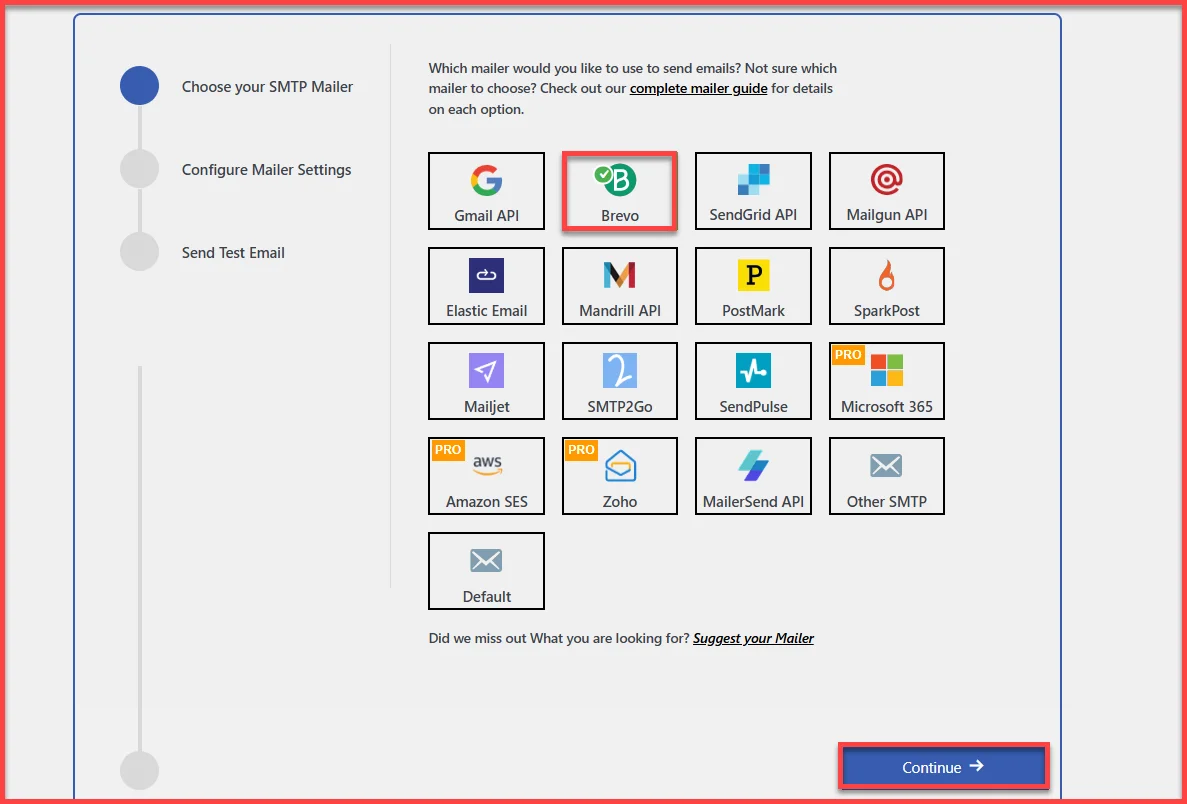
For Example, let’s say you pick Brevo—a solid option for transactional emails.
- Now, fill in the basics:
- From Email: Use your domain-based email (e.g., alerts@yourdomain.com)
- From Name: This is what your recipients will see in the “Sender” field
- SMTP Credentials or API Key: Based on your provider’s settings
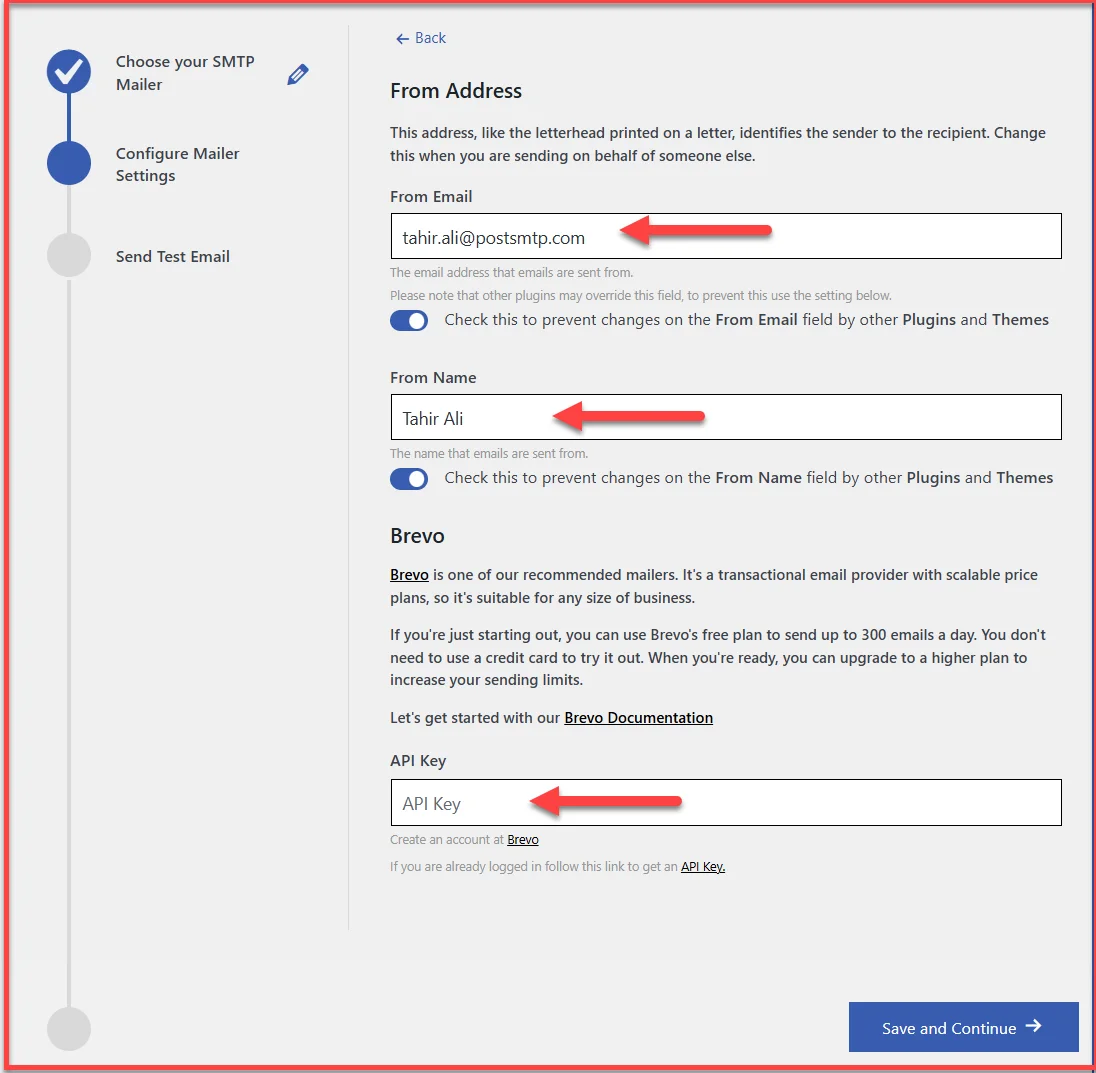
- Click ‘Save and Continue’ once done.
After setup, you’ll be prompted to send a test email.
- Type in a valid email address in the ‘Recipient Email Address’ field and click ‘Send Test Email.’
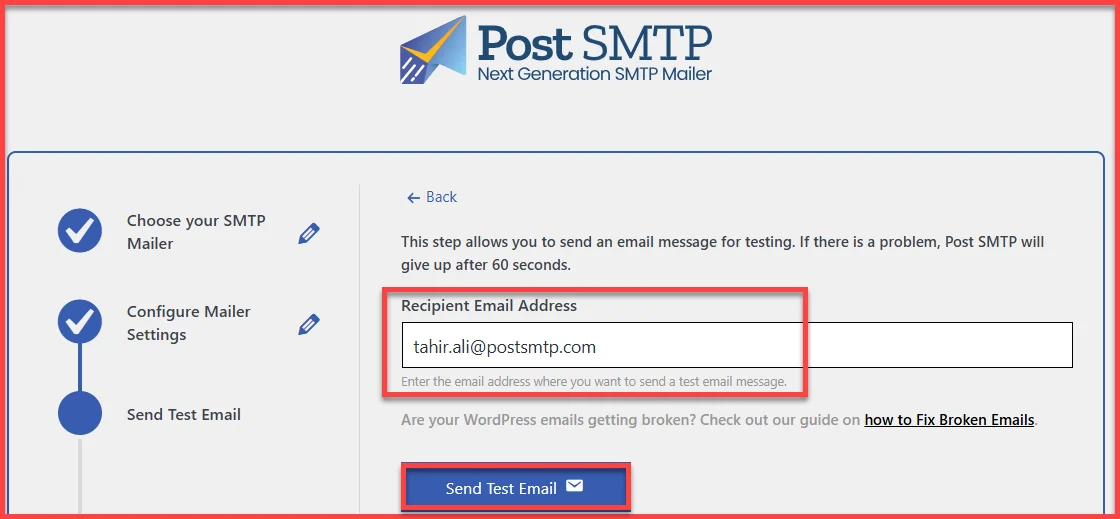
Post SMTP will instantly show you if the message was sent successfully. If it wasn’t, the error log will help you pinpoint exactly what went wrong—whether it’s a DNS issue, an authentication problem, or something else.
Once the test email is confirmed, you’re all set. Solid Security will now send notifications through your authenticated SMTP provider, drastically improving the chances that they land in your inbox instead of the spam folder.
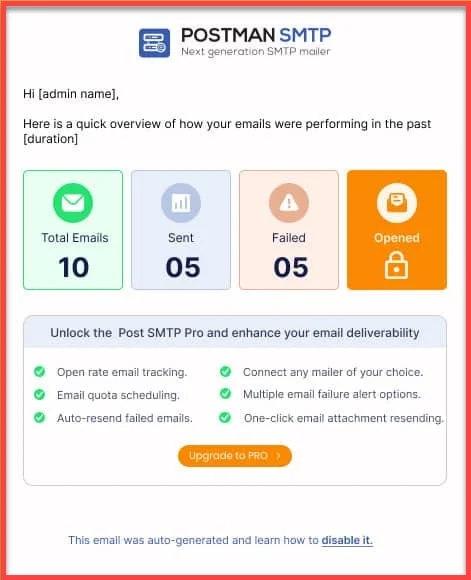
Step 3: Enable the Post SMTP Email Health Report
You’ve configured Solid Security. You’ve set up Post SMTP. Everything looks good—but how do you know your emails are still being delivered tomorrow, or next week?
That’s where the Email Health Report from Post SMTP can help. It gives you regular updates on how your WordPress emails are performing.
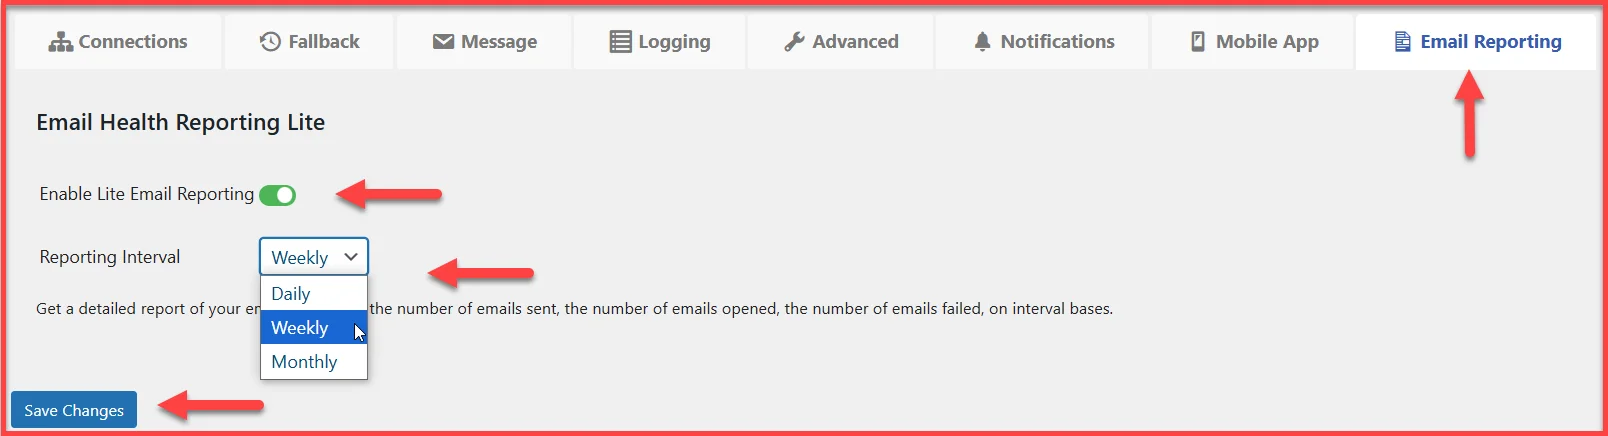
To enable the Email Health Report, follow the steps below:
- In your WordPress dashboard, go to Post SMTP → Settings.
- Navigate to the Email Reporting tab.
- Toggle the switch to Enable.
- Choose your preferred frequency:
- Daily
- Weekly
- Monthly
- Click Save Changes.
And that’s it—you’re now getting regular insights just like in the screenshot given below:
Bonus Tip: Use MainWP Post SMTP Extension
If you manage multiple websites using the MainWP Dashboard, there’s an official Post SMTP Extension for MainWP. With it, you can:
- View health reports from all your sites in one place
- Get alerts from any child site with failed emails
- Centralized SMTP configuration for easier maintenance
This is especially useful for agencies, freelancers, or developers managing client sites.
Step 4: Check SPF, DKIM, and DMARC DNS Records
Even if everything else is set up properly, your emails might still get flagged or dropped if your domain lacks the correct DNS records. To boost credibility and avoid spam folders, you need to configure these three DNS Records: SPF, DKIM, and DMARC.
- SPF tells email providers which servers are allowed to send on your domain’s behalf.
- DKIM adds a digital signature that proves your emails haven’t been tampered with during transit.
- DMARC gives ISPs instructions on what to do if SPF or DKIM fails, and it also sends you delivery reports.
To add them, log in to your domain registrar’s DNS settings and:
- Add a single SPF TXT record (don’t use multiple!).
- Insert your SMTP provider’s DKIM record.
- Set up a basic DMARC policy to receive reports (e.g., p=none).
If this sounds technical, we get it—it can be. That’s why Post SMTP offers 1-on-1 expert help to review your DNS records, fix common mistakes, and test deliverability in real time.
Still Not Working? Get Help from Post SMTP Experts
You’ve tried everything, and your emails still won’t show up? You’re not alone. Sometimes, WordPress email issues go deeper than plugin settings or DNS records. It could be a conflict with your hosting provider, a firewall blocking ports, or a misconfigured SMTP credential you overlooked.
Don’t worry! The Post SMTP expert support team is here to help!
Our team of WordPress email specialists can help you with:
- Personalized SMTP setup for your provider and domain
- SPF, DKIM, and DMARC record configuration
- Spam score testing and fix recommendations
- Real-time email delivery tests
- A live 30-minute troubleshooting session (screen sharing included)
If you’re stuck, don’t waste more time guessing.
👉 Book a 1-on-1 session or submit a support ticket, and we’ll take care of the rest.
With expert help, you can finally stop worrying about missed notifications and get back to running your site.


