Have you recently installed the Kadence WooCommerce Email Designer plugin but noticed that it isn’t sending email notifications as expected? If so, you’re not alone.
Many WordPress users face the “Kadence Not Sending Email Notifications” issue, where their Kadence-designed emails don’t reach their customers’ inboxes. Whether it’s order confirmations, password reset emails, or new account emails, this problem can disrupt the user experience and cause frustration for both the store owner and customers.
Thankfully, there’s no need to panic—this issue is common, and the solution is straightforward. In this detailed guide, we will walk you through three easy steps to fix the “Kadence Not Sending Email Notifications” issue, which will ensure that all of your WooCommerce emails are delivered properly to your recipients.
Ready? Let’s get started!
Why Is Kadence Not Sending Email Notifications?
The Kadence WooCommerce Email Designer plugin is a powerful tool that helps you customize your WooCommerce emails. However, Kadence’s functionality largely depends on WooCommerce and WordPress email settings. If these are misconfigured or not optimized, Kadence emails may not be sent as they should.
There are two major reasons why your Kadence email notifications are not working. These issues can arise from either WordPress’s default mail functions or specific WooCommerce email settings.
Let’s break down each of these reasons.
Reason #1: WordPress Default Mail Functions
One of the main reasons Kadence WooCommerce Email Designer fails to send notifications is the limitations of WordPress’s native email functionality. WordPress uses a built-in mail function, wp_mail(), which relies on PHP’s mail() function to send emails. This method is not optimized for high deliverability, leading to emails ending up in spam folders or failing to send altogether.
- No Authentication: When emails are sent using WordPress’s default mail function, they often lack authentication protocols such as SPF, DKIM, and DMARC. These are vital for ensuring that emails are identified as legitimate by email service providers (ESPs). Without authentication, ESPs may reject the email, flag it as spam, or deliver it late.
- Spam Filters: Since the emails sent through the default WordPress mail system don’t have proper authentication, they often fail to pass spam filters. This means that even if the email is sent, it might end up in the customer’s junk folder, unnoticed and unread.
- Hosting Restrictions: Many hosting providers disable PHP mail functionality to prevent misuse. If your hosting provider restricts or blocks emails sent through PHP, your Kadence emails won’t be delivered. Without an SMTP setup, you may experience significant delays or outright failures when sending WooCommerce notifications.
This default setup is not designed for large-scale transactional emails. Therefore, switching to an SMTP plugin such as Post SMTP is essential for better email performance. We will talk about it later in the article.
Reason #2: WooCommerce Email Notification Settings
Another common cause of “Kadence Not Sending Email Notifications” is related to the settings within WooCommerce itself. WooCommerce is responsible for handling order-related emails, and if the settings are incorrect, those emails might not get sent.
WooCommerce includes several types of email notifications—such as order confirmations, payment receipts, and shipping notifications. If any of these emails are disabled in the settings, customers won’t receive them. You need to make sure that all required notifications are enabled and sent from a properly configured email address.
You also need to check the recipient fields and confirm that the correct email addresses are entered for both customers and site administrators. Even a small typo in the email address can prevent notifications from being delivered.
3 Easy Steps to Fix Kadence Not Sending Email Notifications
In the following section, we will show you how to fix Kadence Email Issue WordPress Plugin problems in just three easy steps.
First, we’ll check WooCommerce email settings, then adjust the sender options, and finally, configure an SMTP plugin to ensure reliable email deliverability.
Step #1: Check and Adjust WooCommerce Email Alert Settings
Before you do anything else, it’s important to make sure WooCommerce email notifications are properly configured. If WooCommerce notifications are disabled or not configured correctly, Kadence emails won’t be sent because WooCommerce controls the trigger for these emails.
You need to ensure that all the relevant email notifications are enabled and set up properly so that Kadence can send custom-designed emails.
Here’s how to check and adjust these settings:
- Log into Your WordPress Dashboard: Start by logging into your WordPress admin panel using your credentials.
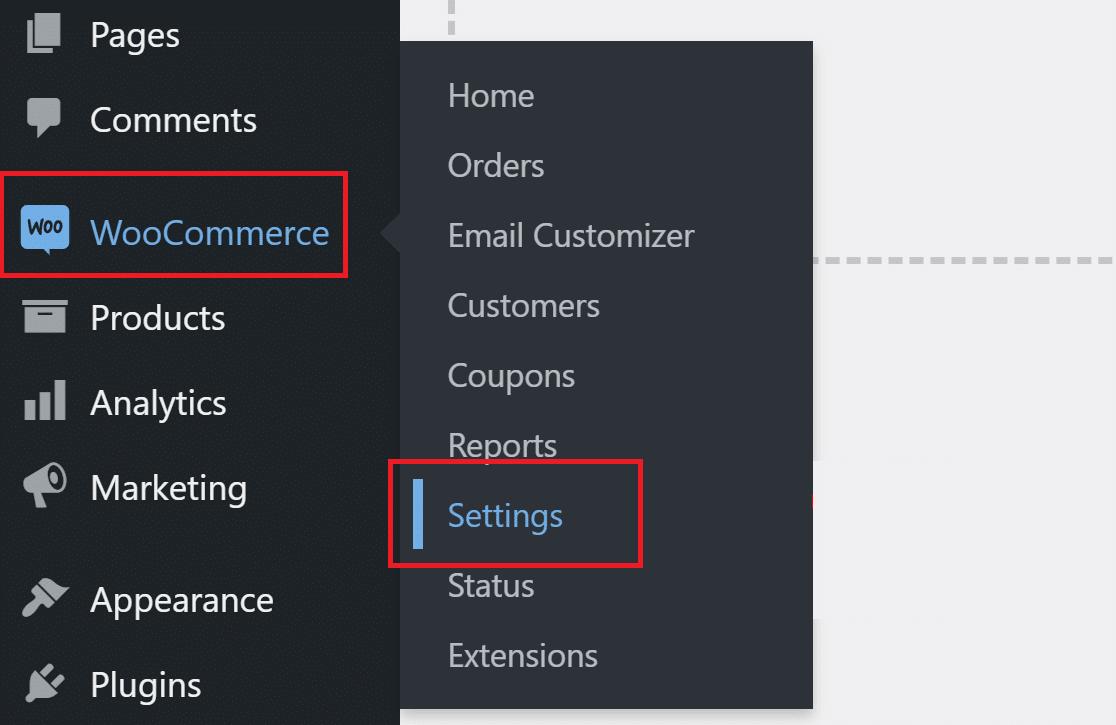
- Navigate to WooCommerce Settings: From the dashboard, go to WooCommerce » Settings.
- Click on the Emails Tab: In the WooCommerce settings page, click on the Emails tab located at the top of the screen. This will display all the available email notifications that WooCommerce sends by default.

- Review the List of Notifications: Go through the list of email notifications such as “New Order,” “Canceled Order,” “Completed Order,” and “Customer Invoice.” Ensure that these notifications are enabled if you want customers or administrators to receive them.
NOTE: If any of these notifications are disabled, Kadence will not send the corresponding customized email.
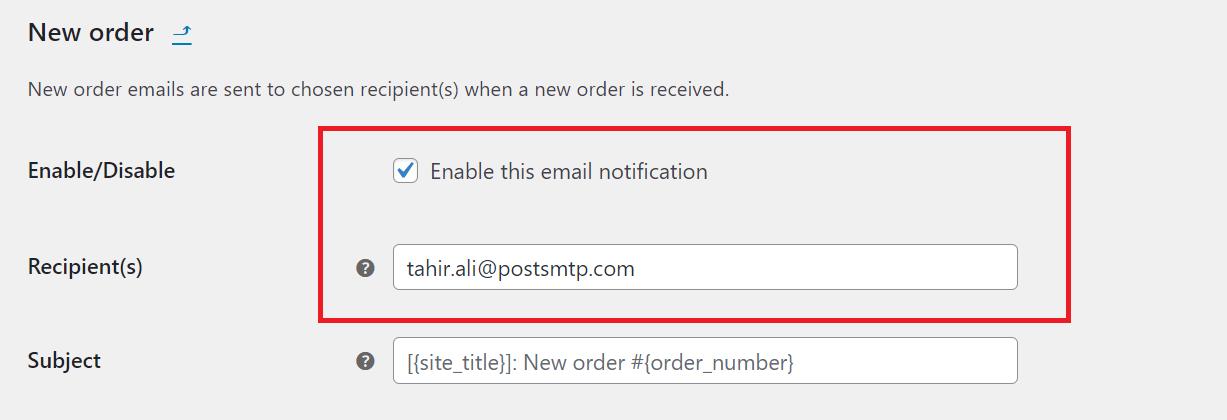
- Enable Email Notifications: For admin emails like “New Order” or “Failed Order,” ensure that the correct recipient email address is entered. Click on the Manage button, check the Enable/Disable box, and make sure you enter a valid email address to receive email notifications.
- Save Changes: After reviewing and adjusting the settings, click the Save Changes button at the bottom of the screen to apply your changes.
Now, let’s move on to the second step.
Step #2: Change Email Sender Options [Name and Email]
Many email providers block emails sent from a generic From Email address, as it appears less credible. Changing these settings to a branded name and a legitimate email address will help improve deliverability and reduce the chances of your emails being marked as spam.
- Access WooCommerce Email Settings: From your WordPress dashboard, go to WooCommerce » Settings » Emails.
- Locate the Email Sender Options: Scroll down until you find the section titled Email sender options.
- Update the From Name: In the “From” name field, enter a recognizable name, such as your store’s or brand name. For example, use “MyOnlineShop” instead of “WordPress” or “Admin.”
- Update the From Email Address: In the “From” address field, enter a valid email address that uses your store’s domain (e.g., info@yourdomain.com). Make sure this email is active.
📕 If you don’t have a custom email domain, check out our guide on How to Get an Email Domain for Your Business – 100% Free

- Save Changes: Once you’ve updated the sender details, click Save Changes at the bottom of the page.
Changing the From Name and From Email improves the credibility of your emails and ensures they aren’t flagged as spam by email providers.
Step #3: Install and Configure the Post SMTP Plugin
The final step to fixing Kadence Not Sending Email Notifications is to install and configure an SMTP plugin. For this guide, we will set up the Post SMTP plugin as it is one of the most reliable options for sending WordPress emails through a third-party email service provider (ESP) like SendGrid, Mailgun, Microsoft 365 SMTP, Gmail SMTP, etc.
You might be wondering why…?
As we told you earlier, WordPress’s default mail functionality is one of the main reasons behind the “WordPress not sending emails.” Using an SMTP plugin, you can send your emails through a reliable SMTP service provider that will be less likely to be marked as spam and more likely to reach the recipient’s inbox.
Follow the steps below to install and set up Post SMTP:
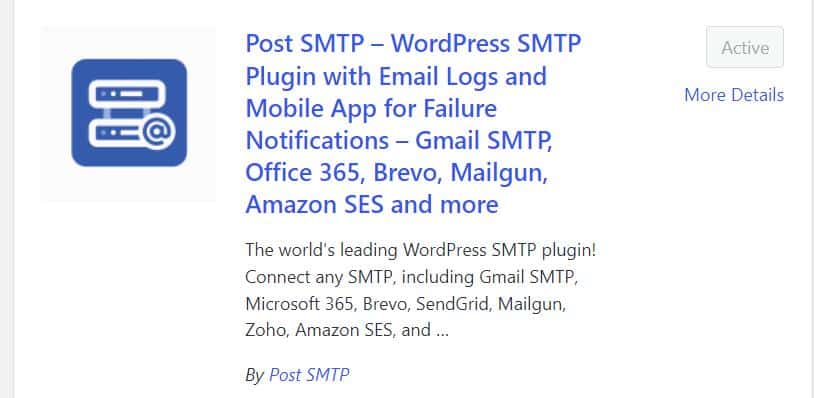
- Install the Post SMTP Plugin:
- From your WordPress dashboard, go to Plugins » Add New Plugin.
- In the search bar, type Post SMTP.
- Click Install and then Activate the plugin.
- Launch the Setup Wizard:
- Once the plugin is activated, navigate to Post SMTP » Dashboard.
- Click Start the Wizard to begin the configuration process.

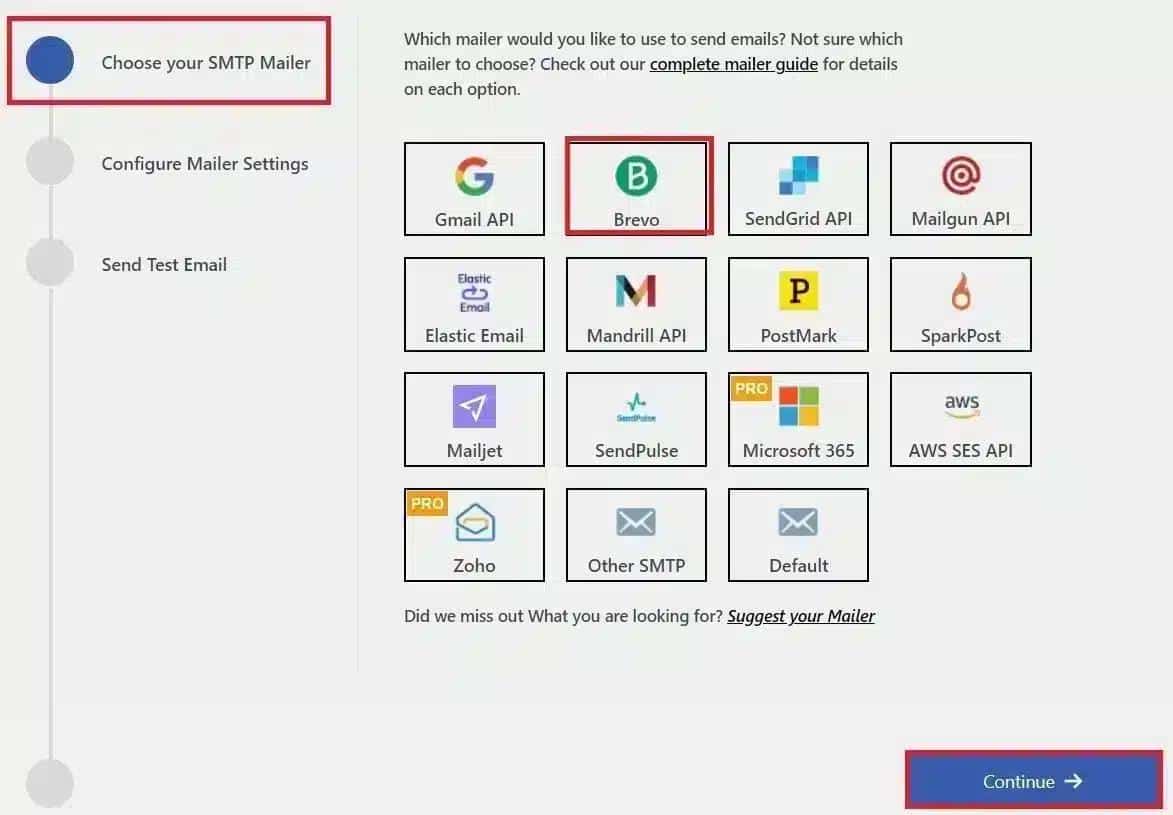
- Select Your Email Provider:
- In the setup wizard, you’ll be prompted to select your email provider. You can choose popular options like Brevo, Postmark, Gmail, SendGrid, etc., or even your own custom SMTP server.
- Select the SMTP service provider that you use for your email delivery and hit Continue. For this guide, we are selecting Brevo.
- Configure and Authenticate Your SMTP Settings:
- Next, enter your From Email and From Name in the respective fields.
- Also, enter your SMTP server details, in this case API Key (these are usually provided by your email service provider).
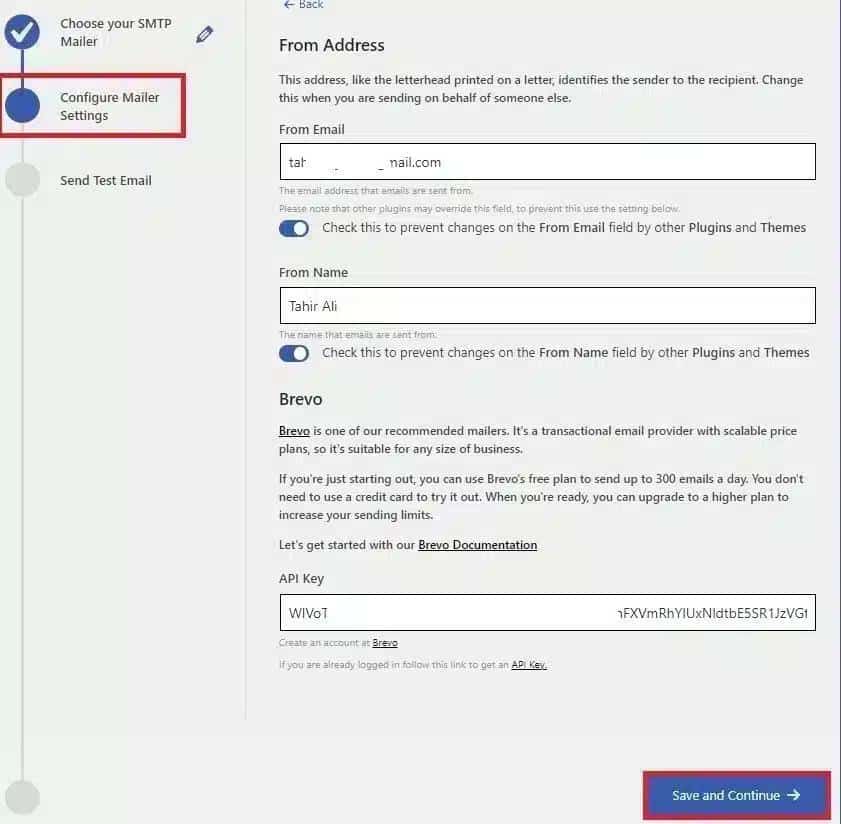
- After entering the API Key, simply click Save and Continue.
- Test Email Sending:
- Post SMTP allows you to send a test email to ensure everything works. Enter a valid email address, click the Send Test Email button, and check your inbox to confirm the email was delivered successfully.
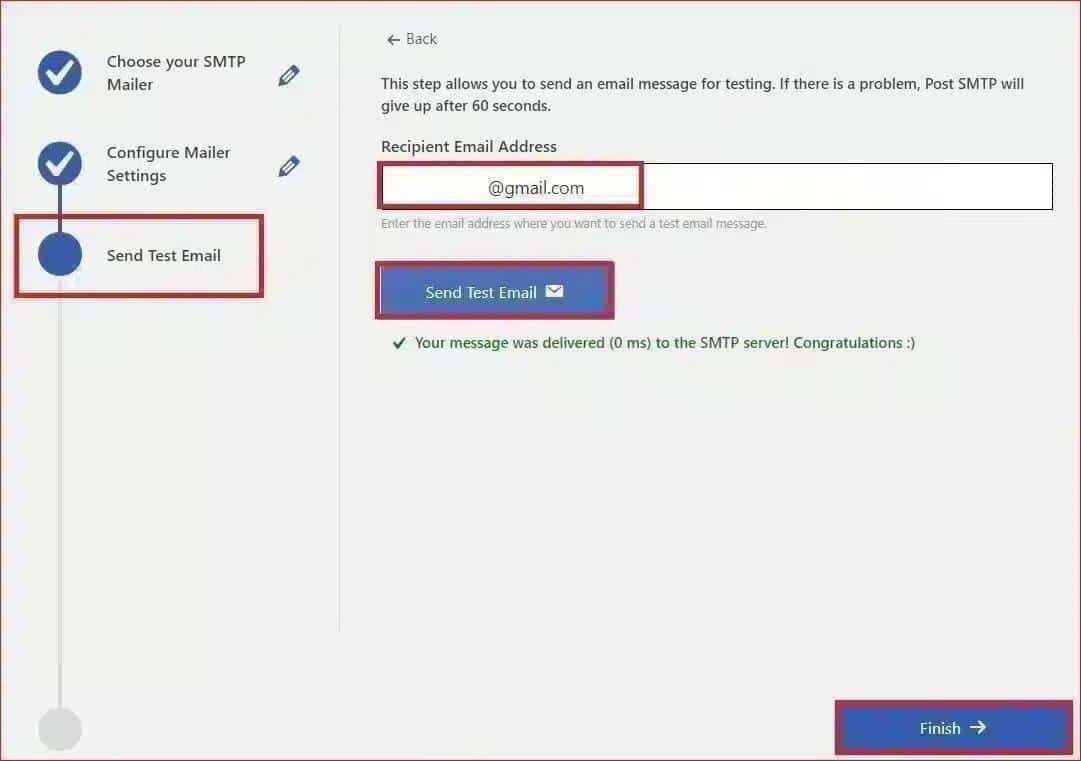
- Save the Configuration:
- Once the test email is sent successfully, click Finish to complete the setup.
Now, your WooCommerce email notifications, including those customized by Kadence, will be sent using your newly configured SMTP server.
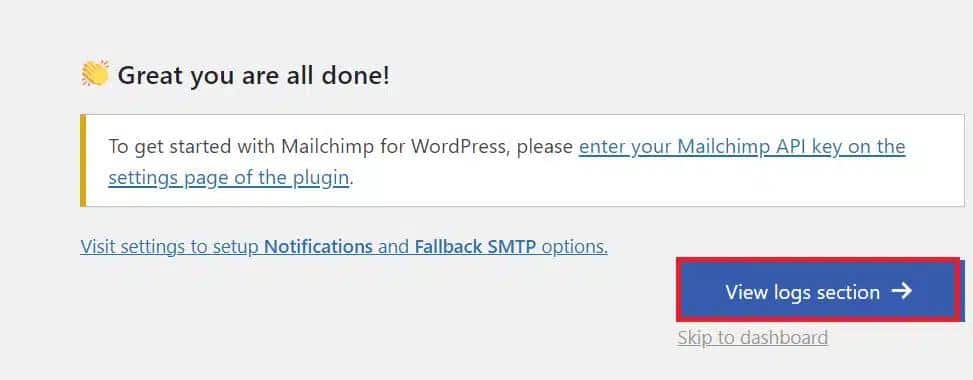
Monitor Logs and Fix Any Issues (Optional)
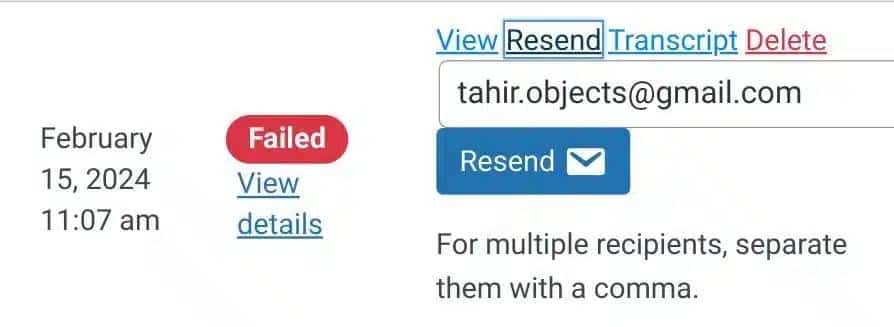
Post SMTP provides detailed email logs so you can track whether emails were sent successfully or if any errors occurred. If the test email wasn’t sent, double-check your SMTP settings or consult with us for expert assistance.
The best thing is that you can resend any failed email directly from the log screen.
Don’t Forget to Set Up DNS Records for Your Domain
To maximize the chances that your Kadence emails reach the inbox and not the spam folder, you must also properly set up DNS records for your domain. These records, including SPF, DKIM, and DMARC, tell email servers that your emails are legitimate and have not been tampered with.
Here’s a quick explanation:
- SPF (Sender Policy Framework): SPF tells receiving servers which mail servers are authorized to send emails on behalf of your domain. You need to add an SPF record in your DNS settings that includes your SMTP provider’s servers.
- DKIM (DomainKeys Identified Mail): DKIM adds a digital signature to your emails, verifying that the email has not been altered after it was sent. Most SMTP providers, including SendGrid, offer DKIM configuration instructions on how to add the necessary records to your DNS.
- DMARC (Domain-based Message Authentication, Reporting, and Conformance): DMARC builds on SPF and DKIM by telling email servers what to do if an email fails these checks. Setting up DMARC helps protect your domain from email spoofing and phishing attacks.
If you are having difficulty setting up these DNS records, don’t hesitate to reach out to us for expert assistance. Our team of Technical Email Specialists is here to assist you with any email-related issues you may have.
Final Remark on Kadence Not Sending Email Alerts
Fixing the Kadence Not Sending Email Notifications issue can seem overwhelming at first, but once you understand the root causes, it becomes clear that most problems stem from improper email settings or a lack of authentication. By following the steps outlined in this guide, you can resolve this issue and significantly improve the deliverability of your WooCommerce notifications.
Let’s recap the steps:
- First, check and adjust your WooCommerce email notification settings to ensure that everything is enabled and properly configured.
- Next, change the From Name and From Email settings to branded options that will help your emails avoid spam filters.
- Finally, install and configure the Post SMTP plugin to send your emails through a reliable email service provider, and don’t forget to set up DNS records like SPF, DKIM, and DMARC for better email authentication.
Lastly, if you need any further assistance, please do not hesitate to contact us. We have a team of WordPress experts who are always ready to assist you with email-related issues.

 OpenAI
 Perplexity