
 OpenAI
 Perplexity
Is your Visual Form Builder plugin not sending emails? If so, you’re not alone.
This is one of the most common issues WordPress users face, and it can be quite frustrating, especially when you rely on form submissions for leads, orders, or support queries.
But don’t worry. You’re about to learn exactly why it happens and how to fix it fast.
In this guide, we’ll walk you through the real causes behind the ‘Visual Form Builder Not Sending Email’ problem and give you a proven step-by-step fix that works—even if you’re not a tech expert.
Ready? Let’s get started!
Why Visual Form Builder Isn’t Sending Emails?
Before we start fixing things, it’s helpful to understand what’s actually going wrong behind the scenes. Let’s break down the most common reasons behind this issue.
Reason 1: Unreliable WordPress Mail Function
By default, Visual Form Builder (VFB) sends email notifications using WordPress’ built-in wp_mail() function—but there’s a big issue here!
That function doesn’t use verified SMTP authentication, which means your web host sends those emails using PHP’s mail() function.
And guess what? Most modern email services—like Gmail, Outlook, Yahoo, and Zoho—don’t trust these types of emails. In fact, they often block them, delay them, or throw them straight into spam.
Even worse, some hosting companies have disabled the PHP mail() function for security reasons.
Reason 2: You’re Using an Invalid “From” Email Address
If your form tries to send emails using a “From” address that doesn’t match your site’s domain (like from xyz@gmail.com instead of yourwebsite.com), that’s a huge red flag for spam filters.
Most email servers block or silently drop those emails to protect their users. It’s like sending a letter with someone else’s return address—it just looks suspicious.
Reason 3: Spam Filters Are Intercepting Your Emails
Sometimes, the email is technically being sent, but it never reaches the inbox. Why? The short answer is ‘Spam filters.’
If your emails are missing proper authentication (like SPF, DKIM, and DMARC records), don’t have consistent headers, or come from a domain with a bad reputation, email providers will flag them as risky and block them.
Unfortunately, Visual Form Builder doesn’t handle those authentication protocols on its own.
Reason 4: Plugin Conflict or Misconfiguration
Sometimes, another plugin or your theme might conflict with Visual Form Builder’s email functionality. Maybe you’ve installed another email-related plugin, or your theme is interfering with how Visual Form Builder handles notifications. Even security plugins can block email delivery if they think it looks suspicious.
5 Easy Steps to Fix the Visual Form Builder Not Sending Email Issue
Now that you know what’s wrong, let’s fix it—step by step. First, we’ll walk through checking your Visual Form Builder settings. Then, we will set up an SMTP connection and other necessary configurations using the Post SMTP plugin.
Step 1: Check Visual Form Builder’s Email Settings
Sometimes, the fix is as simple as correcting a setting that was overlooked. Visual Form Builder allows you to define which email address receives notifications and which one the user can reply to—but if those fields aren’t set up correctly, your messages might never arrive.
To check and adjust those settings, follow the steps below:
- Go to your WordPress Dashboard.
- Hover over ‘Visual Form Builder’ in the left-hand menu and click on ‘All Forms.’
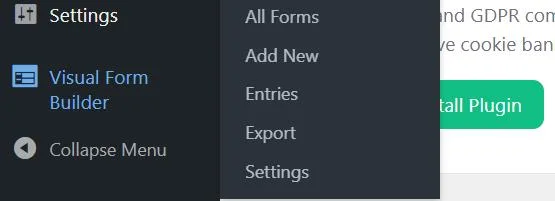
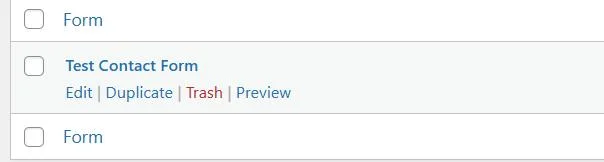
- Find the form that’s not sending emails and click ‘Edit’ under its title.
Once you’re inside the form editor:
- Click the ‘Settings’ button.
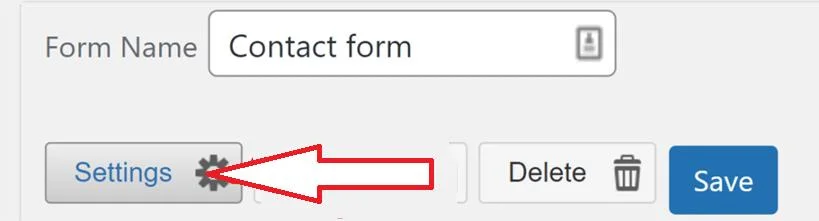
- Then click on ‘Email’ to open the notification settings panel.
There are two critical fields here:
- Reply-To Email: Replies to your email will be sent to this address.
- Email(s) To: This is the address where form submissions will be delivered.
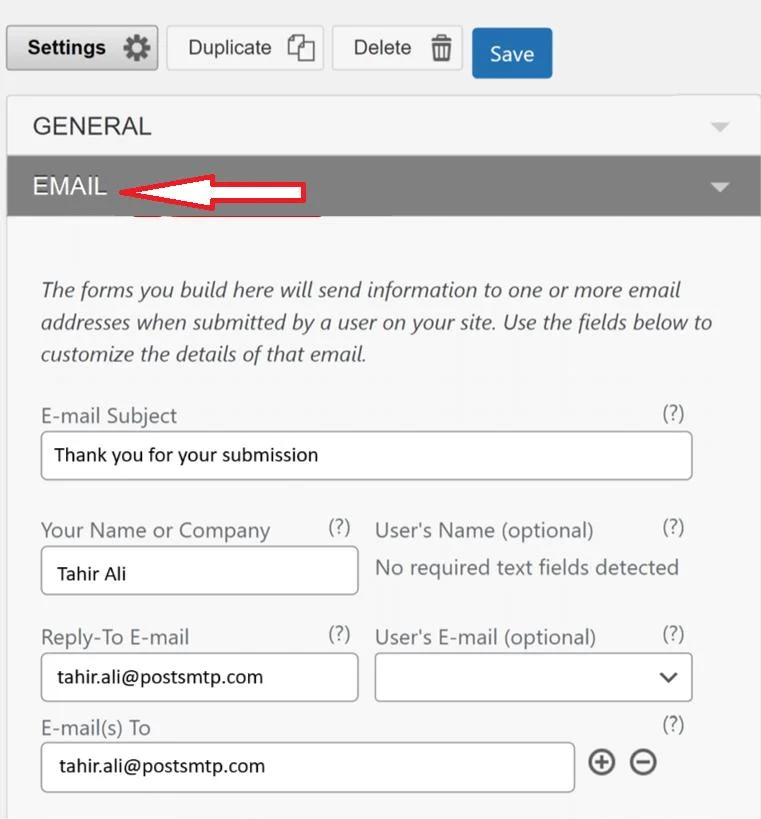
After reviewing and updating the email settings, click the ‘Save’ button at the top right of the form editor.
If everything was already set up correctly here, but your form still isn’t sending emails, don’t worry. This step alone doesn’t fix the deeper email deliverability issues related to WordPress’s email system.
That’s where SMTP comes in—and that’s what we’ll cover next.
Step 2: Install an SMTP Plugin to Bypass PHPMailer
So, your Visual Form Builder settings look good, but emails still aren’t getting delivered? That’s because the real problem isn’t the plugin—it’s WordPress’s default email delivery settings, which are primarily responsible for WordPress email delivery failures.
The solution is to use SMTP (Simple Mail Transfer Protocol) instead of the wp_mail() function. The easiest way to do that is to install the Post SMTP plugin, which is one of the best SMTP plugins available.
Let’s walk through how to do it:
1. Install Post SMTP
- Head to your WordPress Dashboard.
- Go to Plugins → Add Plugin.
- Search for Post SMTP.
- Click Install Now, then Activate.
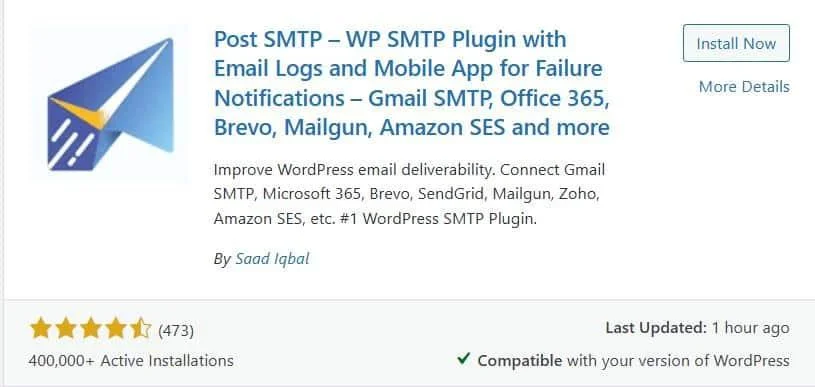
Once installed, you’ll see a new menu item called ‘Post SMTP’ in your sidebar.
2. Launch the Setup Wizard
- Go to Post SMTP → Dashboard.
- Click the button that says ‘Start the Wizard.’
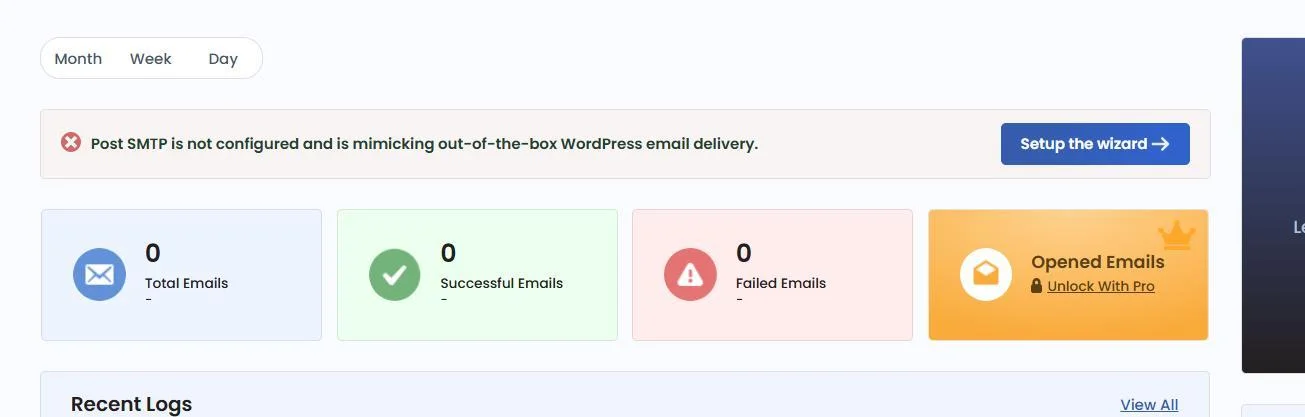
This wizard will guide you step-by-step through configuring your email service—no coding or technical knowledge is required.
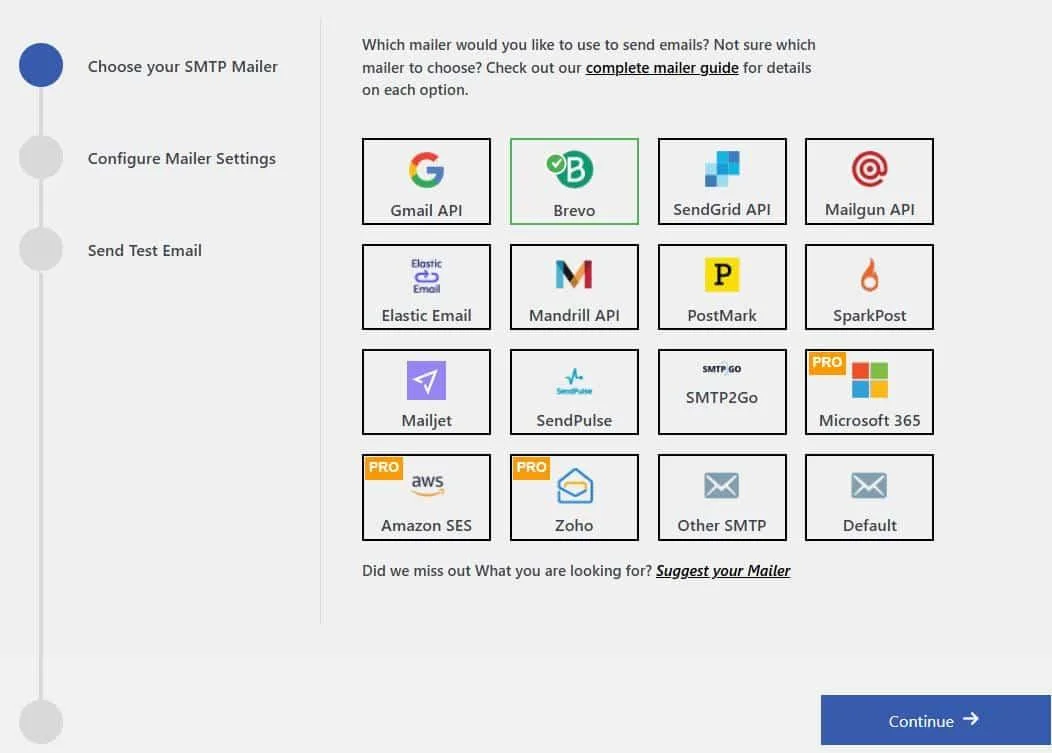
3. Pick Your SMTP Provider
Next, you’ll choose the email provider through which you want to send your WordPress emails. Post SMTP supports all major platforms, including:
- Gmail (Google Workspace)
- Outlook (Microsoft 365)
- Amazon SES
- Mailgun
- Zoho Mail
- Brevo (formerly Sendinblue)
- And many others
For this guide, let’s say you pick ‘Brevo.’
Click ‘Continue’ to move to the next step.
Fill in Your Email Credentials
Here’s what you’ll need to enter:
- From Email: Use a verified domain-based address (like support@yourwebsite.com).
- From Name: This is the name people will see in their inboxes (e.g., “Website/Brand” name).
- SMTP Server Details or API Key: Depends on the provider you selected. Post SMTP will guide you through this. In Brevo’s case, the API key.

Once filled in, click ‘Save and Continue.’
5. Send a Test Email
Once your configuration is done:
- Use the built-in test tool to send a quick email.
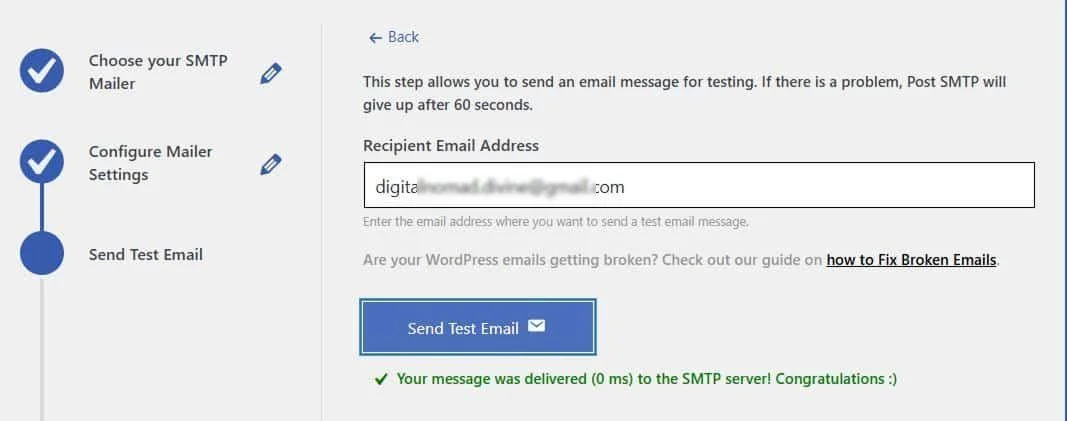
- If everything is set up correctly, you’ll see a success message.
Congratulations! Your WordPress site (including Visual Form Builder) is now sending authenticated emails via SMTP—no more deliverability headaches.
But we’re not done yet. There’s another important step to stabilize your email system and prevent conflicts with other plugins.
Step 3: Lock a Consistent “From” Email Address
Here’s something most WordPress users don’t realize, even if you’ve set up SMTP correctly, your emails can still get flagged—or worse, dropped—if different plugins on your site use different “From” addresses.
Why does that matter? Because email providers (like Gmail, Outlook, and Yahoo) see this inconsistency as a potential red flag for phishing or spoofing attacks. If your contact form uses form@yourdomain.com, but your WooCommerce emails come from orders@yourdomain.com, that could create confusion—and hurt your credibility.
Luckily, Post SMTP lets you lock in a single sender address and block any plugin or theme from overriding it.
Here’s how you can do it:
- From your WordPress dashboard, navigate to Post SMTP → Settings.
- Now, click on the ‘Message’ tab at the top.
In this section, you’ll find two important fields:
- Email Address: Enter the domain-based email from which you want all outgoing messages, like noreply@yourdomain.com or support@yourdomain.com. This should match your SMTP setup from Step 2.
- Name: Choose a friendly sender name that represents your brand. This is what your users will see in their inbox, so use something recognizable like your business name or site name.
Now for the key part:
- You’ll see a checkbox labeled: “Prevent plugins and themes from changing this.” Check it out.
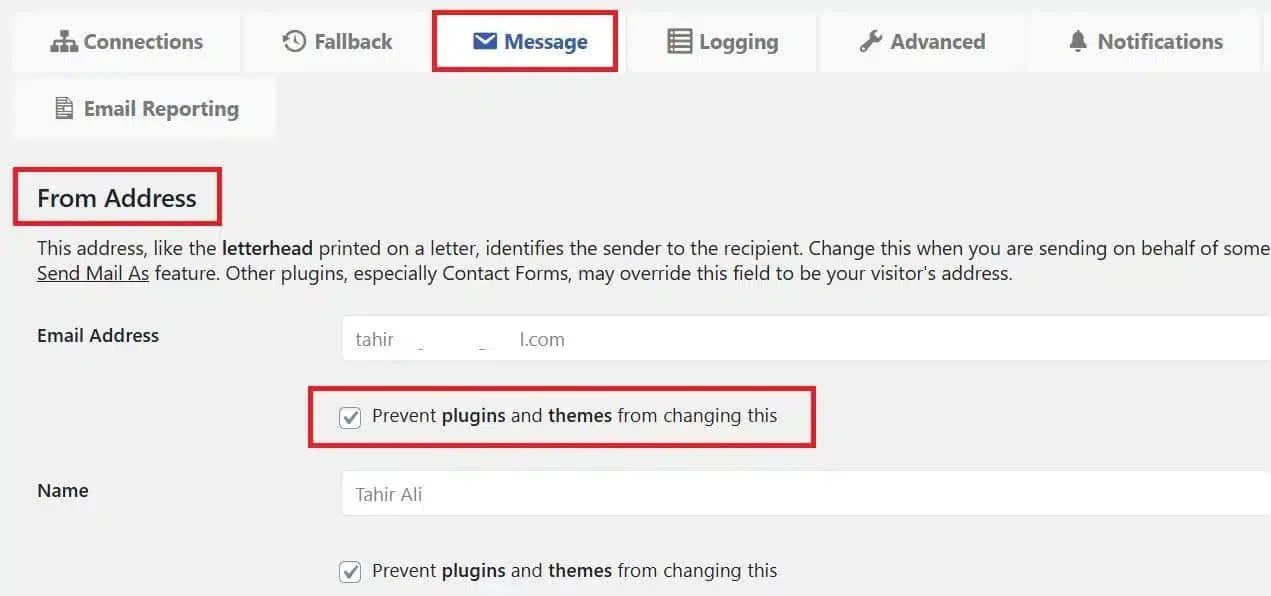
This forces all emails—regardless of which plugin sends them—to use your authenticated sender email. It’s one of the most underrated features for boosting email deliverability and maintaining domain reputation.
- Click the ‘Save Changes’ button to lock everything in place.
From now on, every email your site sends will come from one consistent, verified address. This not only reduces the chance of hitting the spam folder, but it also gives your users a more professional and trustworthy experience.
Step 4: Enable the Email Health Report
You’ve come a long way—Visual Form Builder is now using a properly configured SMTP connection with a consistent sender email. But even with everything set up correctly, things can still go wrong behind the scenes.
SMTP provider issues, DNS misconfigurations, host-level restrictions—the problem is that you won’t always know when something is broken… until you log into WordPress or when a user tells you.
To tackle this problem, you can enable Post SMTP’s Email Health Report. This built-in feature acts like a daily (or weekly) health check for your site’s email system, keeping you in the loop before problems escalate.
Here’s how to enable it:
- Head back to your WordPress dashboard.
- Go to Post SMTP → Settings.
- Click on the ‘Email Reporting’ tab at the top.

- Look for the section titled ‘Email Health Report.’
- Click the ‘Enable’ toggle.
- After that, choose how often you want the report delivered:
- Daily: Best for high-traffic sites or WooCommerce stores.
- Weekly: Perfect for blogs or smaller business sites.
- Monthly: Ideal if your site doesn’t send emails regularly.
Pick what suits you best.
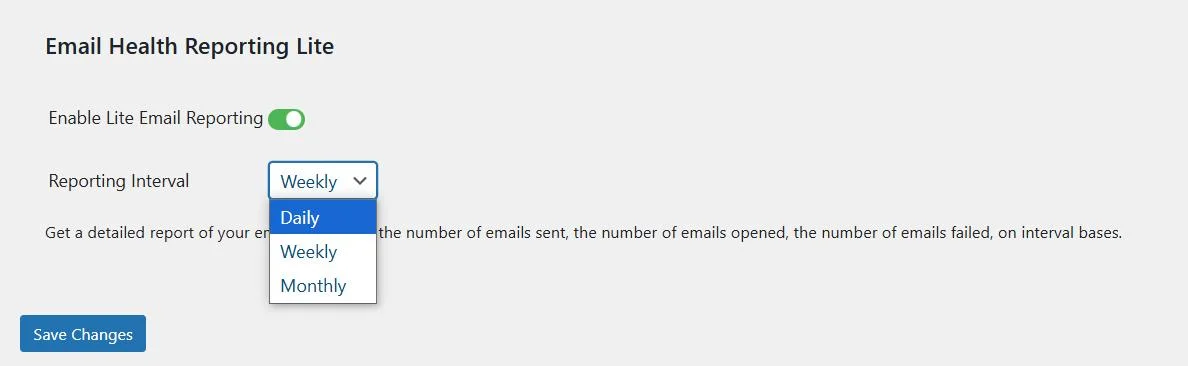
- After you select the frequency, scroll down and click ‘Save Changes.’
That’s it! You’ve now got a reporting system in place that tracks deliverability issues before they become serious.
Pro Tip:
If you manage multiple WordPress websites, consider installing the MainWP Post SMTP Extension. It gives you combined health reports for all your connected sites, which is super useful for agencies or freelancers juggling client projects.
Step 5: Check Your Domain’s Spam Score (Optional, But Smart)
So your emails are sending perfectly now, but still landing in the spam folder. Now, the problem might not be your form or SMTP settings. It could be your domain reputation.
Email providers like Gmail and Outlook use reputation-based algorithms to decide whether to deliver, delay, or reject messages. If your domain is flagged as suspicious—even slightly—your emails might get dumped in spam or blocked entirely.
That’s why checking your spam score is a smart move.
How to Check Your Domain’s Spam Score
You don’t need to be a tech wizard. Here’s how to get a clear picture of where your domain stands:
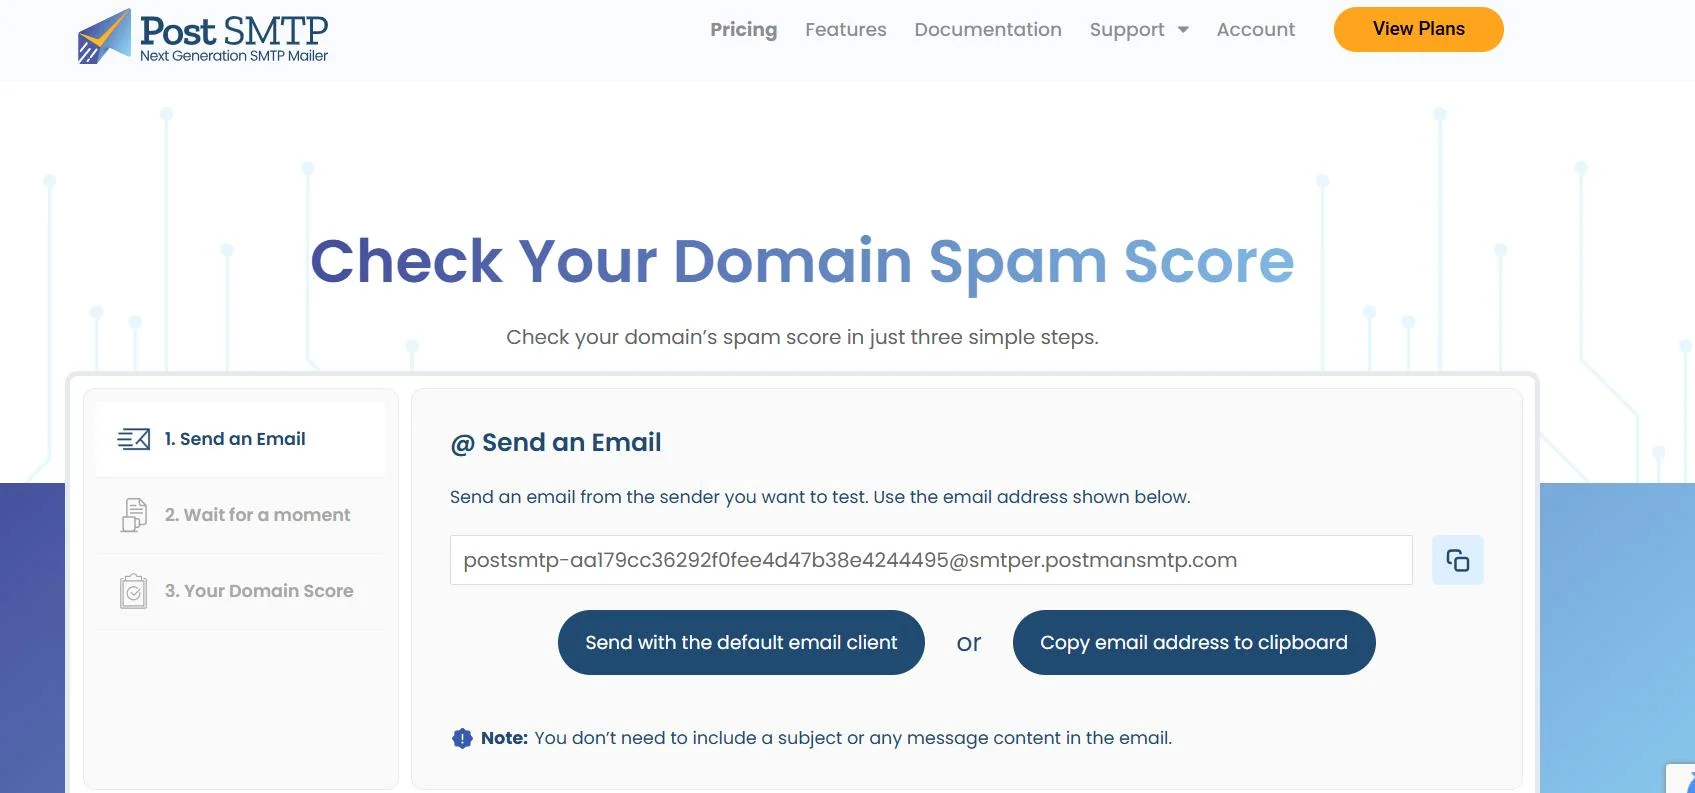
- Go to the Spam Score Checker tool from the Post SMTP dashboard.
- The tool will give you a unique email address.
- Send a test email from your domain to the given address.
- After sending, go back to the tool and click “Check Spam Score.”
- Wait a few seconds, and you’ll receive a spam score for your domain.
If you see a high spam score, then the possible red flags can be:
- Missing or broken SPF, DKIM, or DMARC records
- Use of blacklisted IPs or domain names
- Over-the-top subject lines like “FREE OFFER!!!”
- Sending emails from free services like Gmail instead of your domain
How to Fix a Bad Spam Score
Here’s what to do if your domain’s reputation needs cleanup:
Add or Fix Your DNS Records
- Log in to your DNS provider (Cloudflare, GoDaddy, Namecheap, etc.).
- Add or correct your SPF, DKIM, and DMARC records.
- Most SMTP providers (like Brevo or Mailgun) give copy-paste-ready DNS values.
Need help? Post SMTP’s expert team can guide you (we’ll cover that next).
Stick to Domain-Based Emails
Always send from something like you@yourdomain.com
Not yourname@gmail.com.
This builds trust and improves delivery.
Clean Up Your Language
Avoid spammy phrases like:
- “Limited Time Offer!!!”
- “Get Paid Fast”
- “No Credit Card Needed!”
Instead, write like a real person. Keep it clear, helpful, and human.
Check for Blacklist Issues
Use tools like:
If your domain or IP is listed, follow the tool’s guidance to request removal.
By checking your domain’s spam score and fixing any red flags, you give your emails the best possible chance of reaching inboxes, not trash folders.
Need Expert Help? Let Post SMTP Handle It For You
Sometimes, you follow all the right steps—check the form settings, install Post SMTP, set up DNS records, even test your spam score—and emails still don’t show up.
That’s because WordPress email deliverability is a moving target. Hosting environments, DNS configurations, and SMTP limitations play a role; when something breaks, it’s not always obvious where.
But don’t worry! The Post SMTP’s expert support team is here to help! These are real professionals who live and breathe WordPress email issues—and they’ve seen everything from simple misconfigurations to deep server-side blocks.
Here’s what you can expect from our expert assistance:
- Customized SMTP setup tailored to your website and email provider.
- Configuration of SPF, DKIM, and DMARC records to authenticate your domain.
- Spam score analysis with recommendations and fixes for any red flags.
- Testing outgoing emails in real-time to confirm delivery.
- A 30-minute live troubleshooting session to answer your questions and walk you through the setup.
Ready to get help to fix the ‘Visual Form Builder Not Sending Email’ issue:
- Book a 1-on-1 session: Schedule a live 30-minute call where an expert walks through your setup, solves your issues, and optimizes your email deliverability.
Submit a support ticket: If your issue isn’t urgent, send a detailed message. Our support team will respond within 24 hours.


