


You are probably facing the “WP Super Cache Not Sending Email” issue. If that is the case, don’t worry—you’re not alone.
Many WordPress users run into this frustrating issue, especially when relying on the plugin’s email alerts for garbage collection and preload processes. These notifications are essential for understanding your site’s caching behavior, and missing them can leave you in the dark about potential performance problems.
Thankfully, there’s a reliable and permanent fix. In this article, we will explore the reason behind this and walk you through the step-by-step process to fix this issue and get your WP Super Cache emails working again.
Ready? Let’s get started!
Why WP Super Cache Is Not Sending Garbage Collection or Preloads Emails
WP Super Cache is one of the most popular caching plugins for WordPress, and it offers email alerts to notify site owners when specific actions occur, like garbage collection and cache preloading.
However, if these notifications aren’t arriving in your inbox, there are several common reasons behind this issue.
Let’s break them down in detail:
Reason 1: WordPress Email Delivery Issues
By default, WordPress attempts to send emails through the server’s built-in PHP mail() function, which is one of the most common reasons behind ‘WordPress not sending emails.’
Unfortunately, this method lacks the authentication required by most modern email providers, which makes your email susceptible to being filtered out or even blocked.
Reason 2: Misconfigured WP Super Cache Settings
If the plugin’s email settings are turned off or improperly configured, no notifications will be triggered—no matter how well your server is set up. Both the Garbage Collection and Preload Mode features require specific email settings to be enabled.
Reason 3: DNS Records Not Set Up and High Spam Score
If your domain’s DNS is missing proper SPF, DKIM, or DMARC records, your email messages will lack legitimacy, and email servers are likely to reject them during delivery.
Also, you have to maintain a low spam score, which directly affects your email domain reputation and sender score.
Later in this guide, we will show you how to check and reduce your spam score.
4 Easy Steps to Fix the WP Super Cache Not Sending Email Issue
This issue often starts with misconfigured email settings or WordPress relying on its outdated and unreliable PHP mail function. The good news? You can fix it in just a few simple steps.
We’ll begin by walking you through how to double-check your WP Super Cache email settings to make sure everything is set up the right way. Then, we’ll move on to installing and setting up the Post SMTP plugin, which significantly boosts your site’s email deliverability.
Step 1: Check WP Super Cache Notification Email Settings
Before we go over the SMTP configuration, it’s worth double-checking whether WP Super Cache is actually set up to send emails. Sometimes, the problem isn’t a complex technical glitch—it’s simply a matter of unchecked boxes in the plugin settings.
The WP Super Cache sends you two types of email notifications:
- Garbage Collection Alerts
- Preload Mode Email Notifications
Let’s configure them one by one.
Garbage Collection Email Notifications
WP Super Cache can notify you when the garbage collection process runs. To check this:
- Go to your WordPress dashboard.
- Navigate to Settings → WP Super Cache.
- Click on the Easy tab.
- Scroll down and make sure the ‘Caching On’ is selected and click on the ‘Update Status.’
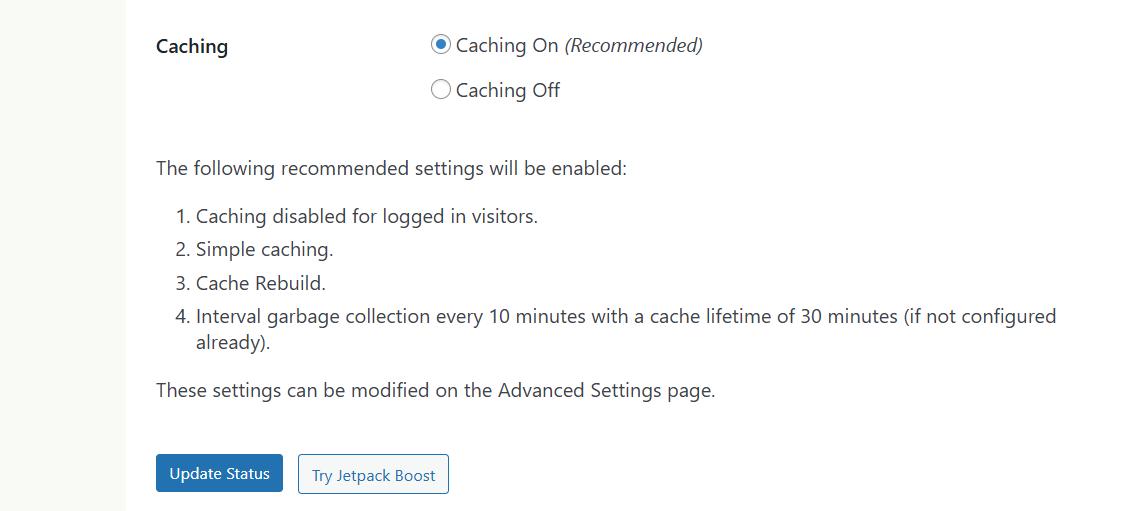
- After that, click on the Advanced tab.
- Scroll down to the Garbage Collection section.
- Make sure the ‘Email me when the garbage collection runs’ option is checked.

Next, we will check the Preload notification settings.
Preload Mode Email Notifications
The plugin can also notify you when it’s preloading the cache for your site. Follow the steps below to check it:
- Go to the Preload tab within WP Super Cache.

- Check the box labeled ‘Preload mode (garbage collection disabled. Recommended.)’
- Choose your desired Email notification frequency from the dropdown menu.
- Less email
- Medium (recommended)
- Many emails
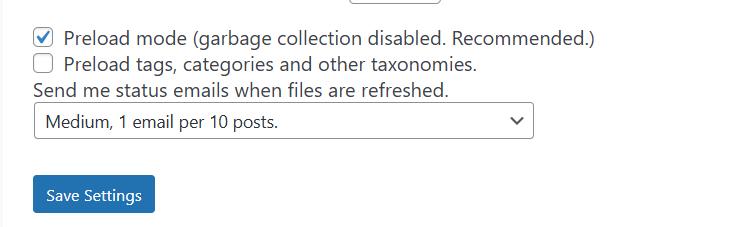
- Lastly, make sure you save the changes.
After enabling both email notification features properly, if you are still not receiving anything, it’s time to install a plugin that can reliably handle WordPress email delivery via SMTP.
Step 2: Configure SMTP with WordPress via Post SMTP Plugin
WP Super Cache’s built-in email notifications rely on WordPress’s default email delivery method, which is not always reliable. To fix this, you need an SMTP plugin such as Post SMTP.
Post SMTP is one of the best SMTP plugins available. It allows you to replace the unreliable PHP mail() function with a more reliable SMTP connection, which in turn guarantees proper authentication, reduces spam flags, and increases deliverability rates.
Why Post SMTP?
- It supports a wide range of email services (Gmail, Amazon SES, Mailgun, Microsoft 365, SendGrid, Brevo, and more)
- Built-in email logging to track every email your site sends
- Real-time alerts if your site fails to send an email
- OAuth 2.0 support for secure SMTP connections
- Backup SMTP connections and much more.
Let’s walk through how to install and configure it.
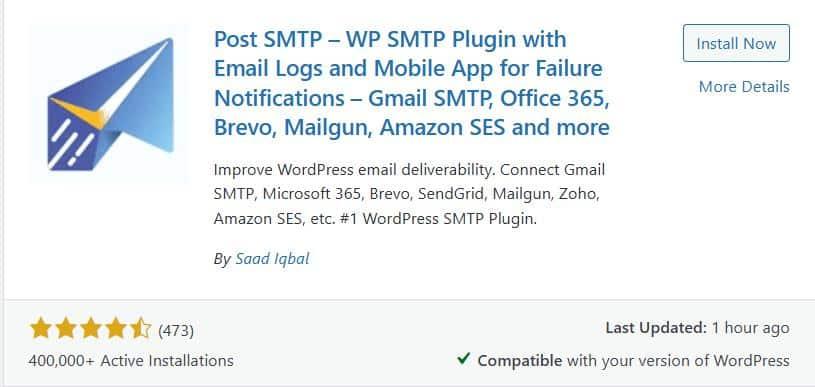
- In your WordPress dashboard, go to Plugins → Add Plugin.
- Type Post SMTP in the search bar.
- Find “Post SMTP – WordPress SMTP Plugin” by Saad Iqbal and click Install Now, then Activate.
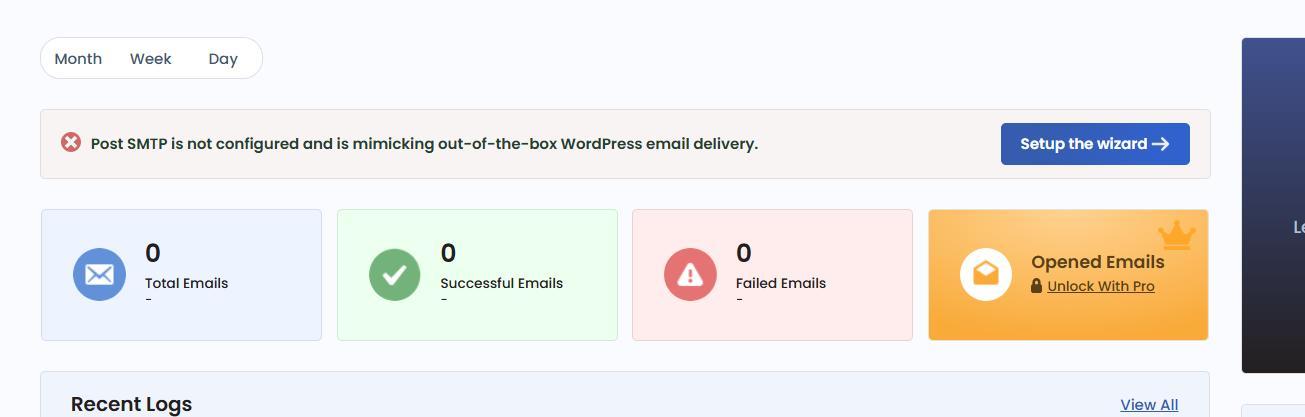
Once activated, navigate to Post SMTP → Dashboard and click on ‘Setup the Wizard.’ This will guide you through connecting your site to an email service provider.
Next, you’ll be asked to select an SMTP service. Popular integration options include:
- Gmail SMTP
- Microsoft 365
- Brevo (formerly Sendinblue)
- Zoho Mail
- Amazon SES
- Mailgun API
- SendGrid
- SparkPost, etc.
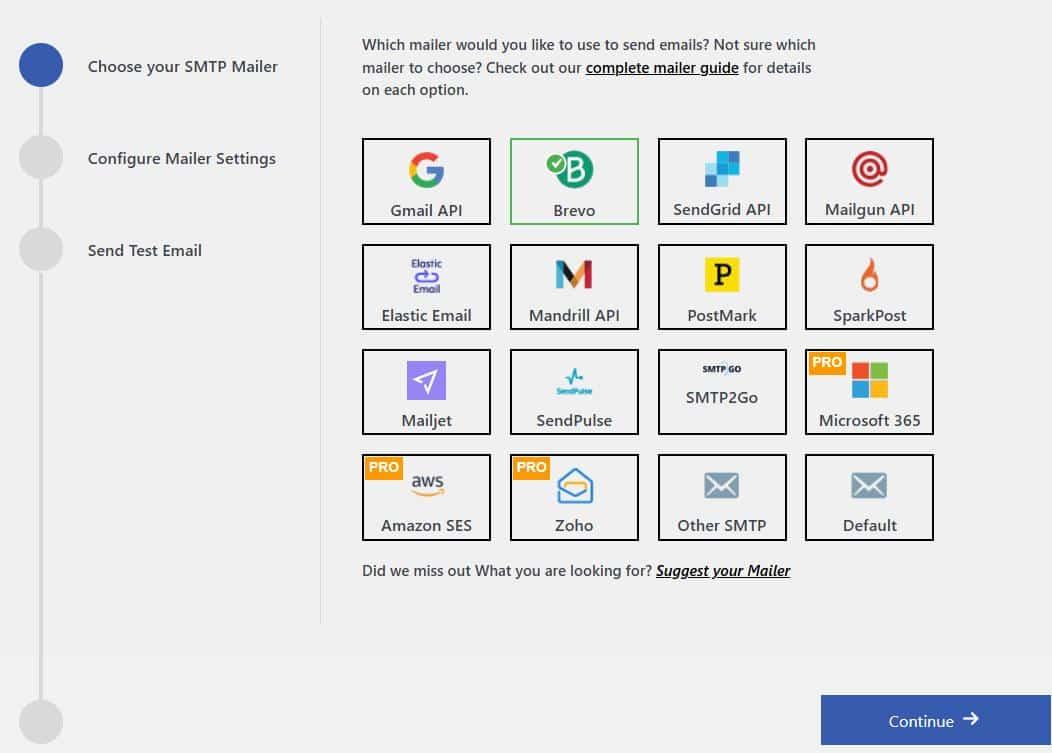
For this guide, let’s say you choose Brevo and hit ‘Continue.’
On the subsequent screen, you’ll be asked for:
- From Email: This should be an email address associated with your domain (e.g., hello@yourdomain.com).
- From Name: The name you want your recipients to see.
- Brevo API Key: You can get this from your Brevo account.
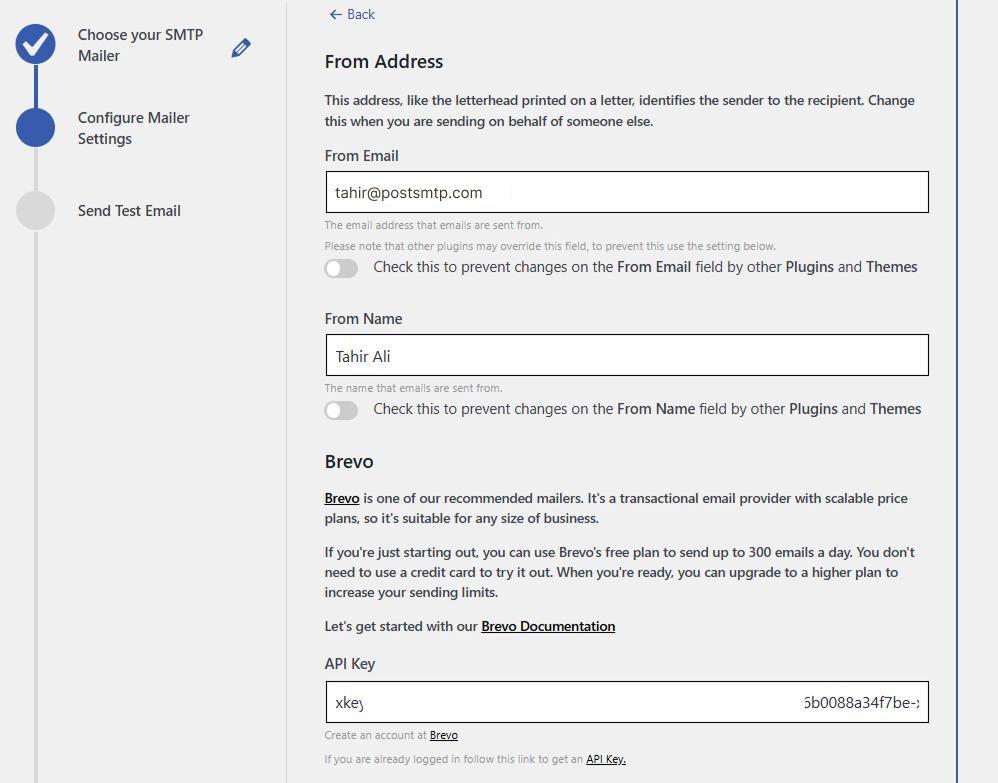
Click ‘Save and Continue’ to move forward.
Now, you’ll be prompted to send a test email. Enter your email address and hit ‘Send Test Email.’ If everything is set up correctly, you’ll see a success message.

Once you complete the wizard, all emails from your WordPress site—including those from WP Super Cache—will be routed through your chosen SMTP provider, which substantially improves deliverability.
For any reason, if you still face the issue, then it’s time to enforce the ‘From’ email address.
Step 3: Force the “From” Email Address Across All Plugins
In some cases, email delivery issues are caused by conflicting email addresses. Because multiple plugins can send emails using different “From” addresses. When this inconsistency happens, email providers are more likely to flag or reject your emails.
To fix this, Post SMTP lets you enforce a single “From” address across your entire site. To do so, follow the steps below:
- Go to Post SMTP → Settings in your WordPress dashboard.
- Click on the Message tab.
- Locate the field labeled Email Address under the “From” section.
- Enter the same domain-based email you used earlier (e.g., hello@yourdomain.com).
- Check the box next to “Prevent plugins and themes from changing this” and save the changes.
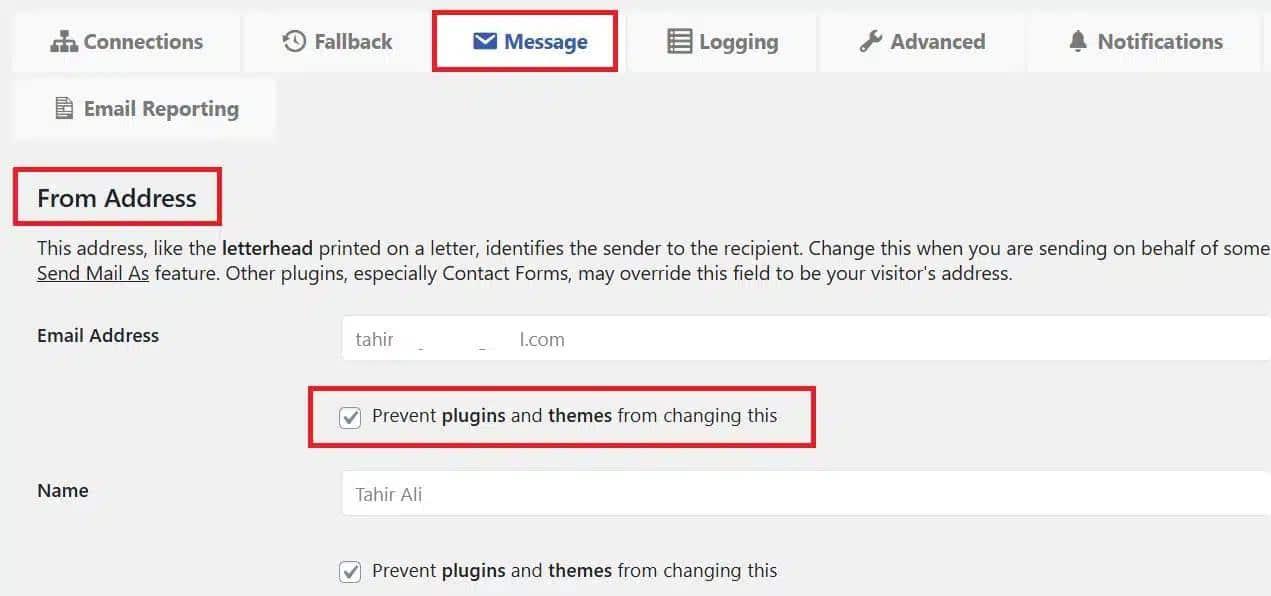
This locks in your chosen email address so that no other plugin or theme can override it, which helps reduce the chance of your emails being treated as suspicious by spam filters.
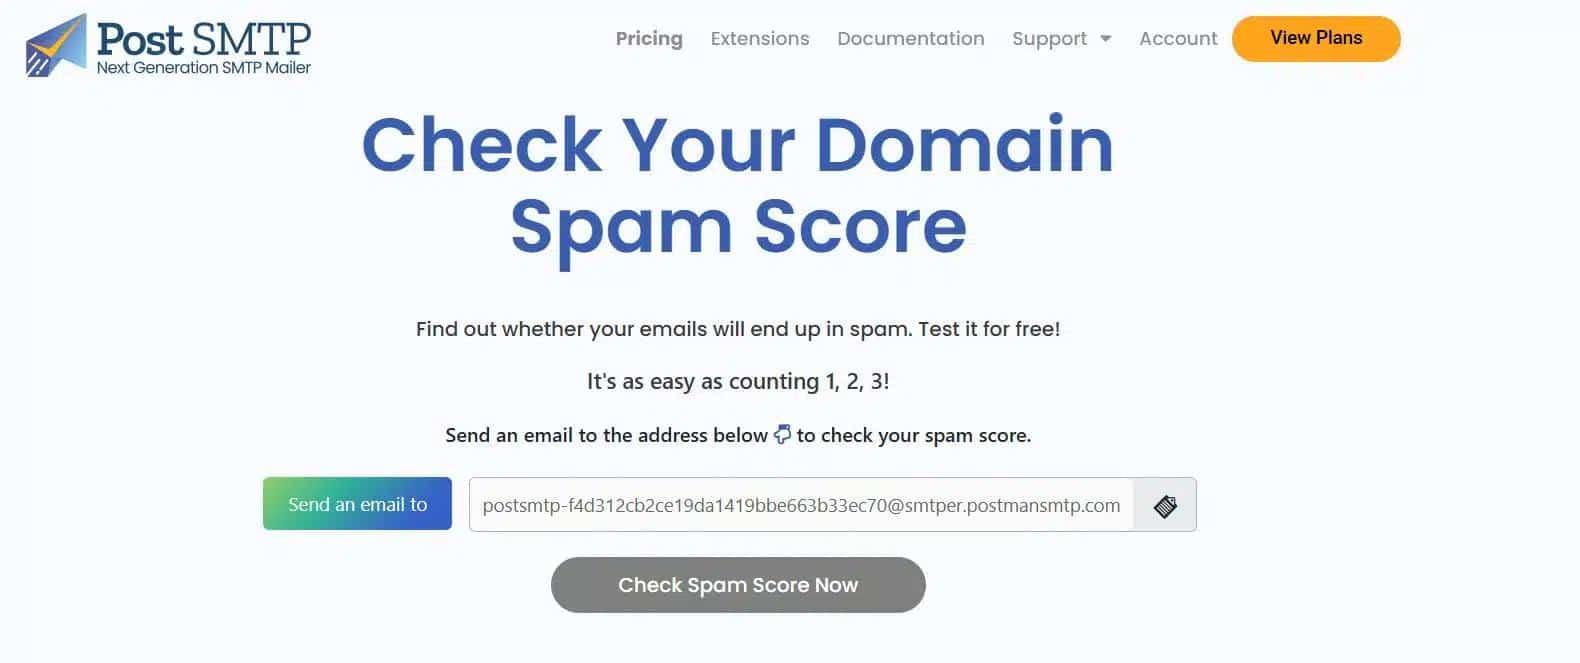
Step 4: Check Your Email Domain Spam Score
If, after setting up WP Super Cache’s email notifications and configuring SMTP, your emails are still getting lost or flagged as spam, it can be caused by your domain’s high spam score.
When your domain has a poor reputation, email providers are more likely to block or filter out your messages. This means the notification emails from WP Super Cache, like garbage collection or preload updates, may never reach your inbox.
To find out if this is the case, run your domain through a spam score checking tool. This will help you identify any red flags that could be affecting your email deliverability.
If your score is high, don’t panic. Here are a few steps you can take to fix it:
- Set Up SPF, DKIM, and DMARC Records: These DNS records add an extra layer of authentication to your emails, making them less likely to be flagged or rejected.
- Use a Domain-Based Email Address: Sending emails from a professional address like you@yourwebsite.com instead of Gmail or Yahoo helps build trust with mail servers.
- Stay Away From Spammy Language: Avoid using overly promotional words like “free,” “urgent,” or “guarantee” in your subject lines.
- Monitor Your Spam Score Regularly: Keeping tabs on your score allows you to catch issues early before they impact your email deliverability.
If you’re not comfortable editing DNS records or troubleshooting email issues, don’t hesitate to get help from someone experienced. Fixing your spam score can go a long way in making sure WP Super Cache emails actually reach your inbox.
Need Expert Help? We’ve Got Your Back
Still not receiving WP Super Cache email notifications after trying all the steps? Don’t worry—you’re not alone, and you don’t have to fix it all by yourself.
We have a team of email specialists who can handle the technical setup for you. Whether it’s fine-tuning SMTP settings, authenticating your domain, or troubleshooting spam score issues, we’ll make sure everything is working exactly the way it should.
Here’s what you get with our expert email configuration service:
- Complete SMTP setup to improve how your emails are sent
- Delivery tests to confirm your messages are actually reaching inboxes
- In-depth spam score analysis with actionable recommendations
- SPF and DKIM record configuration to authenticate your domain
- MX and TXT record updates to strengthen your email reputation
- A 30-minute live session for hands-on troubleshooting and guidance
Don’t let broken email alerts keep you guessing about your site’s performance. Reach out today and let us help you get those WP Super Cache notifications back in action.

