Probably you’re experiencing the Beaver Builder Forms not sending email issue, right? Don’t worry—we’ve got the perfect solution!
In general, when a visitor on your website submits a contact form, you and the user get email notifications.
However, if you are facing the Beaver Builder contact form not sending email notifications, it leaves a bad impression and affects your email communication workflow.
Continue reading, in this article we’ll explain how to resolve Beaver Builder contact form not sending emails in just two steps.
Are you ready? Let’s begin!
Why is Beaver Builder Contact Form Not Sending Email Notifications?
There are two primary reasons why your Beaver Builder contact form is not sending email notifications.
- WordPress email function
- Incorrect Beaver Builder contact form settings
Let’s discuss each of the reasons one by one:
#1: WordPress Email Function
The Beaver Builder contact form relies on the default WordPress mail function (wp_mail) to send emails. This function lacks proper email authentication and depends heavily on your web server’s email settings.
Also, many web servers have strict email domain authentication requirements to prevent spam, so even if your form sends the email correctly, it might not reach the recipient’s inbox due to these restrictions.
Therefore, this dependency on the default WordPress mail function is a common cause of WordPress not sending emails.
#2: Incorrect Beaver Builder Contact Form Settings
Another reason for email issues is incorrect settings within the Beaver Builder contact form itself. When you set up a contact form, it automatically sets an email address in the “Send To Email” field for notifications. If this email address is not correct or contains typos, it can lead to emails being rejected or marked as spam by the recipient’s email server.
2 Simple Steps to Fix Beaver Builder Contact Forms Not Sending Email
Now that we’ve identified why Beaver Builder Forms isn’t sending emails, let’s go over how you can solve this problem. We’ll guide you through the three simple steps to fix the Beaver Builder Forms email notifications issue.
Each step addresses a specific issue that might be causing the failure of email notifications in Beaver Builder Forms.
Step #1: Review Contact Form Settings of Beaver Builder
To add contact forms to your website, Beaver Builder offers a separate module for contact forms.
So, first, let’s review the contact form settings in Beaver Builder. This will help you confirm that your form is configured correctly for sending email notifications.
To review your Beaver Builder contact form settings, follow the steps below:
- Log in to WordPress Dashboard:
- Access your WordPress dashboard by logging in with your credentials.
- Locate the Page with the Contact Form:
- Navigate to the page containing your Beaver Builder module for contact forms.

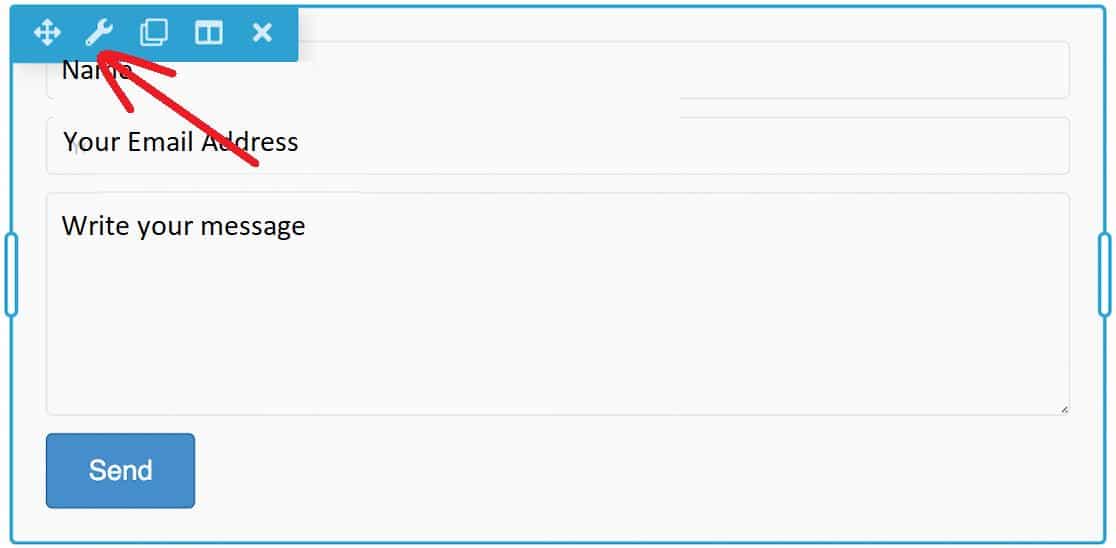
- Open the Settings:
- Click the wrench (spanner) icon to open the settings of your contact form.
- Check the “Send To Email” Field:
- In the General Settings, look for the “Send To Email” option.
- If this field doesn’t have an email address, emails will default to the site admin address.
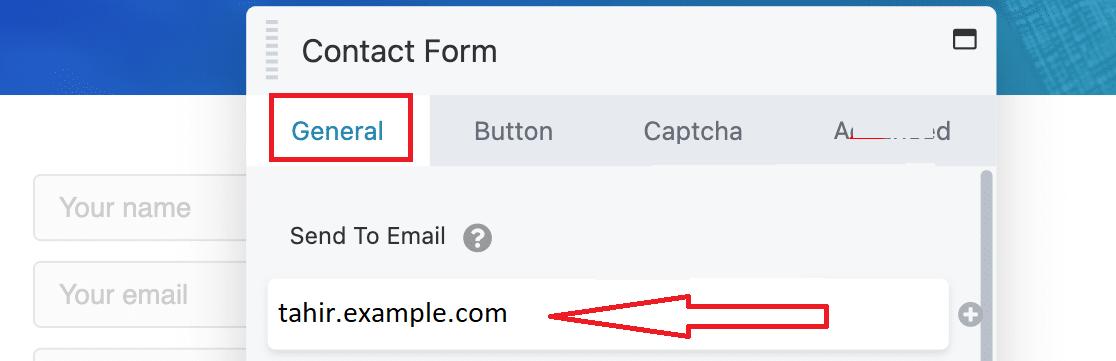
- Update the Email Address:
- If you want the notifications sent somewhere other than the default admin address, enter a valid email address in the “Send To Email” field.

- You should use a custom email address to improve deliverability. For example, use “contact@yourdomain.com” or “tahir@yourdomain.com” instead of a generic email address.
📕 You might also like: How to Get an Email Domain for Your Business – 100% Free
- Save Changes:
- After updating the email address, save your changes.
If you have verified that the email address is correct and you are still not receiving notifications, proceed to the next step, where we will install the Post SMTP plugin to resolve the issue.
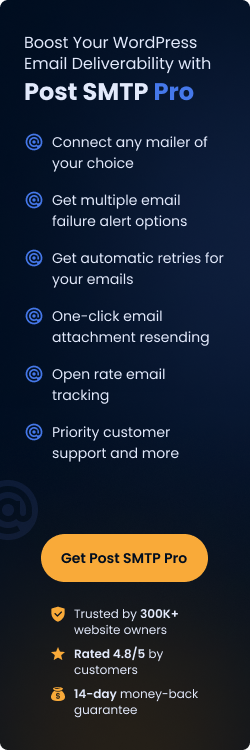
Step #2: Install and Set Up Post SMTP Plugin
To resolve the email delivery issues caused by the default WordPress wp_mail function, we will switch it with SMTP via the Post SMTP plugin.
This plugin connects WordPress websites to reliable email providers such as Gmail SMTP Server, Brevo, SendGrid, Amazon SES, Microsoft 365, Zoho Mail, Mailgun, or your own SMTP server for better email deliverability.
Follow these steps to install and set up the Post SMTP plugin:
- Log in to WordPress Dashboard:
- Access to your WordPress dashboard as an administrator.
- Navigate to Plugins:
- In the menu on the left, go to Plugins → Add New Plugin.
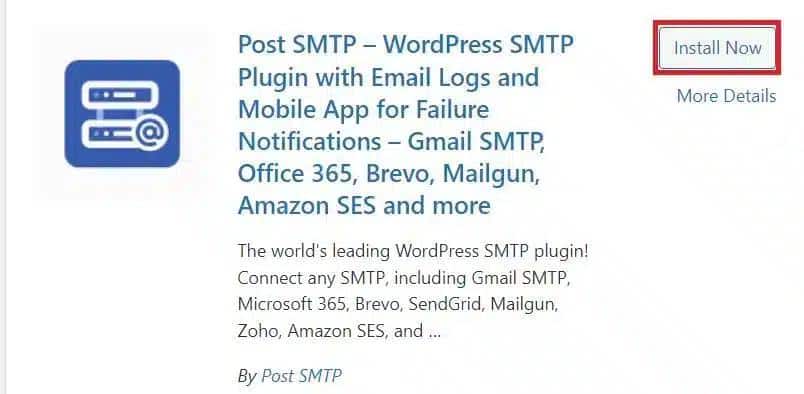
- Search for Post SMTP:
- Type “Post SMTP” in the search bar and look for the plugin named “Post SMTP – WordPress SMTP Plugin with…..” Click “Install Now.”
4. Activate the Plugin
- After the installation is complete, click “Activate.”
- Configure Post SMTP:
- Once activated, on the subsequent screen, you will see the simple 3-step setup wizard.
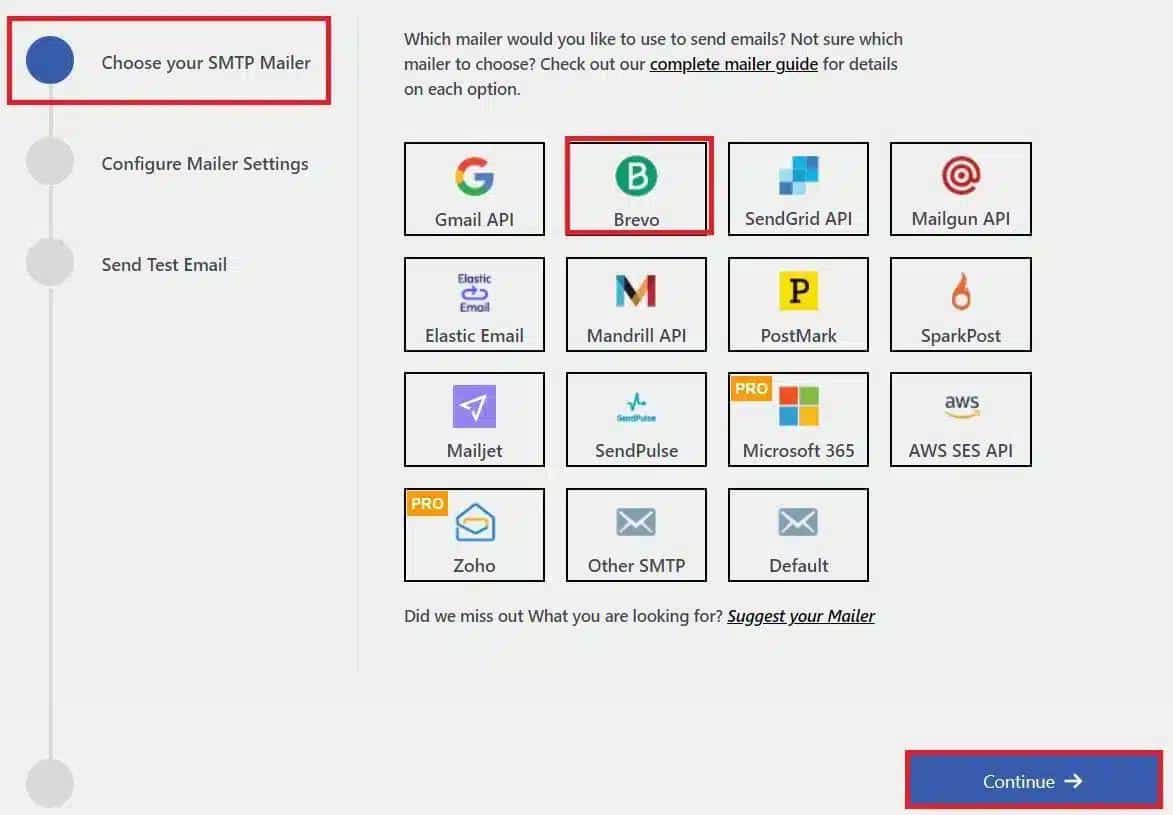
- Choose Your SMTP Service:
- Select your preferred SMTP service (e.g., Gmail, Microsoft 365, Brevo, etc.) and click “Continue.”
- Enter Email Details:
- Fill out the “From Email” and “From Name” test fields, and enter your email address and name.
- Next, authenticate your SMTP service account with your API Key.
- Click “Save and Continue.”

- Test SMTP Configuration:
- After authentication, you can test your SMTP configuration. Enter a valid “Recipient Email Address” and click “Send Test Email.”
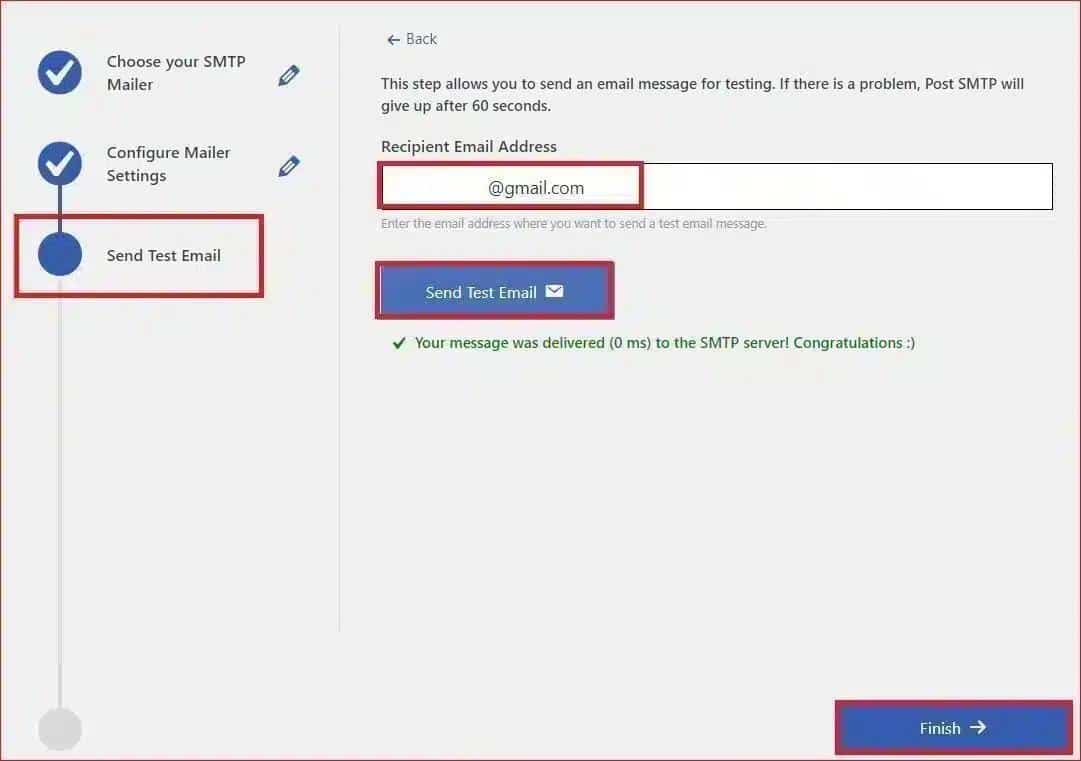
- Complete Setup:
- If the test email is successful, you will see a green “Congratulations :)” message.
- Finally, click the “Finish” button at the button to complete your SMTP configuration.
There you have it. Now, your Beaver Builder contact form should send emails properly. However, if the issue continues, you should set up email authentication protocols for your email domain.
Don’t Forget to Set Up DNS Records for Your Domain
To ensure optimum email deliverability, you need to configure DNS records for your domain. Key DNS records like SPF, DKIM, and DMARC help verify that your emails are legitimate and not flagged as spam.
1. SPF (Sender Policy Framework)
SPF records specify which mail servers are allowed to send emails on behalf of your domain. Adding an SPF record helps prevent unauthorized sources from sending emails using your domain name, thereby reducing the risk of your emails being marked as spam.
2. DKIM (DomainKeys Identified Mail)
DKIM adds a digital signature to your emails. This signature allows email providers to verify that the content of the email has not been altered and that it originates from a legitimate source. Implementing DKIM helps improve your email’s credibility and deliverability.
3. DMARC Policy
DMARC stands for Domain-based Message Authentication, Reporting, and Conformance. It works in conjunction with SPF and DKIM to provide an additional layer of email security. It helps you manage how your domain handles email authentication failures and offers detailed reports on email deliverability. Setting up a DMARC record enhances your domain’s domain protection against email spoofing and phishing attacks.
For detailed instructions on setting up these DNS records, refer to our detailed guide on SPF, DKIM, and DMARC.
If you need assistance, feel free to contact us. Our team of experts is ready to help you set up these DNS records, so your emails will go to your recipients’ inboxes reliably.
Final Thoughts on Beaver Builder Contact Form Not Sending Email
On every successful contact form submission, you and the user should receive an email notification. However, if the Beaver Builder contact form is not sending emails, it is likely due to one of two primary reasons:
- The form uses the default WordPress PHP Mail (wp_mail) function for email delivery.
- There are incorrect settings within your Beaver Builder contact form (e.g., an invalid “Send To Email” address).
To resolve these issues, install and set up the Post SMTP plugin as detailed above. After following the steps outlined above, your Beaver Builder contact form should start sending email notifications correctly.
However, if the problem persists, feel free to reach out to our support team. You can always count on our WordPress experts to assist with any of your WordPress email delivery issues.