


Is your Broken Link Checker plugin detecting dead links but not sending you email alerts? If yes, that can be a real problem.
When visitors see the ‘404 Page Not Found’ error on your website, it signals to search engines that your site is not well-maintained, and ultimately, it negatively impacts your traffic and credibility.
If the plugin is not sending you email alerts, you might not know about broken pages until it’s too late.
But don’t worry!
In this guide, we will walk you through exactly how to troubleshoot and fix Broken Link Checker email alerts in WordPress, step-by-step.
Ready? Let’s get started!
What Is a Broken Link and Why Does It Matter?
A broken link is any hyperlink on your website that no longer leads to the intended page. Instead, visitors land on an error page, usually a 404 Not Found, which signals that the content has been moved, deleted, or the URL was mistyped.
These broken paths can sneak into your site for all kinds of reasons:
- The linked page was removed or relocated.
- The URL structure changed after a site redesign.
- External websites you referenced have gone offline.
While a few broken links might seem harmless, they have two serious downsides:
- They hurt your visitors’ experience: They hurt your visitors’ experience: Imagine clicking a link expecting valuable information, only to hit a dead end. It’s frustrating, isn’t it? Too many of these moments can push visitors to leave your site and never return.
- They damage your SEO: Search engines like Google use broken links as a signal of poor site maintenance. If they see too many, your rankings can slip and make it harder for potential visitors to find you.
- While fixing broken links protects your site’s authority, actively building high-quality backlinks can further strengthen your site’s visibility and ranking potential.
That’s why the Broken Link Checker plugin is so useful. It automatically scans your site for dead internal and external links, helping you catch and fix them before they impact your audience or search visibility.
But if the plugin isn’t sending you email alerts, you’re left checking manually, which defeats the purpose.
Now, let’s figure out why that happens.
3 Reasons Why Broken Link Checker Is Not Sending Emails
When Broken Link Checker fails to send email alerts, the problem usually isn’t the plugin itself. In most cases, it’s tied to how your WordPress site handles outgoing emails.
Let’s look at the most common causes:
Reason #1: Incorrect Email Notification Settings
Inside the plugin’s settings, you can control when and where email alerts are sent. If the ‘Send me email notifications about newly detected broken links’ option is unchecked or set to send email alerts to an outdated email address, you won’t receive anything.

Additionally, if you leave the recipient field blank, WordPress sends email alerts to a generic admin address you rarely check.
Reason #2: WordPress PHP mail() Limitations
By default, WordPress uses the PHP mail() function to send emails, and many hosting providers limit or completely block this method to prevent spam abuse. That means your site is sending the emails, but they are getting blocked by the hosting provider’s server.
Reason #3: Conflicting “From” Email Addresses
If different plugins on your site use different sender addresses (for example, one sends email from abc@yourdomain.com and another from xyz@yourdomain.com), most email service providers will likely flag this inconsistency as suspicious. As a result, your alerts will either be flagged as spam or will disappear entirely.
Understanding these causes makes the fix much easier, and in the following section, we’ll tackle them one by one with a simple, step-by-step process.
Step-by-Step Process to Fix Broken Link Checker Not Sending Email
Step 1: Review Broken Link Checker Email Notification Settings
The first place to look is inside the plugin’s own settings. If Broken Link Checker isn’t configured to send alerts, or if it’s sending them to the wrong address, they’ll never reach your inbox.
Here’s how to check:
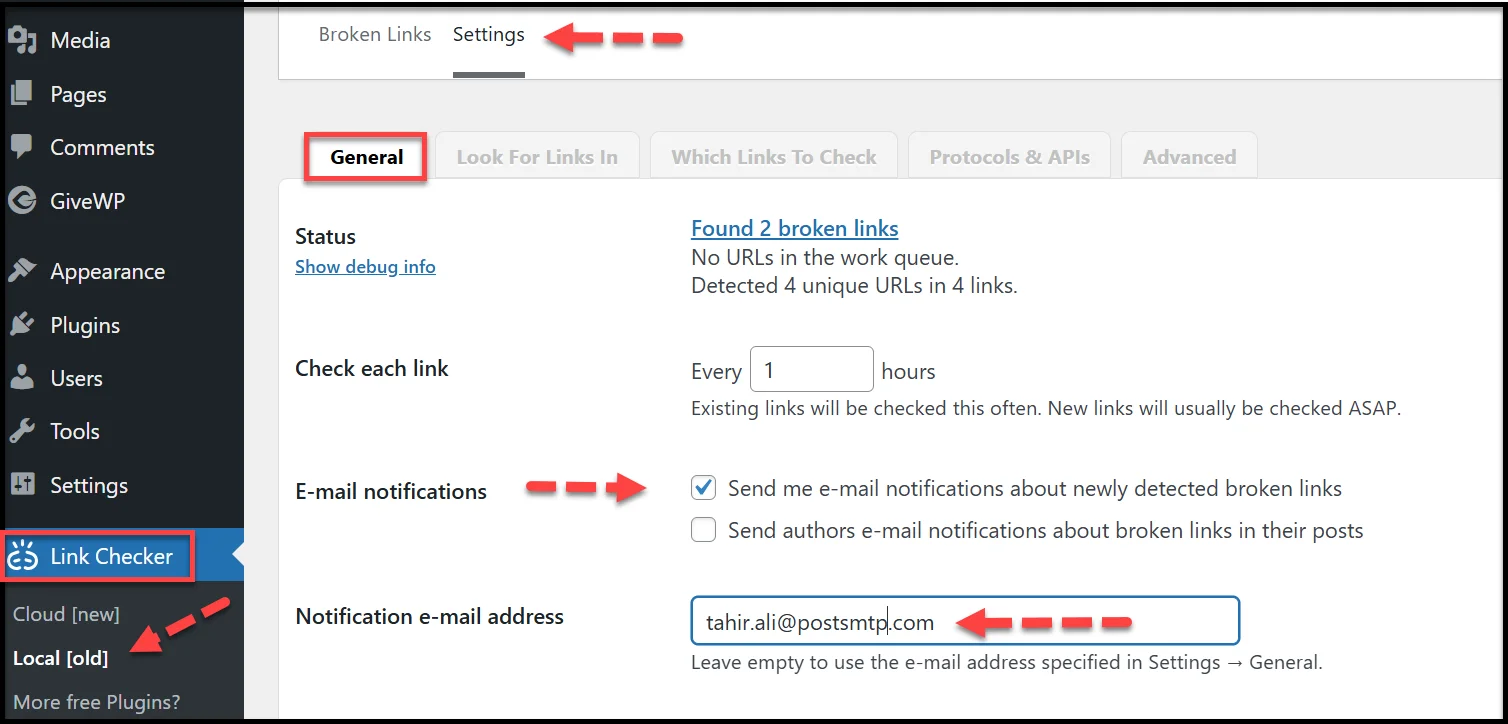
- In your WordPress dashboard, go to ‘Link Checker → Local [old] → Settings’.
- In the General tab, find the ‘E-mail notifications’ option.
- Make sure ‘Send me e-mail notifications about newly detected broken links’ is checked. This is the setting that alerts you as soon as a broken link is found.
- Optionally, you can also check ‘Send authors e-mail notifications about broken links in their posts’ if you want post authors to be notified directly.
- Look at the Notification e-mail address field:
- If it’s blank, WordPress will default to the site admin email, which might not be the address you actively use.
- Enter the email address where you actually want to receive alerts.
- Scroll down and click ‘Save Changes’ before moving on.
By updating these settings, the plugin knows exactly where to send notifications, but if they’re still not arriving, the issue could be elsewhere. That’s what we will cover in the next step.
Step 2: Enable All Required Post Types for Link Scanning
Even if email alerts are enabled, Broken Link Checker can only report broken links that it actually scans. If some content types are excluded from its checks, you’ll miss alerts for those areas of your site.
Here’s how to make sure all relevant content is being monitored:
- In your WordPress dashboard, go to ‘Link Checker → Local [old] → Settings → Look For Links In’ tab.
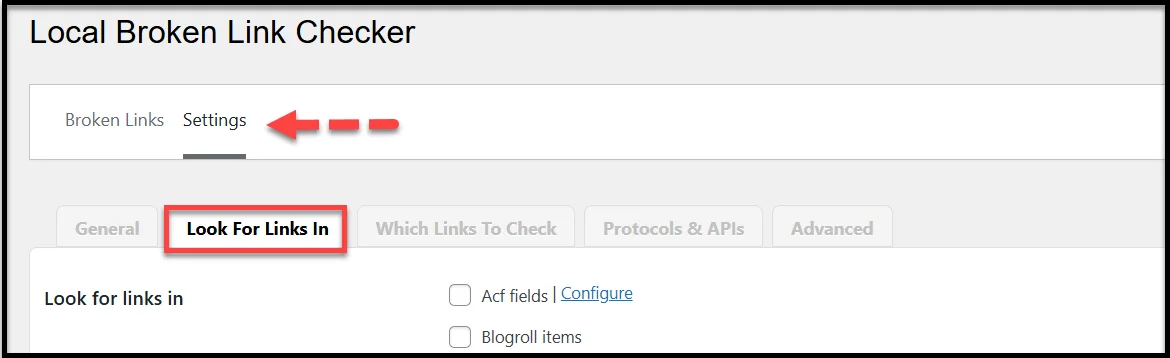
- You’ll see a list of post types the plugin can scan, such as Posts, Pages, and any custom post types your site uses.
- Check the boxes next to the content types you want included in link scans.
- For most sites, Posts and Pages should definitely be enabled.
- If you have custom post types for portfolios, products, or events, enable those too.

- Avoid selecting system or plugin-generated post types that aren’t publicly visible; this just slows down scans without adding value.
- Scroll down and click ‘Save Changes’.
By making sure the plugin scans the right post types, you increase the chances of catching every broken link and receiving an email alert about it.
Step 3: Turn On the Hourly Broken Link Monitor
If Broken Link Checker isn’t running scans regularly, it can’t send timely email alerts. The plugin includes a Link Monitor feature that automatically checks your site on a set schedule — but sometimes this is turned off by default.
To activate it:
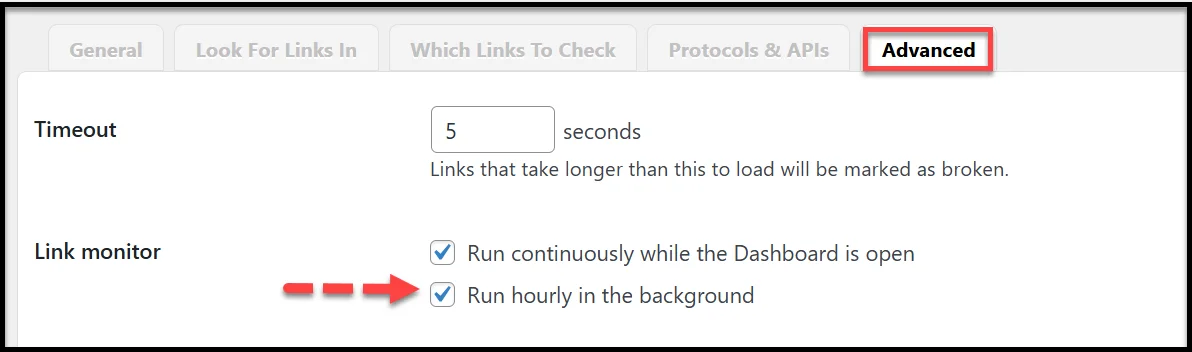
- Go to the ‘Advanced’ tab under ‘Settings’ in your WordPress dashboard.
- Scroll down until you find the ‘Link Monitor’ section.
- Check the box next to ‘Run hourly in the background.’ This tells the plugin to keep scanning for broken links automatically, even when you’re not logged in.
- Click ‘Save Changes.’
With hourly monitoring enabled, the plugin can quickly detect new broken links and send you alerts right away, instead of waiting for a manual scan.
If your alerts still don’t arrive after this, the problem is likely related to how WordPress sends emails. That’s exactly what we’ll fix in the next step by switching to a more reliable delivery method.
Step 4: Install and Configure Post SMTP for Reliable Email Delivery
One of the biggest reasons Broken Link Checker alerts don’t reach your inbox is that WordPress uses PHP’s built-in mail() function, which is one of the biggest reasons behind the WordPress not sending emails issue.
Fortunately, you can replace it with SMTP (Simple Mail Transfer Protocol) using the Post SMTP plugin. SMTP is the standard email-sending method trusted by all major mailbox providers, including Gmail, Outlook.com, Zoho, Yahoo Mail, and more.
Here’s how to set it up:
- Install Post SMTP
- In your WordPress dashboard, go to ‘Plugins → Add Plugin.’
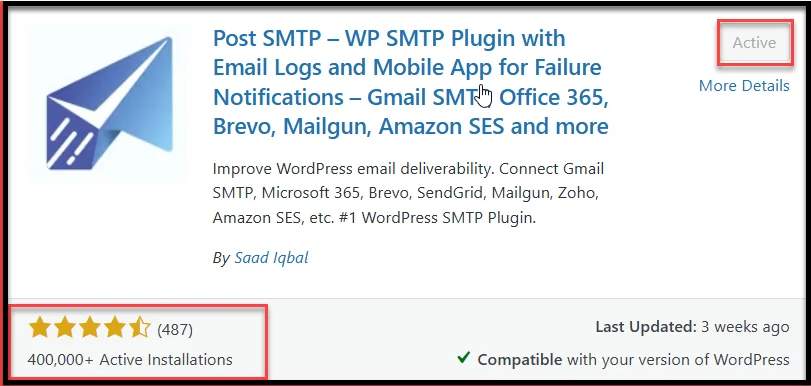
- Search for “Post SMTP.”
- Click Install Now, then Activate.
- Run the Setup Wizard
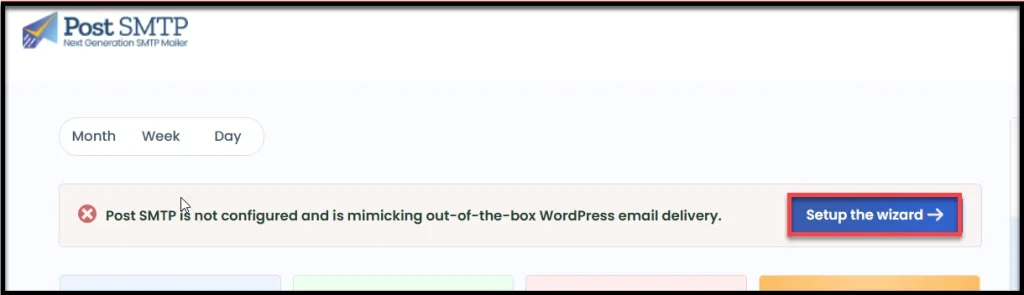
- After activation, go to ‘Post SMTP → Dashboard.’
- Click ‘Start the Wizard.’
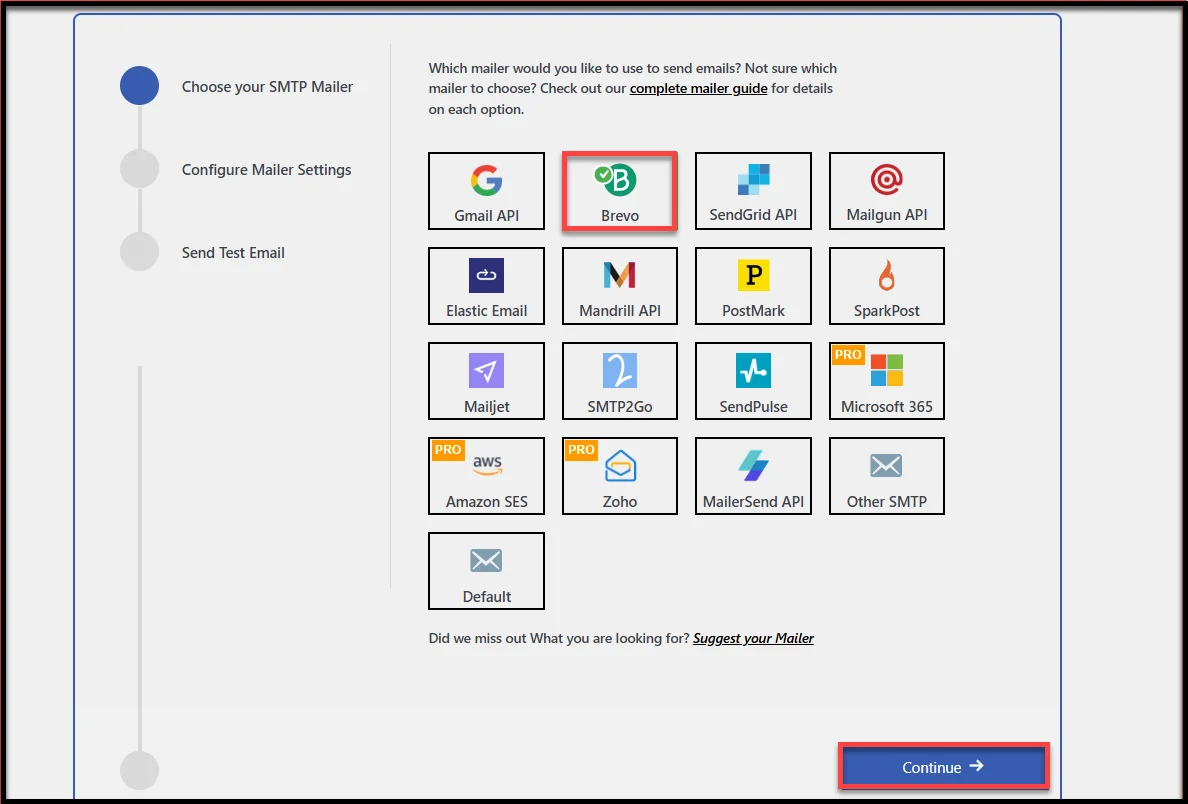
- Choose Your Email Provider
- Post SMTP supports all major email service providers.
- Select yours (e.g., Gmail, Microsoft 365, Brevo, Zoho Mail, Amazon SES) and click ‘Continue.’ In this guide, we’ll be using Brevo as our example.
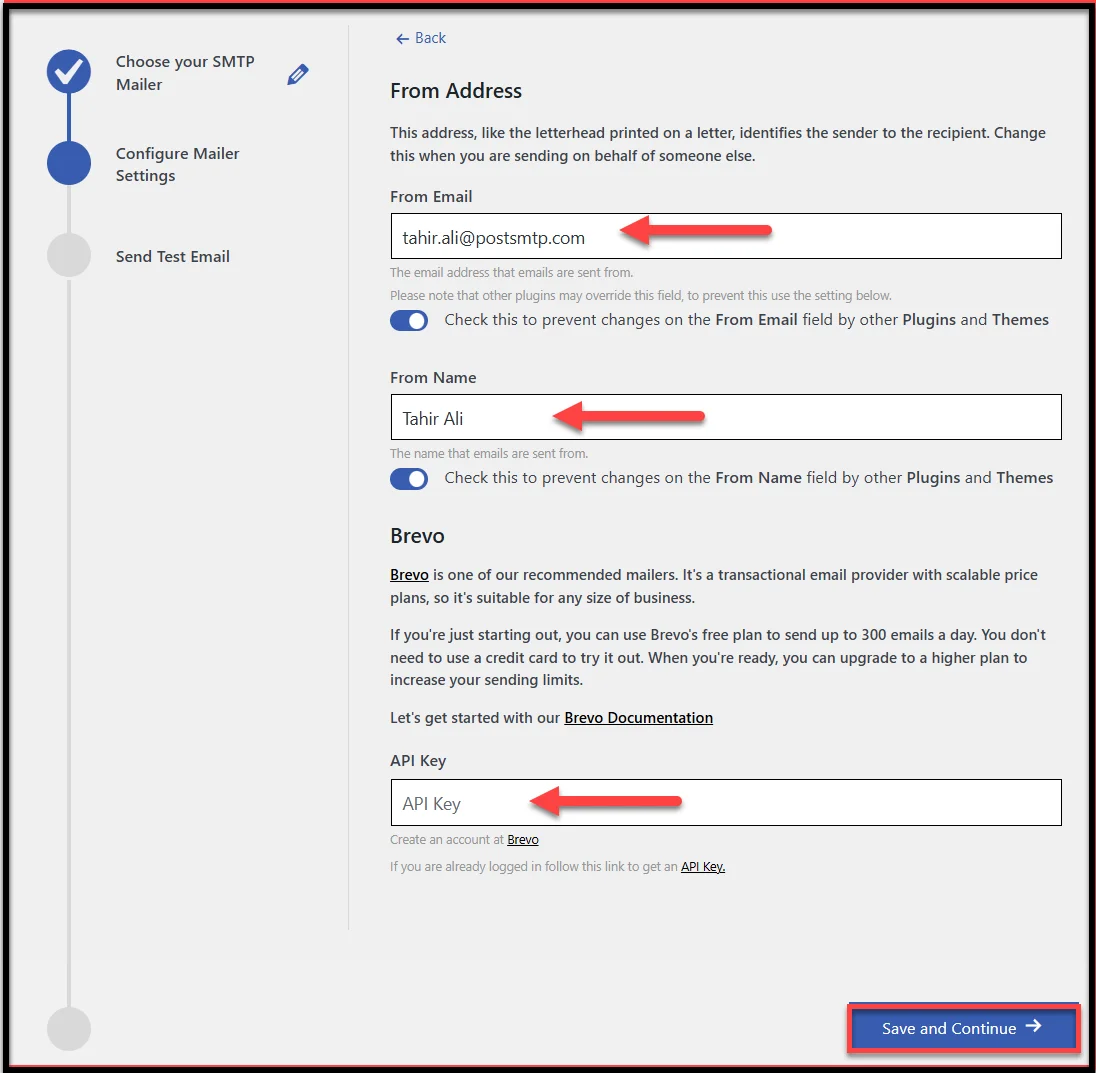
- Enter Your Email Details
- From Email: Use a domain-based email address (e.g., example@yourdomain.com). This email address must be the same that you have added in the Broken Link Checker notification settings.
- From Name: This is the name that will appear in your inbox.
- Add SMTP Credentials or API Key
- You can get this from your email service provider’s account.
- Copy the API key and paste it into the relevant field.
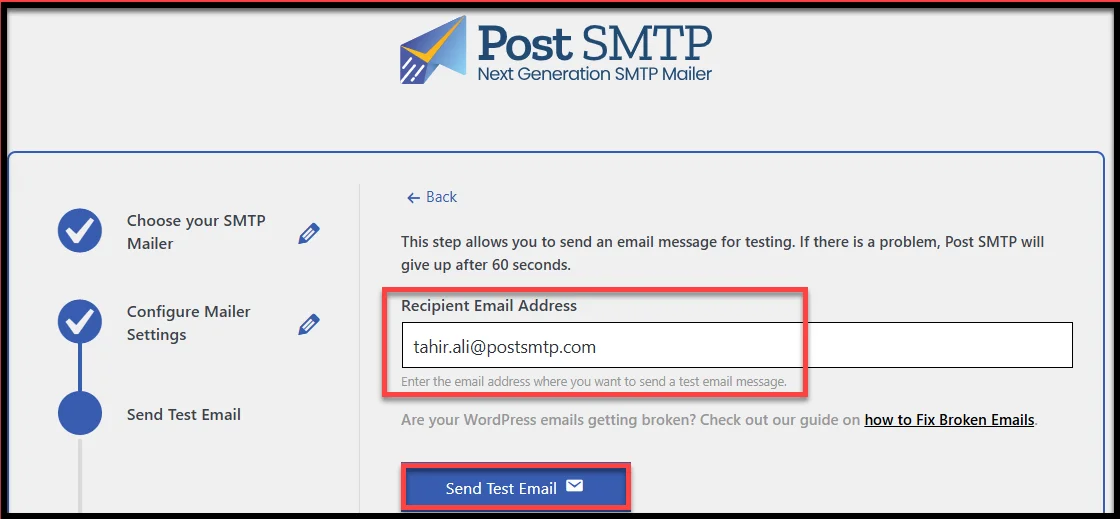
- Send a Test Email
- The wizard will prompt you to send a test message.
- Use your own email address, click Send Test Email, and check your inbox.
Once Post SMTP is set up, all WordPress emails, including Broken Link Checker alerts, will be sent using your chosen SMTP provider. This greatly improves deliverability and keeps your alerts out of the spam folder.
Step 5: Force a Consistent “From Email Address” Across All Plugins
As we have discussed earlier in the article, even with SMTP in place, your alerts can still get flagged if different plugins on your site send emails from different addresses.
The solution is to lock your site into using one verified sender address for every outgoing email. Here’s how to do it with Post SMTP:
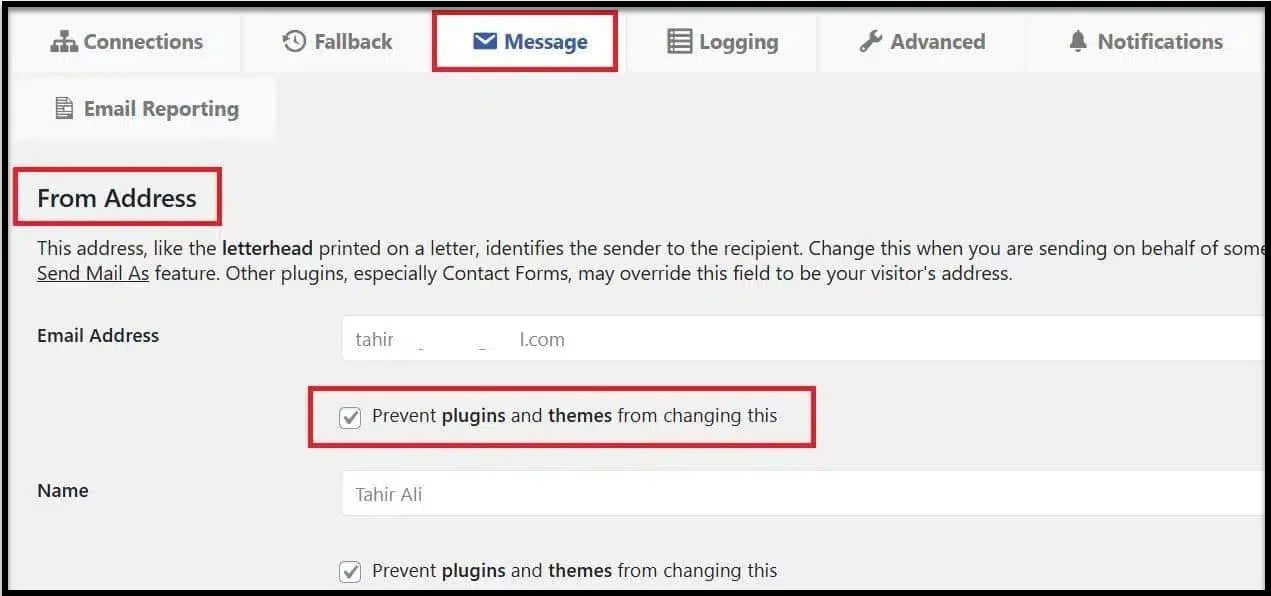
- In your WordPress dashboard, go to Post SMTP → Settings.
- Click the Message tab.
- In the Email Address field, enter the same domain-based email you used in Step 4 (e.g., example@yourdomain.com).
- Scroll down and check ‘Prevent plugins and themes from changing this.’
- Click Save Changes.
From now on, every plugin on your site will send emails from the same trusted address, which makes it far more likely they land in your inbox.
Check Your Spam Score and Improve Deliverability (Optional)
If you’ve followed the steps so far, the Broken Link Checker emails should already be arriving. But if you want to maximize deliverability, it’s worth testing your spam score. Email providers use the spam score to determine whether messages will appear in your inbox, spam folder, or elsewhere.
Fortunately, Post SMTP comes with a built-in Spam Score Checker that makes this quick and easy:
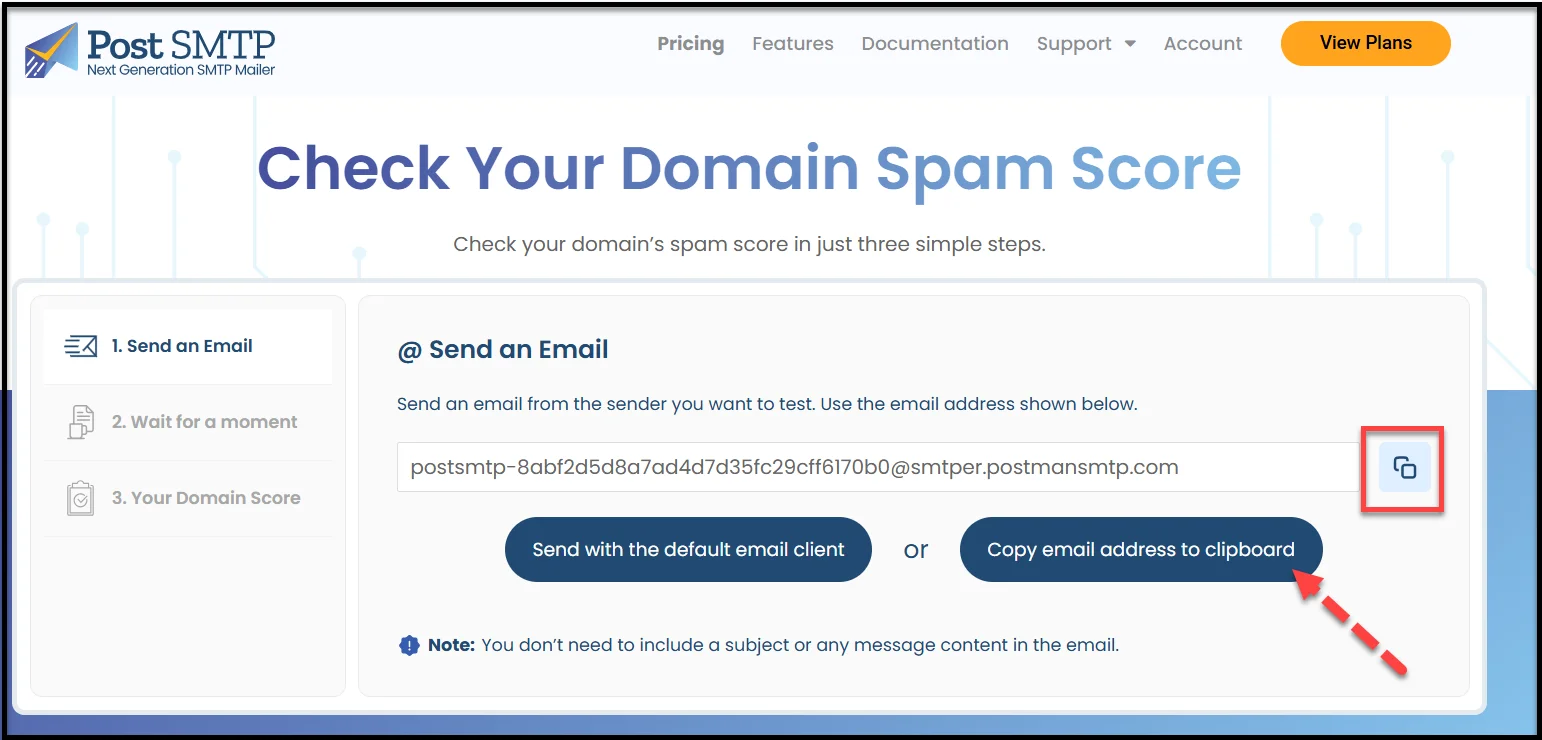
- In your Post SMTP dashboard, click ‘Spam Score Checker’ under the Troubleshooting section.
- On the subsequent page, click ‘Copy email address to clipboard.’
- Send a test email from your email domain to that address.
- Go back to the Spam Score tool and click Confirm Email Sent.
- Wait a few moments to see your results.
If your score is low, here’s how to improve it:
- Set up SPF, DKIM, and DMARC records in your domain’s DNS settings — these help prove your emails are genuine.
- Use a professional, domain-based email address (e.g., examlpe@yourdomain.com instead of Gmail or Yahoo).
- Avoid spam trigger words like “FREE!!!” or “Act Now” in your subject lines.
- Check if your domain is blacklisted using a tool like MXToolbox.
- Send at a steady pace — don’t blast too many emails in a short time, especially from a new domain.
Improving your spam score gives your Broken Link Checker alerts the best possible chance of landing exactly where they should: in your inbox.
Get Post SMTP Now and Fix Broken Link Checker Not Sending Email
When Broken Link Checker stops sending emails, it’s usually caused by WordPress’ default mail function and not the plugin itself. By switching to SMTP and optimizing your spam score, you can get those alerts right back in your inbox.
Remember, catching broken links early isn’t just about keeping your site tidy—it also helps protect your SEO rankings and user experience.
If you want a reliable fix that works long-term, consider installing Post SMTP today. It’s the most trusted WordPress email delivery plugin, with built-in testing tools, spam score checks, and integrations for all major email providers. Get Post SMTP now and never miss an important site email again.

