


 OpenAI
 Perplexity
Is the ‘The Events Calendar’ plugin not sending email notifications from your WordPress site? You are not alone! Many WordPress users face this issue.
Whether ticket confirmations, attendee alerts, or admin notices—missing these emails can cause real trouble for event organizers and attendees.
If your visitors are not getting confirmations, you risk confusion, missed events, and lost revenue.
But don’t worry—you can fix this problem in just a few simple steps. In this guide, we’ll walk you through exactly how to troubleshoot the ‘The Events Calendar Not Sending Email’ issue and get email alerts working again using the Post SMTP plugin.
Ready? Let’s get started!
Who Faces This Issue (And Why It Matters)
This problem shows up for a wide range of users, such as
- Small business owners running event promotions
- Event organizers using Event Tickets or Event Tickets Plus
- Developers building custom WordPress solutions
- General users trying to manage community events or workshops
When emails don’t send properly, it creates a mess:
- Admins don’t get notified about new ticket sales.
- Customers never receive their tickets or confirmation.
- Attendees miss important event info.
In short, your email system is essential to your business. Without it, you’re flying blind.
The good news? You don’t have to be a tech genius to solve it. In this guide, we will show you how to fix the ‘Events Calendar Not Sending Email’ issue. However, we will have a quick glance ar
Types of Emails Sent by The Events Calendar
The Events Calendar plugin integrates with the Event Tickets and Event Tickets Plus plugins. If you’re using these plugins to sell event tickets, when a customer purchases a ticket from your website, these plugins send out several different email notifications. These emails keep both you and your attendees in the loop.
Let’s break down who should be getting what, and from where:
Order Confirmation (from your eCommerce plugin)
When someone buys a ticket, your eCommerce plugin (like WooCommerce, Easy Digital Downloads, or Ticket Commerce) should immediately send an order confirmation email to the customer.
You, as the admin or store owner, should also get a notification email that a purchase has been made.
Ticket Email (from Event Tickets/Event Tickets Plus)
After the order is processed, each attendee should receive a separate email containing their ticket(s). This email usually includes:
- The event name
- Ticket type and quantity
- A unique ticket QR code or barcode
- A link to view or download the ticket
These emails are sent by the Event Tickets plugin itself—not your eCommerce plugin—and that’s why you need both systems to work properly.
RSVP or Confirmation Notices (Optional)
If you’re using RSVP functionality instead of paid tickets, your visitors should still receive an email confirming their RSVP. This also comes from the Event Tickets plugin.
When things go wrong, one or more of these emails just never arrive. Let’s understand why in the following section.
Why The Events Calendar Email Notifications Fail
If The Events Calendar isn’t sending email notifications, don’t panic. You’re not alone. This issue pops up more often than you’d expect — and it’s not always the plugin’s fault.
Let’s examine the common causes of this frustrating issue:
Reason 1: WordPress Uses an Unreliable Mail Function
By default, WordPress sends emails using the wp_mail() function. Behind the scenes, this relies on PHP’s native mail() function. In most cases, when users complain that WordPress is not sending emails, it is because this default method has problems, such as:
- No authentication: Emails go out without proving they’re legitimate, which makes email providers nervous. Most of them either block the email completely or send it as spam.
- No error reporting: You won’t even know when things fail. Because there’s no bounce message, the email just vanishes.
- Blocked by hosting: Most web hosting companies block PHP mail entirely to stop abuse. So your site is sending emails, but nothing’s actually going out.
Reason 2: Missing DNS Records (SPF, DKIM, DMARC)
These DNS records act like ID checks for your emails. Without them, your domain looks sketchy to email services.
- SPF tells mail servers which IPs are allowed to send on your behalf.
- DKIM adds a digital signature to prove your email wasn’t tampered with.
- DMARC tells servers what to do if SPF or DKIM fail.
If your domain is missing even one of these, your messages are at high risk of being flagged or rejected.
Reason 3: Spam Score is Too High
Even if everything is technically set up, your domain’s reputation might be dragging things down.
Maybe your site has been flagged before, or you’re unknowingly using spam-trigger words in subject lines. A high spam score will kill your deliverability, even if the email is totally legit.
Reason 4: Plugin Conflicts or Misconfigured Settings
If you’re using Event Tickets or Event Tickets Plus, those plugins are responsible for sending ticket-related emails. However, they rely on your eCommerce plugin (like WooCommerce or Easy Digital Downloads) for purchase confirmations.
If any one of those is misconfigured, or if different plugins are trying to send emails using different addresses, it creates confusion — and sometimes, the email never gets sent.
Step-by-Step Guide to Fix The Events Calendar Not Sending Emails
If The Events Calendar isn’t sending emails, the issue is usually caused by WordPress’s unreliable default mail function. Fortunately, you can resolve this in just a few steps using the Post SMTP plugin.
First, we will show you how to use the Post SMTP plugin to replace the WordPress default mail function with SMTP (Simple Mail Transfer Protocol). After that, we will discuss the other issues that might be affecting your email deliverability.
Step 1: Install & Configure Post SMTP Plugin
Post SMTP is one of the best WordPress SMTP plugins out there. To set up the plugin, follow the steps below:
- Log in to your WordPress dashboard.
- Head over to Plugins → Add New.
- In the search box, type ‘Post SMTP.’
- Find Post SMTP—WordPress SMTP Plugin by Saad Iqbal.
- Click Install Now, then click Activate.

You’ll now see a new “Post SMTP” tab in your admin menu.
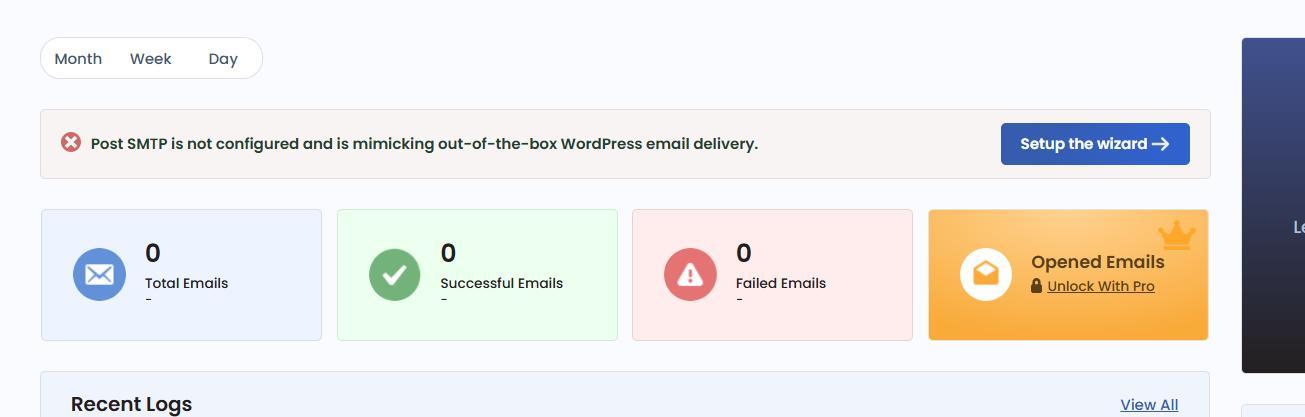
Post SMTP makes it easy to get started with its built-in wizard.
- Navigate to Post SMTP → Dashboard.
- Click the “Start the Wizard” button.
The wizard will guide you through the next steps, from choosing your email service to sending a test email.
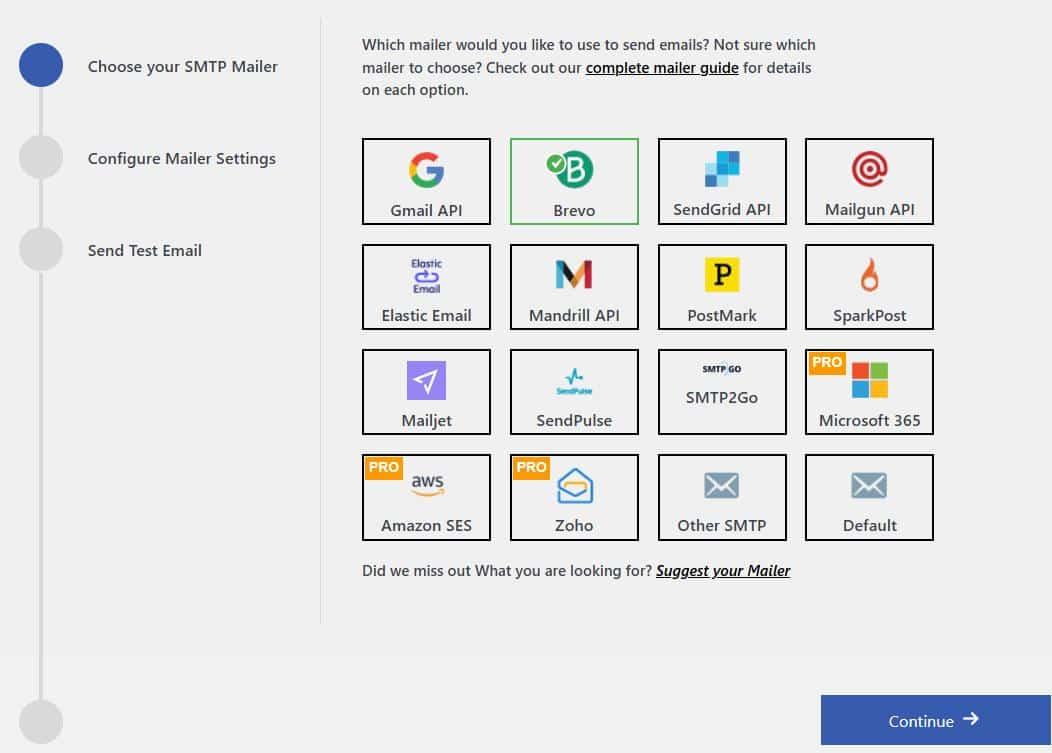
You’ll now be prompted to pick the email service you want to connect with. Post SMTP supports all the popular options:
- Gmail SMTP (Google Workspace)
- Microsoft 365 (Outlook)
- Brevo (formerly Sendinblue)
- Zoho Mail
- Mailgun
- SendGrid
- Amazon SES
- And many more…
For this tutorial, we’ll use Brevo, but the steps are similar for most providers.
Choose your service and click ‘Continue.’
Next, you’ll need to fill in the following sender’s details:
- From Email: Use an email address that matches your domain (e.g., hello@yourwebsite.com).
- From Name: This is the name that shows up in inboxes (e.g., Your Website or Event Support).
- API Key: Provide the “API Key” or SMTP credentials for your chosen service.
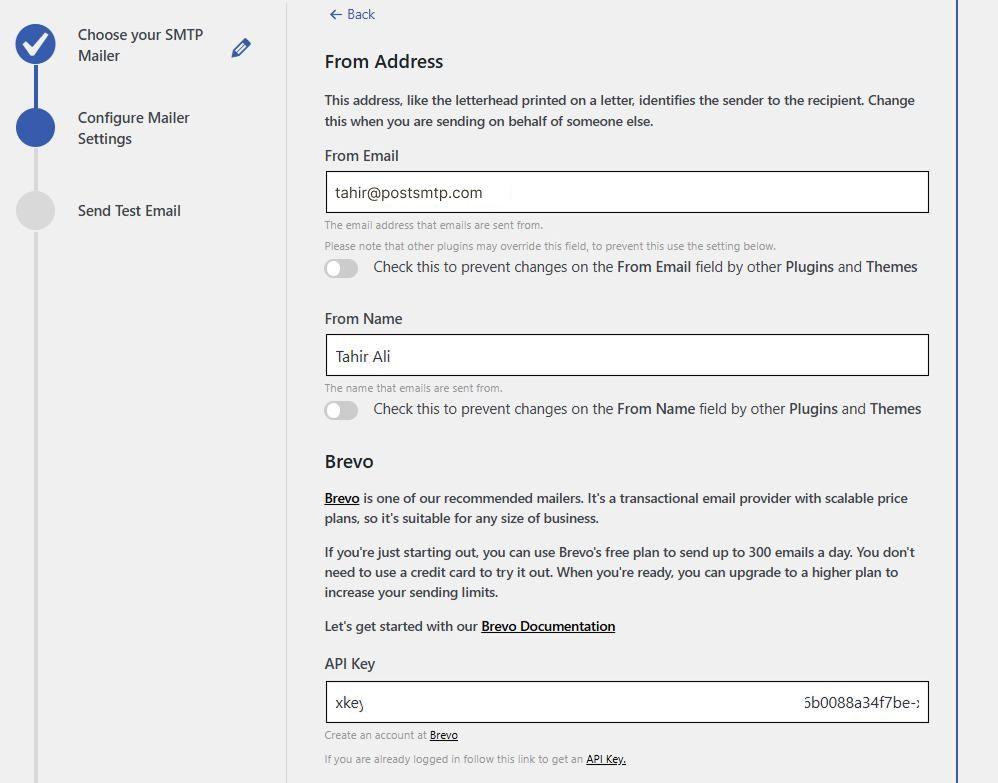
Add the requested details and click ‘Save and Continue.’
Before finishing up, the wizard lets you test your configuration:
- Enter a valid email address in the test field.
- Click ‘Send Test Email.’
If everything’s set up correctly, you’ll get a success message—and the email will arrive in your inbox within seconds.
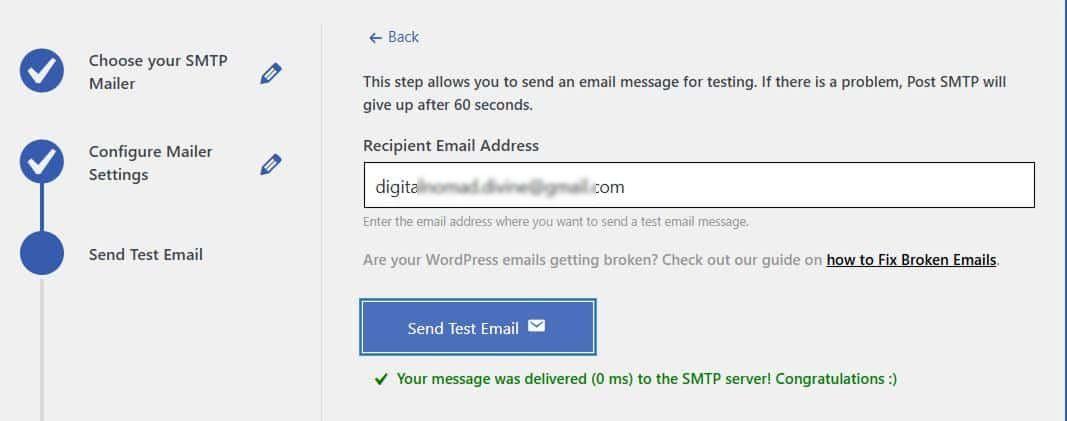
Click ‘Finish’ to complete the wizard.
From now on, Post SMTP will handle all outgoing emails from your site, including ticket emails, event confirmations, and order receipts.
Step 2: Force a Specific “From” Email Address
While you’ve already set a fixed “From” email, you still need to make sure every plugin follows it, especially ones that handle forms, event tickets, or order confirmations.
Some plugins, like The Events Calendar or contact forms, might have different sender addresses. That can trip up email servers and cause delivery failures.
Luckily, Post SMTP gives you a way to enforce your chosen sender address for every email leaving your site.
Here’s how to do it:
- Go to Post SMTP >> Settings >> Message Tab
- In the ‘Email Address’ field, enter the email address from which all your site’s emails will come (e.g., noreply@yourdomain.com or events@yourdomain.com).
- In the ‘Name’ field, type a recognizable sender name (like “Event Notifications” or “Your Site Team”).
- Check the box that says “Prevent plugins and themes from changing this.”
- Scroll down and click ‘Save’ to lock in your settings.
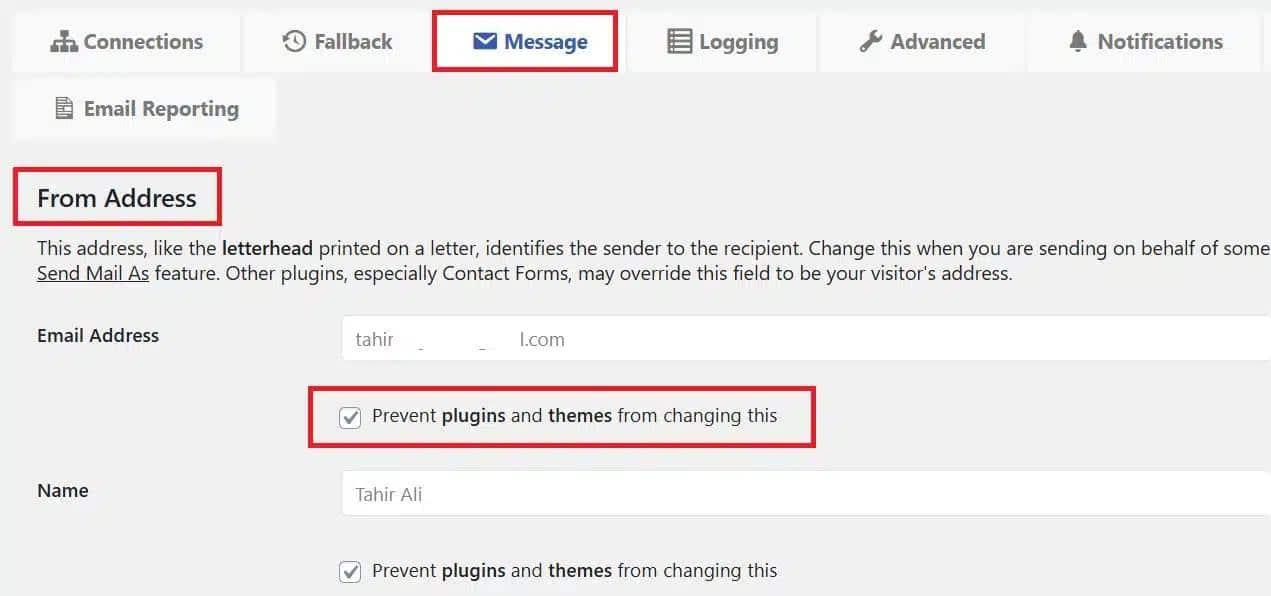
This overrides other plugins trying to use random addresses and keeps things consistent.
Step 3: Resend Missed Ticket Notifications
If you missed emails before fixing SMTP, don’t worry — you can resend them using the email logs feature in the Post SMTP plugin.
Go to Post SMTP >> Email Log
This section shows a detailed history of every email sent from your WordPress site, along with delivery status. You’ll see the following:
- The subject line
- The recipient
- The date and time
- Whether it was delivered or failed
Look for emails with a failed or pending status.
Finally, click ‘Resend’ next to each one.
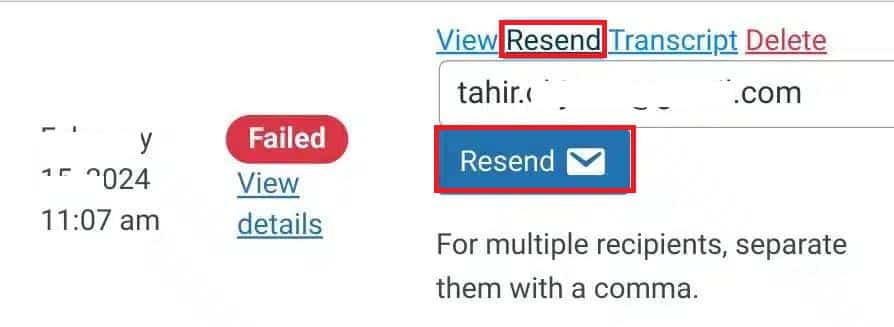
Boom — those ticket confirmations are back on track.
💡 Pro Tip: Use This Log Screen for Future Troubleshooting
Even after things are working, keep the email log active. It helps you:
- Catch issues quickly
- Resend important messages on demand
- Confirm that The Events Calendar emails are going out as expected
It’s like having a black box for your WordPress email system — and it’s one of Post SMTP’s most powerful features.
Step 4: Check and Lower Your Domain’s Spam Score
Even after fixing SMTP settings and resending emails, some messages are still landing in spam folders. There is a high chance that your domain has a high spam score.
Your domain’s spam score is a measure of how trustworthy email servers perceive your domain to be. A high spam score can cause emails from The Events Calendar to get filtered out or blocked altogether.
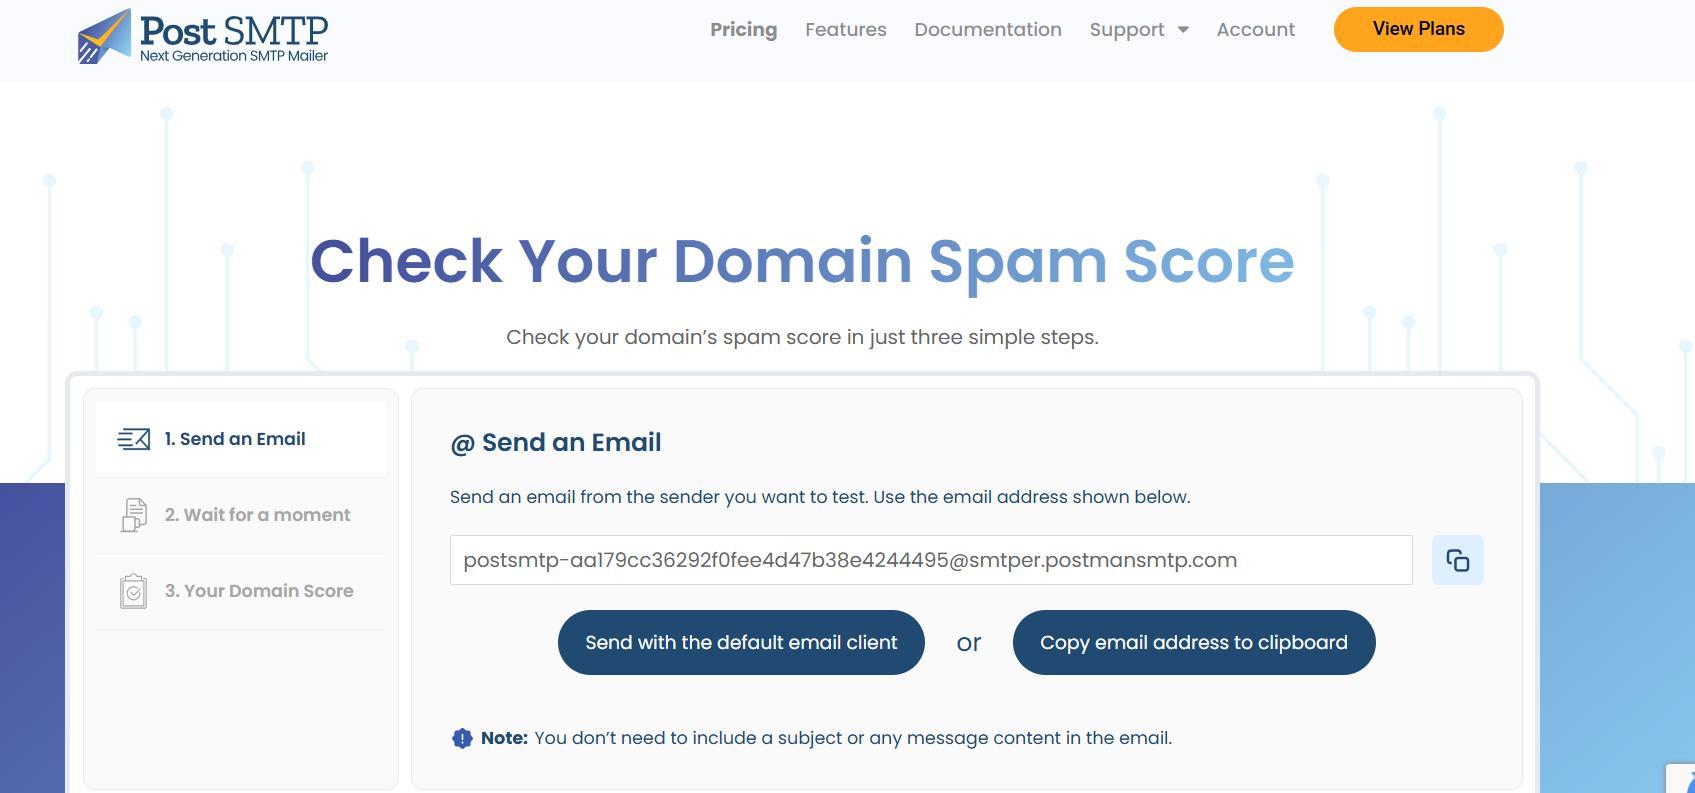
Here’s how to check it using the Spam Score Checker tool provided by Post SMTP:
- Send a test message to the provided test address.
- Click “Copy email address to clipboard.”
- Send an email to the copied address from your domain.
- After that, click ‘Confirm email sent.’
- Wait for your report.
If your spam score is high, fix these common problems:
- Add SPF, DKIM, and DMARC to your domain’s DNS
- Use professional content — no spammy keywords or shady links
- Avoid using free email addresses like Gmail or Yahoo for sending
- Make sure your domain isn’t blacklisted
Remember that keeping a clean email setup results in better inbox delivery.
Still Not Working? Get Expert SMTP Help
If you’ve followed all the steps but still face issues with The Events Calendar emails not sending or landing in spam, you don’t have to tackle this alone.
Our Post SMTP email specialists offer hands-on support to get your email set up and running smoothly. Here’s what you can expect from our expert assistance:
- Customized SMTP setup tailored to your website and email provider.
- Configuration of SPF, DKIM, and DMARC records to authenticate your domain.
- Spam score analysis with recommendations and fixes for any red flags.
- Testing outgoing emails in real-time to confirm delivery.
- A 30-minute live troubleshooting session to answer your questions and walk you through the setup.
👉 Ready to fix The Events Calendar emails once and for all? Reach out now for professional SMTP setup and support.
