


 OpenAI
 Perplexity
Setting up DNS for email is critical because email deliverability often fails silently, and DNS misconfiguration is one of the biggest reasons why.
Industry analyses of over 250 million domains show that millions suffer from broken or misconfigured DNS records, directly impacting email delivery and authentication.
If your emails land in spam, fail to send, or lose trust with inbox providers like Gmail and Outlook, your DNS setup is likely the root cause.
Setting up DNS for email sending becomes simple when you understand how email authentication works. By correctly configuring SPF, DKIM, and DMARC records, you can prevent emails from going to spam, improve email deliverability, and secure your domain from spoofing.
In this guide, you’ll learn how DNS works for email, why it directly impacts deliverability, and how to correctly configure SPF, DKIM, and DMARC step by step.
What Is DNS for Email Sending?
DNS (also known as Domain Name System) acts as the Internet’s directory. It translates domain names into IP addresses and helps route both website traffic and email messages to the correct servers. But beyond the definition, what role does DNS actually play in email delivery?
DNS servers connect domain names to their corresponding web and mail servers. Every time you visit a website or send an email, DNS works in the background to route your request to the correct server.
This is how DNS works:
- DNS translates a domain name into its corresponding IP address, allowing browsers and mail servers to locate and communicate with the correct destination.
- DNS also controls email routing by using specific records (MX, SPF, DKIM, and DMARC) to verify sending servers and authenticate outgoing emails.
- These records provide authentication signals that receiving mail servers use to verify sender identity and prevent spoofing.
Why DNS Setup Is Important for Email Deliverability
If your DNS records are incorrect, misconfigured, or missing, it can cause issues with email deliverability. The most common issues are: emails ending up in spam without your knowledge, failure to send, issues in establishing a connection between the recipient’s and sender’s servers, etc.
To get further into them, here’s why DNS setup is crucial:
Improve Email Deliverability and Avoid Spam Filters
Without proper DNS authentication, receiving mail servers cannot verify your sender identity. As a result, they flag your emails as suspicious and often send them to spam.
Whereas correct SPF, DKIM, and DMARC records help your emails land where they belong: in the inbox.
You can also monitor your sender reputation using tools covered in our Google Postmaster Tools Guide, which helps track how Gmail treats your emails.
Protect and Build Your Domain Reputation
Every email you send contributes to your domain reputation—a key ranking factor used by inbox providers like Gmail, Outlook, and Yahoo. Proper DNS authentication signals that your emails are legitimate, consistent, and trustworthy.
Reduce Phishing and Cyberattack Risks
One of the oldest fraud strategies, phishing, is still used to impersonate domains. Proper DNS records prove that emails originate from your domain. This protects your brand and your recipients from phishing.
Essential DNS Records for Sending Email
Here is the list of key DNS records that you should take a further look at:
SPF Record
SPF (Sender Policy Framework) defines which mail servers can send emails on behalf of your domain using a DNS-based authorization mechanism. It acts as a DNS-based authorization mechanism that defines which mail servers can send emails on behalf of your domain. The failure of SPF records often causes emails to fail authentication or land in spam folders.
Purpose: Prevents spammers from pretending to send emails from your domain.
Example:
Code “v=spf1 include:_spf.google.com -all“
Key Point: You must publish only one SPF record per domain. Multiple SPF records cause validation failures and break email authentication. If multiple SPF records exist, merge them into a single record using include mechanisms.
DKIM Record
DKIM (DomainKeys Identified Mail) adds a cryptographic signature to each outgoing email using a public and private key pair stored in DNS. This record ensures message integrity by confirming that email content has not been altered during transit.
Each DKIM record uses a selector (e.g., default._domainkey) that allows multiple keys to exist under the same domain.
Purpose: Ensures the email hasn’t been tampered with during transit.
How it works:
- Your mail server signs outgoing emails with a private key.
- Receiving servers check the signature against the public key stored in your DNS.
Benefit: Builds trust with inbox providers like Gmail and Outlook.
DMARC Record
DMARC (Domain‑based Message Authentication, Reporting, and Conformance) works alongside SPF and DKIM to enforce policies. DMARC enforces domain alignment between SPF and DKIM and defines how receiving servers should handle authentication failures.
DMARC also enables reporting using RUA (aggregate reports) and RUF (forensic reports), helping you monitor authentication failures and detect domain abuse.
Purpose: Tells receiving servers what to do if an email fails SPF or DKIM checks.
Policy Options:
- none → Monitor only.
- quarantine → Send suspicious emails to spam.
- reject → Block unauthorized emails completely.
Extra Value: Provides reporting so you can see who is sending emails on behalf of your domain.
For a deeper understanding of how these authentication methods work together, read our complete guide on Email Authentication in WordPress (SPF, DKIM, DMARC & BIMI Explained).
MX Record (Mail Exchange)
MX (Mail Exchange) records define which mail servers receive incoming emails for your domain. Without a properly configured MX record, your domain cannot receive emails.
Purpose: Routes incoming emails to the correct mail server.
Requirement: MX records must point to your email provider’s mail servers with correct priority values.
Benefit: Ensures your domain can receive emails reliably without delivery failures.
BIMI Record
BIMI (Brand Indicators for Message Identification) lets you display your brand logo in supported inboxes.
Purpose: Boosts brand recognition and trust.
Requirement: BIMI also requires a Verified Mark Certificate (VMC) from a trusted authority for full logo display support.
Benefit: Makes your emails stand out visually in crowded inboxes.
Learn more about how BIMI improves trust and visibility in our guide on What is BIMI and How It Boosts Email Trust and Open Rates.
MTA‑STS & TLS‑RPT
These records enforce secure transport of email.
MTA‑STS (Mail Transfer Agent Strict Transport Security): Ensures emails are delivered over encrypted connections (TLS).
TLS‑RPT (TLS Reporting): Provides reports if secure delivery fails.
Benefit: Protects against downgrade attacks and ensures your emails travel securely.
ARC
ARC helps preserve authentication results when emails are forwarded (for example, through mailing lists).
Purpose: Prevents forwarded emails from failing SPF or DKIM checks.
How it works: Adds a chain of authentication results to the email header.
Benefit: Improves deliverability for forwarded messages, which are often tricky to validate.
PTR Record (Reverse DNS)
PTR (Pointer Record) maps an IP address back to a domain name using reverse DNS lookup, allowing receiving mail servers to verify that the sending server is legitimately associated with your domain. If you want to learn more about reverse DNS, take a look at our DNS PTR guide.
Purpose: Verifies the identity of the sending mail server.
Requirement: The PTR record must match your sending domain and is usually configured by your hosting provider or SMTP service.
Benefit: Improves email deliverability by helping receiving servers trust your emails and reducing the chances of messages being marked as spam.
How Email Providers Evaluate Your DNS Setup
Inbox providers like Gmail, Outlook, and Yahoo don’t rely on a single DNS record. They evaluate multiple signals together to decide whether your email should reach the inbox:
- SPF authentication result
- DKIM signature validity
- DMARC policy and alignment
- Sending IP reputation
- Domain history and consistency
Even if one record passes, weak alignment or poor reputation can still push your emails to spam. That’s why a complete DNS setup—not partial—is critical for consistent email delivery.
How DNS Misconfiguration Breaks Email Delivery
Even a small DNS mistake can break email delivery completely. For example:
- Missing SPF → Emails fail authentication
- Wrong DKIM selector → Signature validation fails
- Strict DMARC too early → Legitimate emails get rejected
- No PTR record → Server looks suspicious
These issues don’t always trigger visible errors—but they silently damage your deliverability and sender reputation.
3 Easy Methods to Set Up DNS Records for Sending Email
By now, you must be familiar with which DNS records you need to add in order to set up DNS for sending emails. Remember, each DNS record comprises three key pieces of information.
- Record Type – The kind of DNS record you want to create (usually TXT).
- Name/Host/Hostname – The spot where the record is added (like @ or your domain DKIM).
- Value/Data/Points To – The authentication string or destination (similar to a long string of characters).
You can configure DNS records using three common methods, depending on where your DNS is managed. You can add SPF, DKIM, and DMARC records in any order, but best practice is to configure SPF and DKIM first, then enable DMARC.
NOTE: If you haven’t configured a WordPress SMTP plugin yet, explore the Best SMTP Plugins for WordPress to ensure reliable email delivery.
Method 1: Set Up DNS Records Using cPanel / hPanel
- Log in to your hosting account and open cPanel or hPanel from your dashboard.
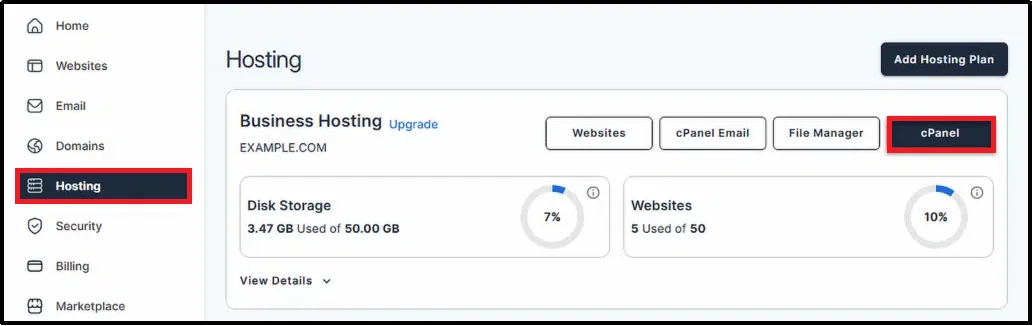
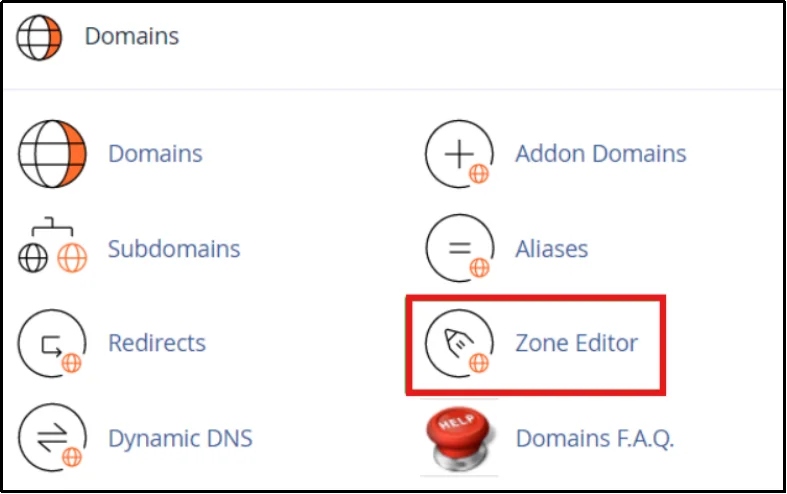
- Scroll down to the Domains section and click on Zone Editor (DNS).
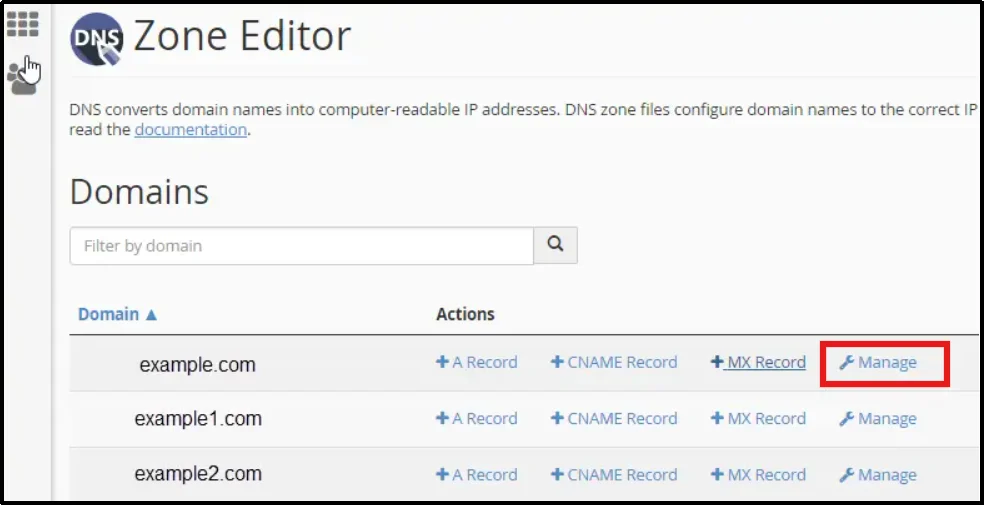
- Find your domain in the list and click the Manage button next to it. If you have multiple domains, make sure you select the correct one.
- Click on + Add Record or Add Record (usually located at the top right).
- Enter the DNS record details provided by your email service:
- Name: Use @ for SPF and DMARC, or a selector for DKIM
- Type: Select TXT
- Record/Value: Paste the full record (e.g., v=spf1 include:_spf.example.com ~all)
- TTL: Leave the default value (e.g., 14400 or 3600)
- Double-check that the record has no missing characters or extra spaces, then click Save Record.
- Repeat the process to add all required records (SPF, DKIM, and DMARC).
For best results, wait at least an hour before testing.
Method 2: Set Up DNS Records Using Third Party Applications
Important: If you are using Cloudflare, ensure DNS records like MX, SPF, and DKIM are set to “DNS Only” (not proxied), or email delivery may fail.
Follow the steps below:
- Log in to your Cloudflare (third-party app) dashboard and open your account.
- From the dashboard, select the domain where you want to add DNS records.
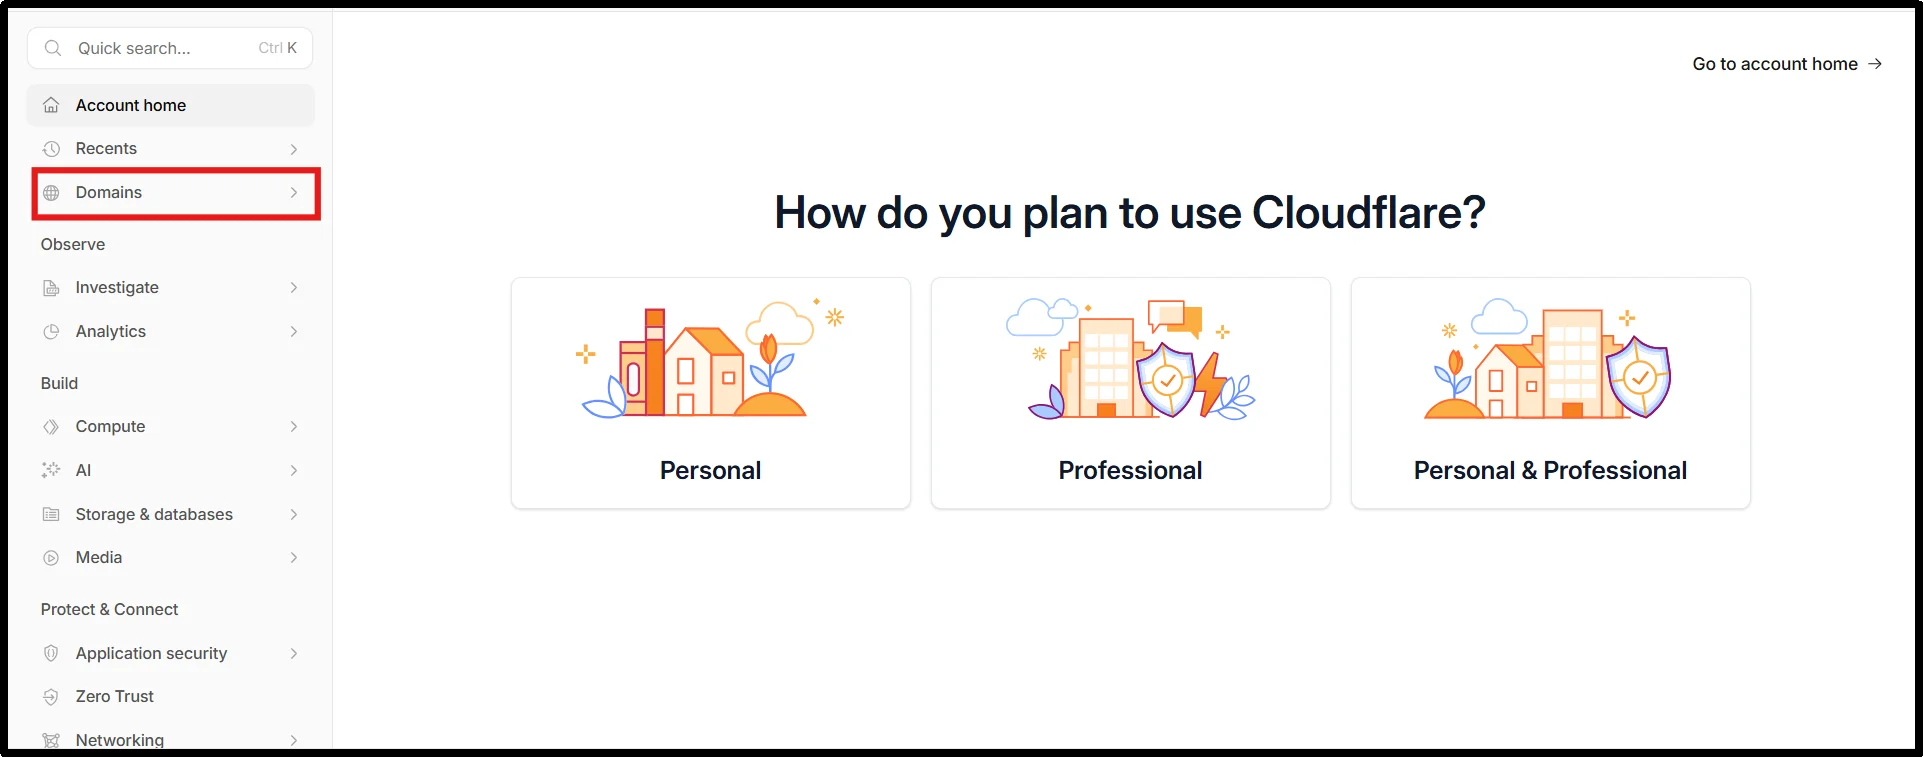
- In the left sidebar menu, click on DNS to open the DNS management page.

- Ensure you are on the Records tab, click on the Add record button at the top of the page to create a new DNS entry.
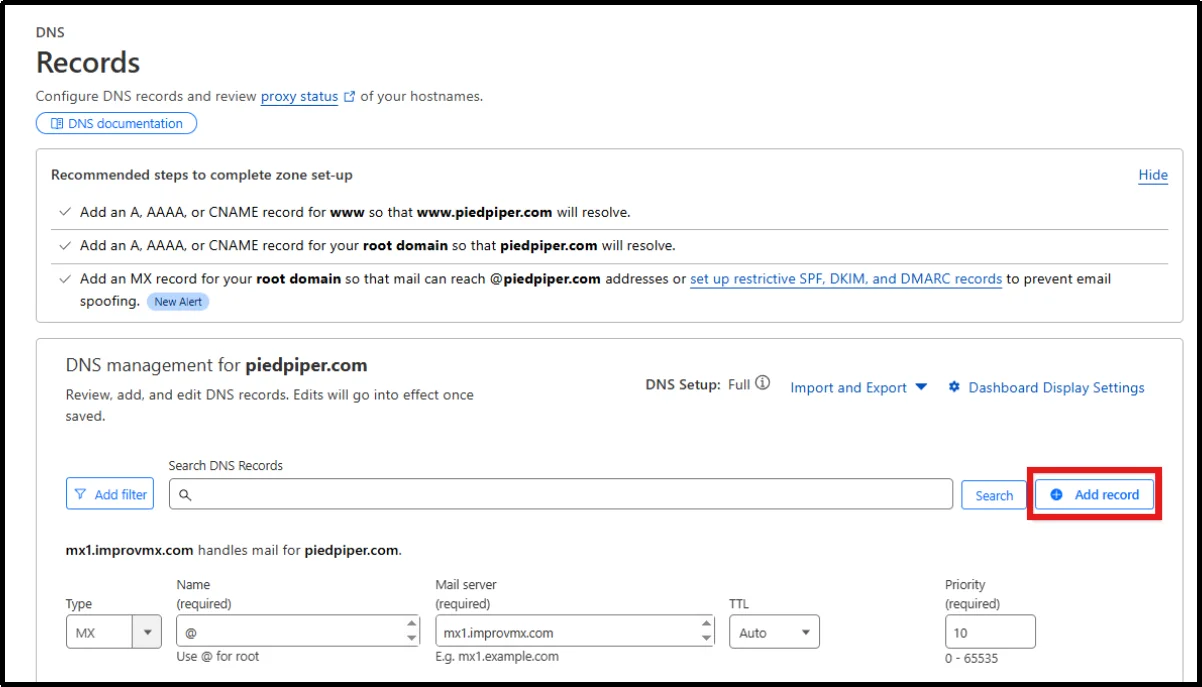
- Choose the required record type from the dropdown:
- Select TXT for SPF, DKIM, and DMARC records
- Select CNAME if your email provider (like SendLayer) gives you domain verification records
- Enter the record details provided by your email service:
- Name: Use @ for root domain or a specific subdomain (e.g., default._domainkey or em1)
- Target/Value: Paste the exact value provided (e.g., SPF string or CNAME target)
- TTL: Leave it on Auto (recommended)
- For domain verification, add the required CNAME record (e.g., em1.yourdomain.com pointing to your provider’s domain).

- Double-check all values for accuracy, then click Save to add the record.
- Repeat the process to add all required records (SPF, DKIM, DMARC, and any CNAME records).
Method 3: Set Up DNS Records Using Domain Registrar
The exact steps may vary depending on your hosting provider, DNS manager, or domain registrar, but the core process remains the same.
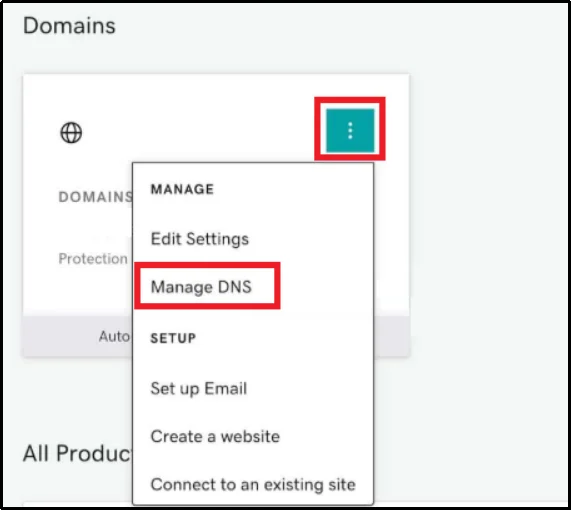
- Log in to your domain registrar account (such as GoDaddy or Namecheap).
- From your dashboard, go to the Domain section and select the domain where you want to add DNS records.

- Click on the Manage DNS button to open your domain’s DNS settings.
- On the DNS management page, click on Add New Record to create a new DNS entry.
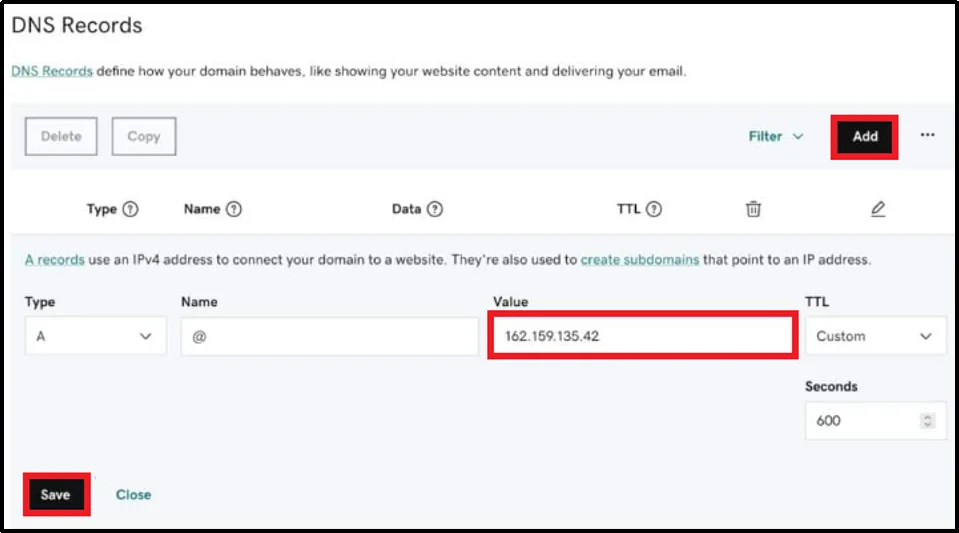
- Choose the appropriate record type from the Type dropdown:
- Select TXT for SPF, DKIM, and DMARC
- Select CNAME if your email provider (like SendLayer) provides verification records
- Enter the Name (Host) value provided by your email service (this may also be labeled as Hostname or Name).
Note: Some registrars, like GoDaddy, automatically append your domain, so only enter the subdomain portion.
- Paste the Value/Target provided by your email service. This defines how the DNS record should function.
- Set the TTL to the recommended value from your email provider (or leave the default if not specified).
- Review all the details carefully, then click Save to add the DNS record.
- Repeat the process to add all required records (SPF, DKIM, DMARC, or CNAME records for verification).
How to Verify Your DNS Records
Once you have added new DNS records or edited existing ones, you should wait for at least 30 minutes for initial propagation to take place. Whenever you update DNS, the changes don’t happen within a span of seconds; it takes time.
DNS propagation delay occurs because DNS records are cached across global DNS servers. Changes must update across multiple locations before they become fully active.
For DNS records to propagate across DNS servers, it can take anywhere from a few minutes to up to 2 days, depending on your provider.
Now that you have waited properly, follow the steps below to verify your DNS records successfully.
- Log in to your WordPress dashboard.
- Go to Plugins → Add Plugin.
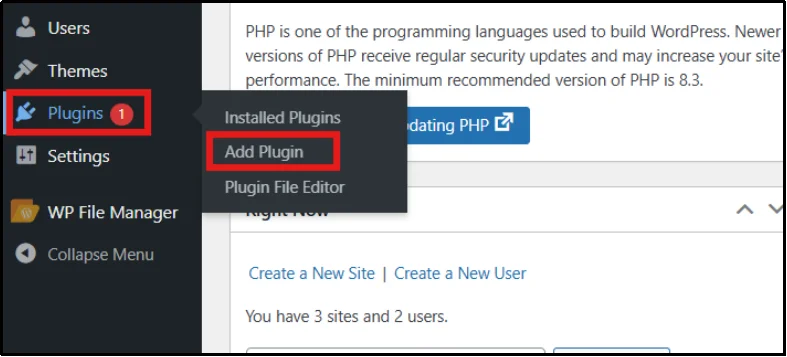
- Enter “Post SMTP” in the right search bar.
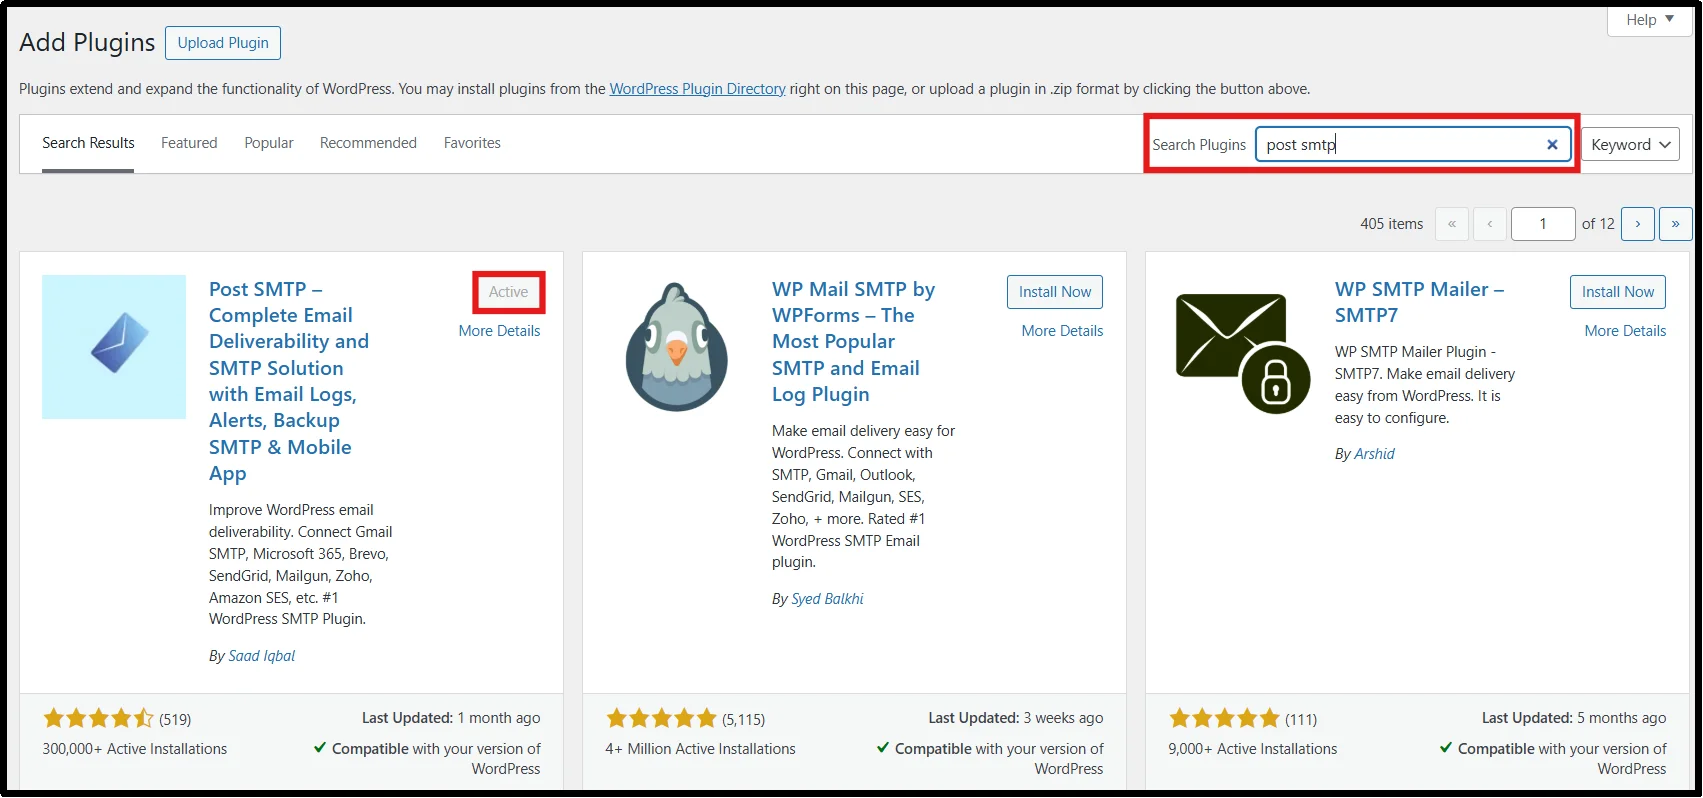
- Click on Install Now and then Activate.
- You will be redirected to the Post SMTP setup wizard, or you can go to Post SMTP → Dashboard → Start the wizard.
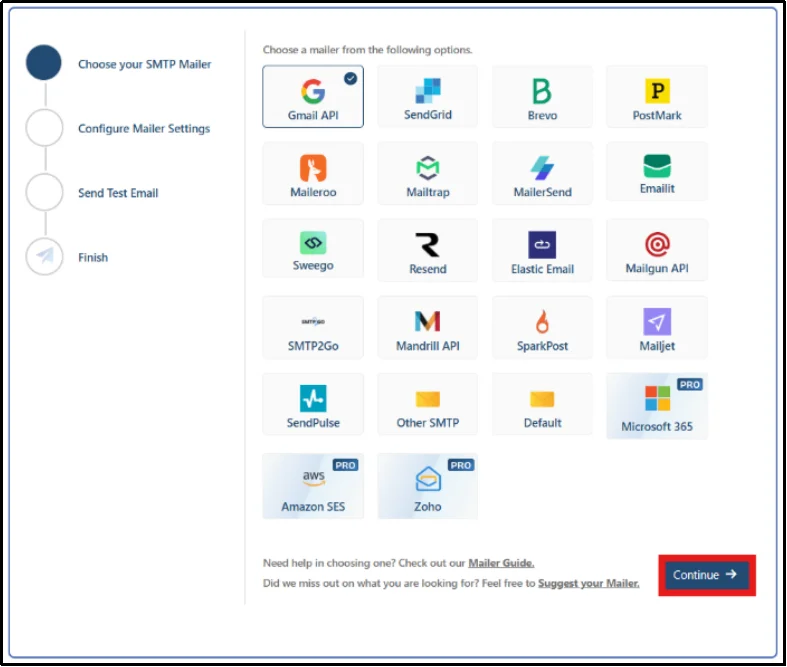
- Choose your preferred SMTP provider, then click Continue to proceed.
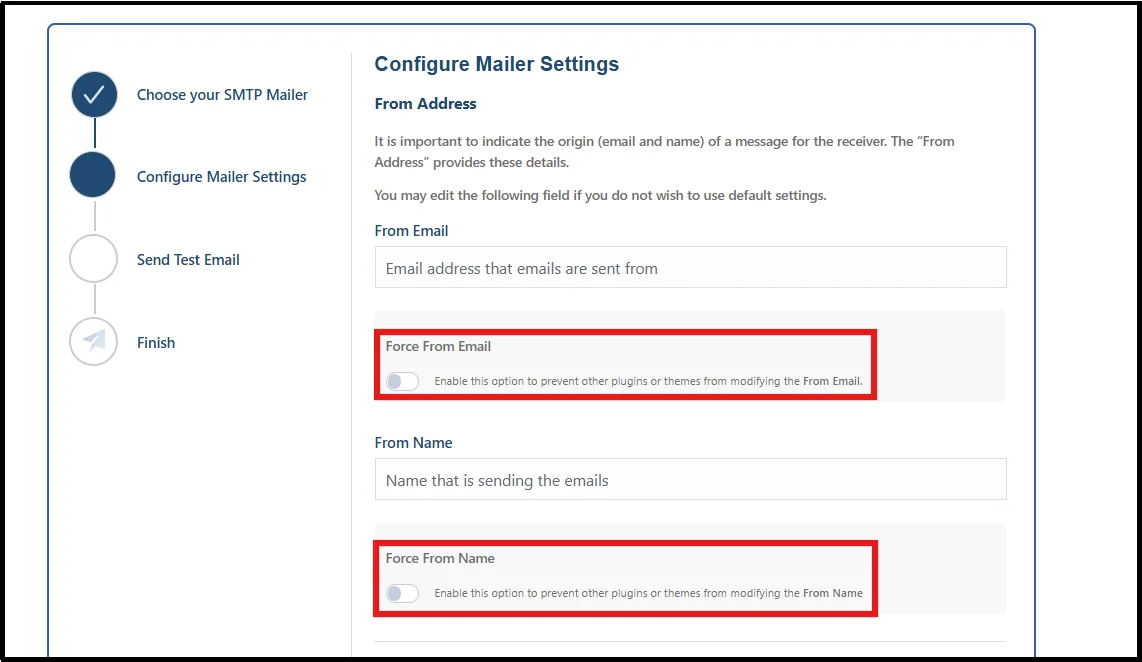
- Enter your desired From Address and From Name, and lock them in with the “Prevent plugins and themes from changing this” toggle.
- After configuring mailer settings, enter a valid recipient email address and click on Send Test Email.

- An email authentication record check report will appear.
You can check whether the record status passed or failed, which will help you verify your DNS records, i.e., SPF, DKIM, and DMARC.
You can also verify DNS records using external tools like:
- MXToolbox
- Google Admin Toolbox
- DMARC Analyzer
Common DNS Mistakes That Break Email Delivery
Even a small misstep in DNS configuration can cause big problems for your email deliverability. Here are the most common mistakes you should avoid:
- Multiple SPF Records – This will break validation.
- Incorrect DKIM Selector – If it doesn’t match, the signature can’t be verified.
- Using Weak or Outdated DKIM keys (less than 1024 or 2048 bits) – Your domain will become vulnerable.
- DMARC Syntax Errors – Wrong format will invalidate your DMARC record.
- Overly Permissive Settings – Weakens your protection by leaving your domain open to abuse.
- Forgetting to Update Records – The emails will fail authentication.
Troubleshooting DNS Problems via Post SMTP
Even with correctly configured SPF, DKIM, and DMARC records, email delivery can still fail due to DNS conflicts, server issues, or authentication misalignment.
Post SMTP makes troubleshooting easier by providing detailed logs and alerts directly in WordPress.
Here’s how to approach common issues:
- Send Test Email: Use Post SMTP’s Send Test Email feature to confirm whether your DNS records are working. If the test fails, the plugin will display detailed error messages that point directly to issues
- Check Spam Score: Analyze email headers and authentication results (SPF, DKIM, DMARC) to identify deliverability issues.
- Run Connectivity Test: Check whether your WordPress site can reach the mail server. If DNS is misconfigured or ports are blocked, this test will fail, giving you a clear signal.
- Run Diagnostic Test: This gives you a detailed snapshot of your email setup. It runs checks on your DNS records to confirm that they’re properly recognized by receiving mail servers.
- Reset Plugin: If troubleshooting gets messy, Post SMTP lets you reset the plugin to its default settings.
Bringing It All Together – Setting Up DNS Records
DNS configuration directly determines whether your emails reach the inbox or disappear into spam.
When you correctly implement SPF, DKIM, and DMARC, and support them with advanced records like BIMI and MTA-STS, you build trust with inbox providers and protect your domain from abuse.
If you still run into issues, use Post SMTP diagnostic tools to troubleshoot any email delivery issues.
Start with proper DNS authentication, test your setup, and continuously monitor performance to maintain strong email deliverability.
FAQs
What is the difference between SPF softfail (~all) and hardfail (-all)?
SPF uses qualifiers to specify how receiving servers should treat unauthorized emails. A softfail (~all) marks emails as suspicious but still allows delivery, while a hardfail (-all) explicitly instructs receiving servers to reject unauthorized emails.
Do I need MX records if I only send emails and don’t receive them?
No, MX records are required to receive emails. If your domain only sends emails, you may not strictly need MX records, but adding them improves domain legitimacy and deliverability.
Does DNS setup affect email sending speed or delivery time?
The DNS setup has no direct relationship to the speed at which emails can be sent, but it is very important in the reception or blocking of emails. Correctly configured DNS entries improve inbox placement and minimize delays caused by spam filtering or authentication procedures.
Can I use multiple email providers with one domain?
Yes, you can use multiple email providers, but you must configure your DNS records carefully. This usually involves combining all sending sources into a single SPF record using include: mechanisms and ensuring DKIM and DMARC are properly aligned. Incorrect configuration can lead to authentication failures.
