


If you are facing the Sucuri not sending email alerts issue, then don’t worry! We have the perfect solution for this problem.
Generally, whenever Sucuri detects any suspicious activity on your WordPress site, it sends you an email alert. On top of that, you can also select additional email alerts as a security measure.
However, if you are not getting Sucuri email alerts, your website security can be negatively affected.
To fix this issue, simply follow the easy three-step process below. We will show you how to fix Sucuri not sending email alerts via the Post SMTP plugin.
Ready? Let’s get started!
What Types of Email Alerts Does Sucuri Usually Send?
Whenever Sucuri detects suspicious activity or security events on your WordPress site, it sends an email alert. These alerts are crucial for maintaining the security of your website.
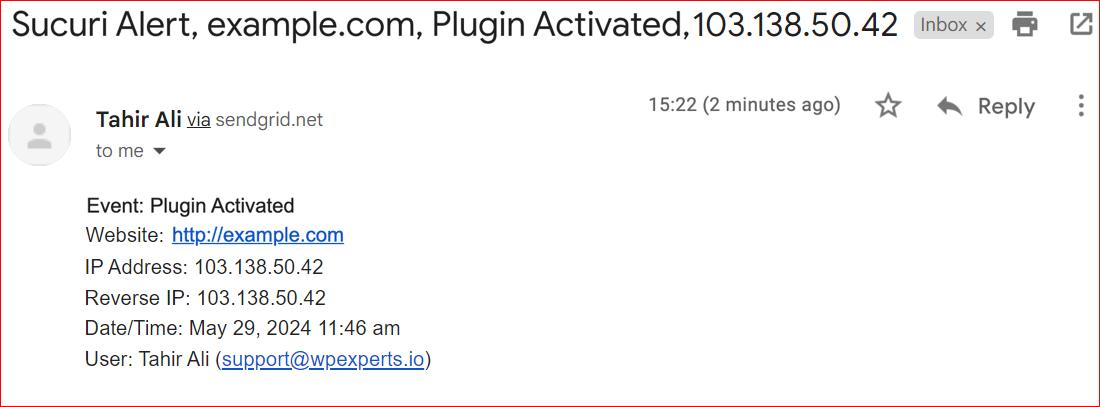
For example, you might receive an alert if a new plugin gets activated.
These alerts help you stay on top of your site’s security by informing you of potential WordPress hacking attacks or other security threats. If you don’t get these Sucuri email alerts, you might miss critical issues that could compromise your site.
There are several email settings in Sucuri that can cause email alert failure. Aside from that, even if these emails get delivered, sometimes they end up in your spam folder.
In the following section, we will show you how to fix these common Sucuri email alert failure issues in just three simple steps.
3 Easy Steps to Fix Sucuri Not Sending Email Alerts
After every step, send a test email alert; if the issue persists, follow the next step.
Step #1: Send a Test Email Alert From Sucuri
Before we get into the nitty gritty of Sucuri not sending email alerts, let’s first try to send a test email alert and see how it goes.
To send a test email, follow the steps below:
- On your WordPress dashboard, go to Sucuri’s Settings page.
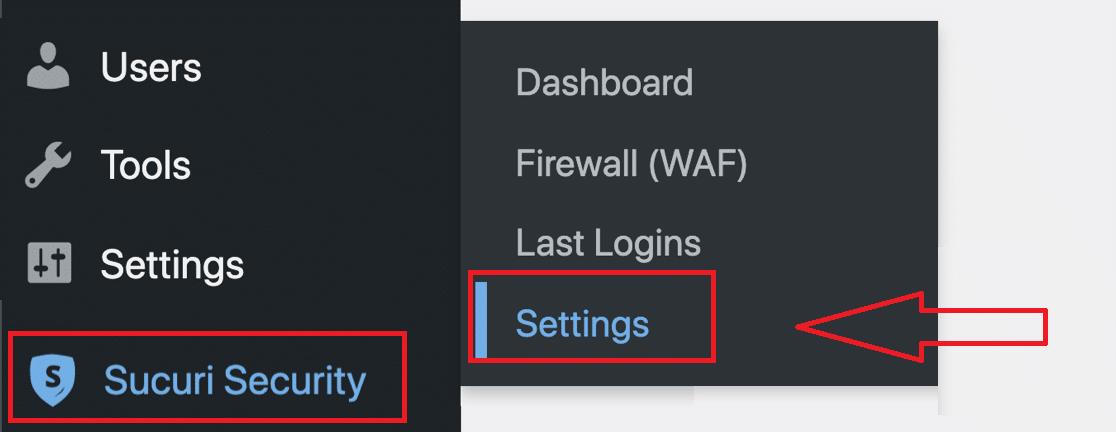
- Then, click on the “Alerts” tab at the top of the page.
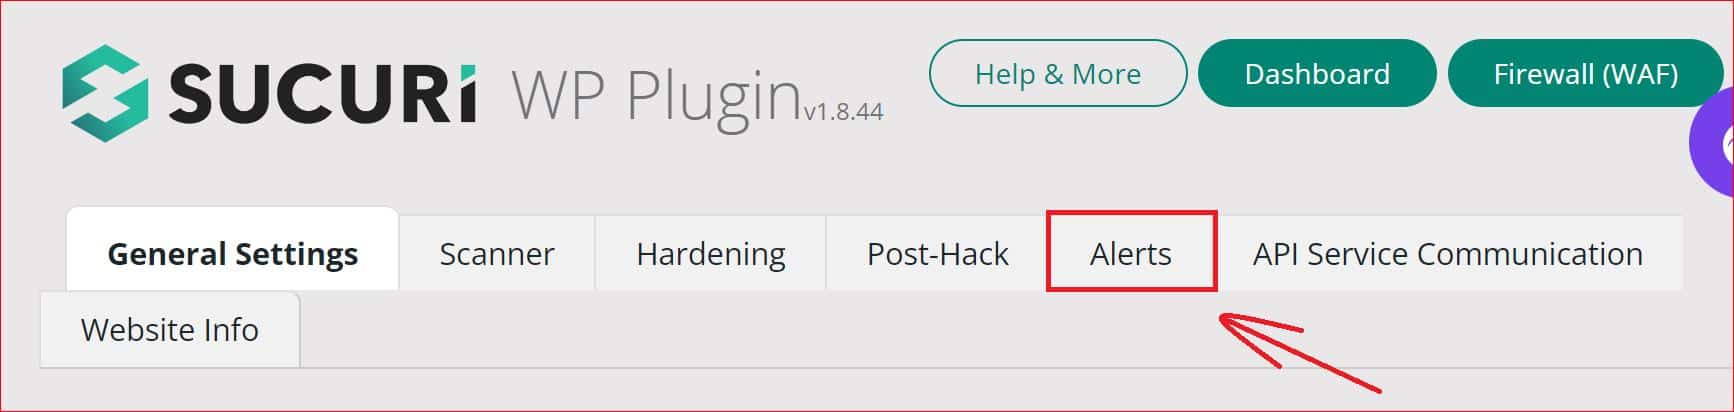
You will see a “Test Alerts” button that allows you to send a test email from Sucuri. By default, your WordPress admin user will receive this email.
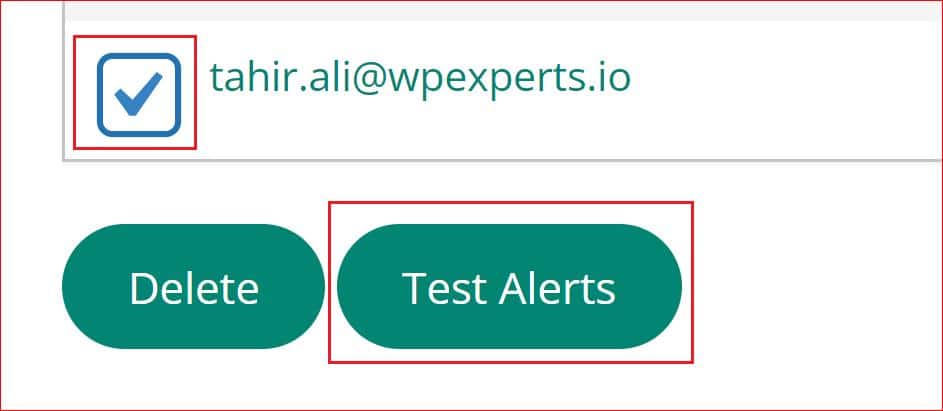
- Simply checkmark the box next to ‘E-mail’ and hit the ‘Test Alerts’ button.

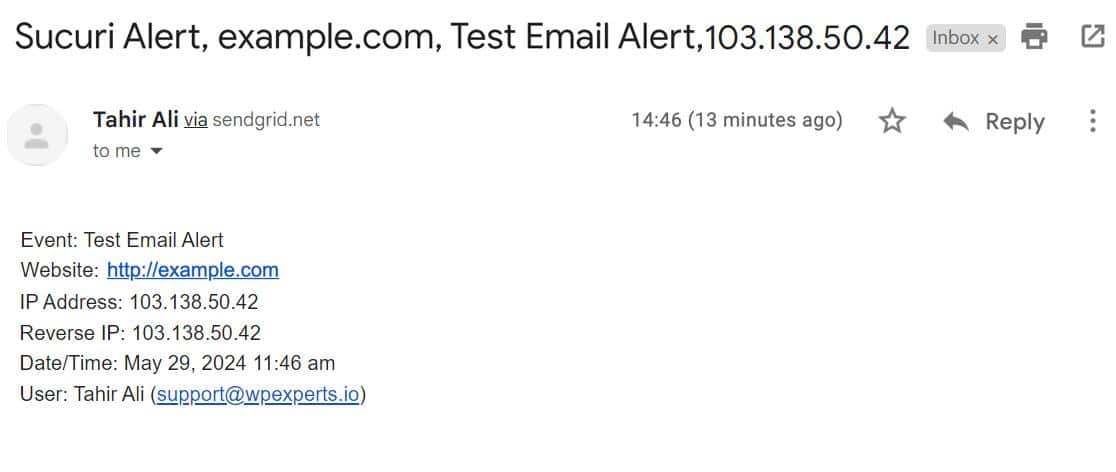
Please note that this test email feature is quite basic. This means that you don’t see any pop-up or successful status on your plugin’s dashboard (window).
Therefore, you need to manually check your email inbox and spam or junk folder to see if the test email arrived. If everything works correctly, you should receive a test email alert from Sucuri.
Which might look something like the following;
If you don’t receive the test email alert, then it’s time to check the Sucuri email alert settings.
Step #2: Check Email Alerts Setting in Sucuri
Here, we will go through the following five different settings to fix the Sucuri not sending email alerts issue. Each setting addresses the particular issue regarding the email alerts.
- Send a Test Email to a Different Email Address
- Delete All Trusted IP Addresses
- Set Unlimited Alerts Per Hour
- Limit the Login Attempts to 30 Per Hour
- Activate All Necessary Security Email Alerts
Let’s discuss each of them in detail:
1. Send a Test Email to a Different Email Address
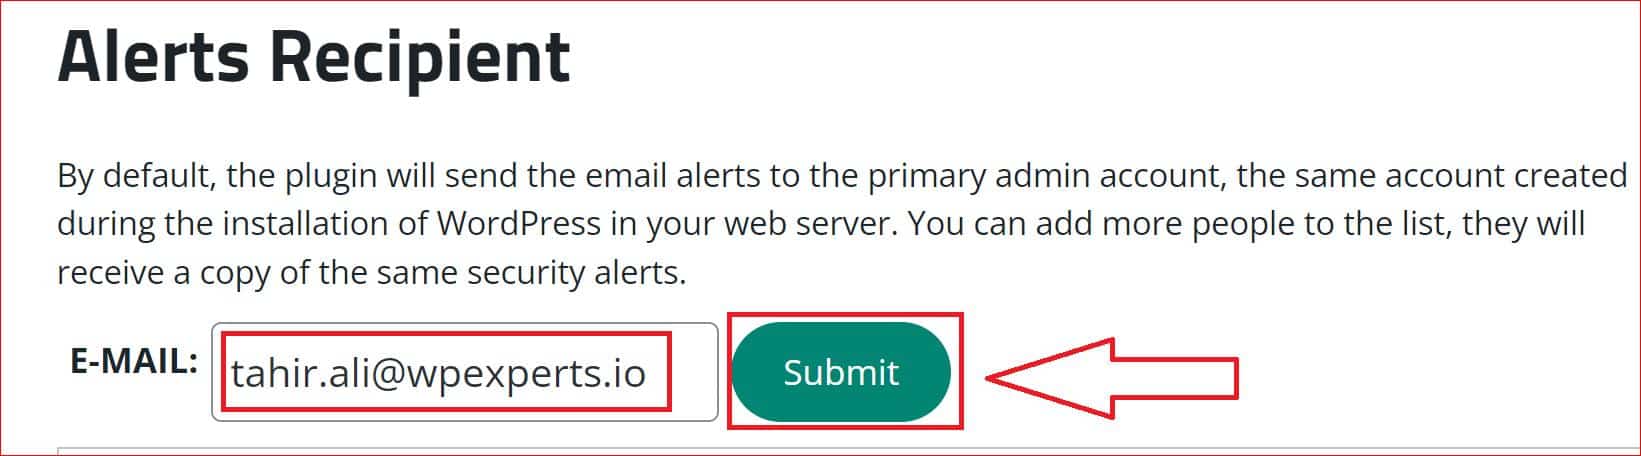
Sometimes, there might be an issue with the recipient’s email address, so add a different recipient and send a test email alert again.
Under the ‘Alerts’ tab, scroll down and look for the ‘Alerts Receipt’ section. Now, type in the new receipt email address and select the ‘Submit’ button next to it.
After submitting the email, simply checkmark the new email address and send a test email alert by selecting the ‘Test Alerts’ button, which you can see in the screenshot below.
Make sure to check the spam folder because, in most cases, WordPress emails end up in the spam folder. Don’t worry; we will also address this issue later in the article.
Meanwhile, let’s check out the other Sucuri email alert settings that can cause the ‘Sucuri not sending email alerts’ issue.
2. Delete All Trusted IP Addresses
If any activity happens on your WordPress site from a trusted IP address, Suciri will not send you email alerts.
To confirm this, scroll down the same ‘Alerts’ tab and check the IP Addresses listed under the ‘Trusted IP Addresses’ section.
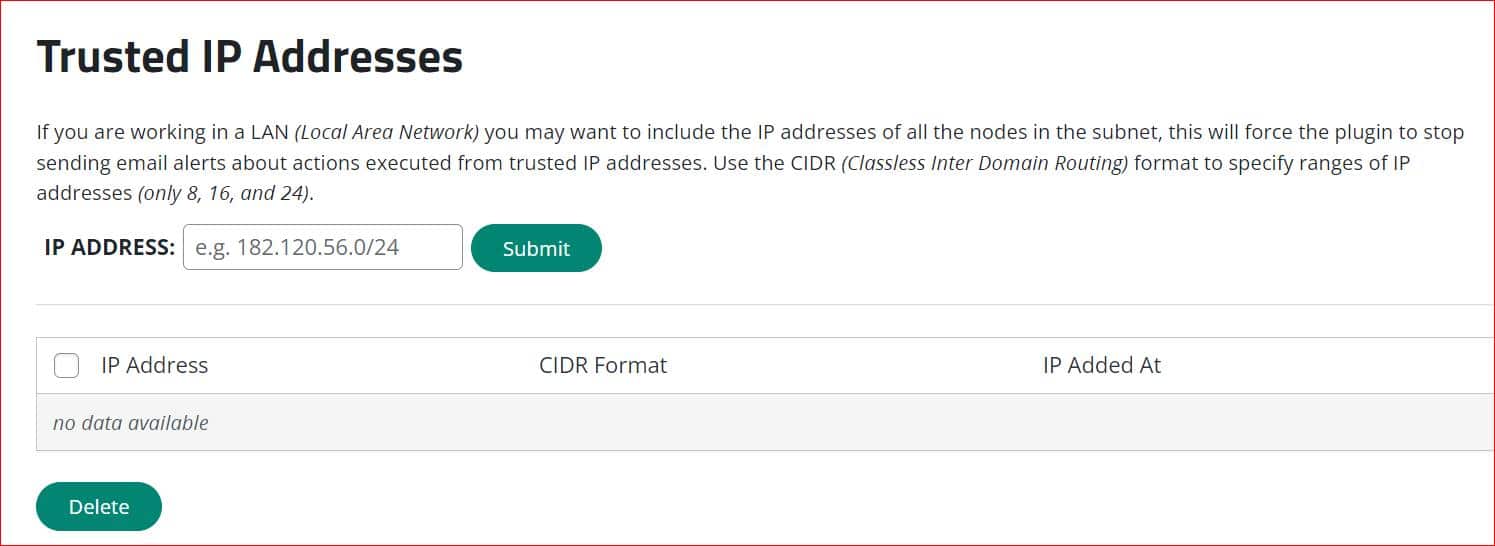
As a precautionary measure, delete all the trusted IP addresses from the list.
3. Set Unlimited Alerts Per Hour
There is a possibility that your maximum limit of 5 email alerts per hour might have been exceeded; that’s why you are facing the ‘Sucuri not sending email alerts’ issue.
By default, Sucuri sets email alerts to a maximum of 5 per hour. If you are actively making changes to your website, you might exceed this limit.
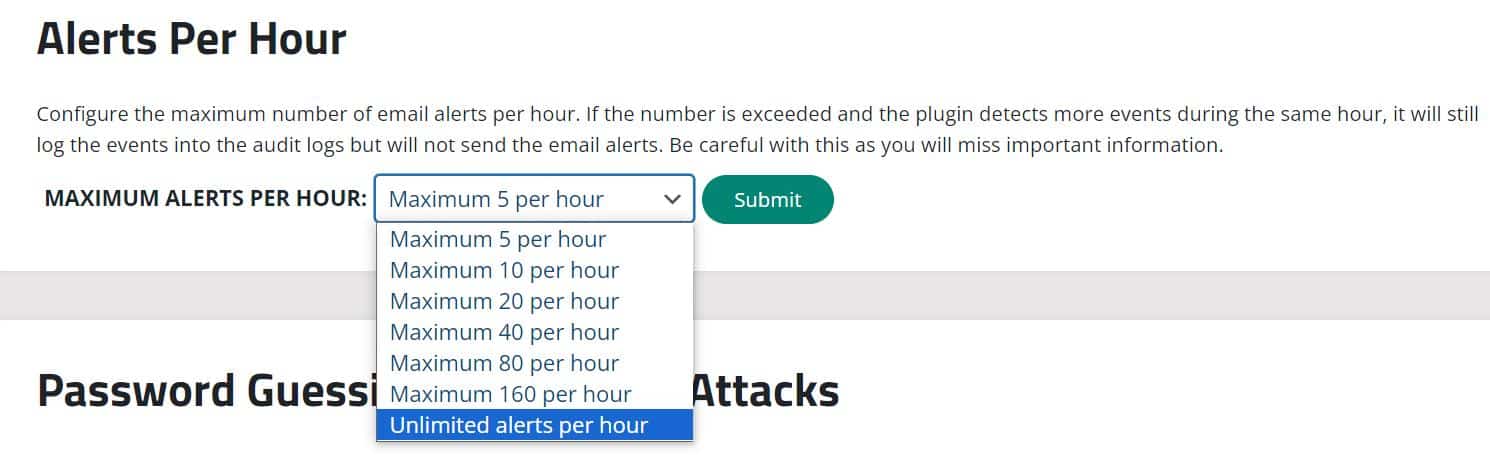
So, to avoid this issue, scroll down and set the limit to a higher number or choose ‘Unlimited alerts per hour.’ This will allow you to receive all necessary Sucuri email alerts without any limitations.
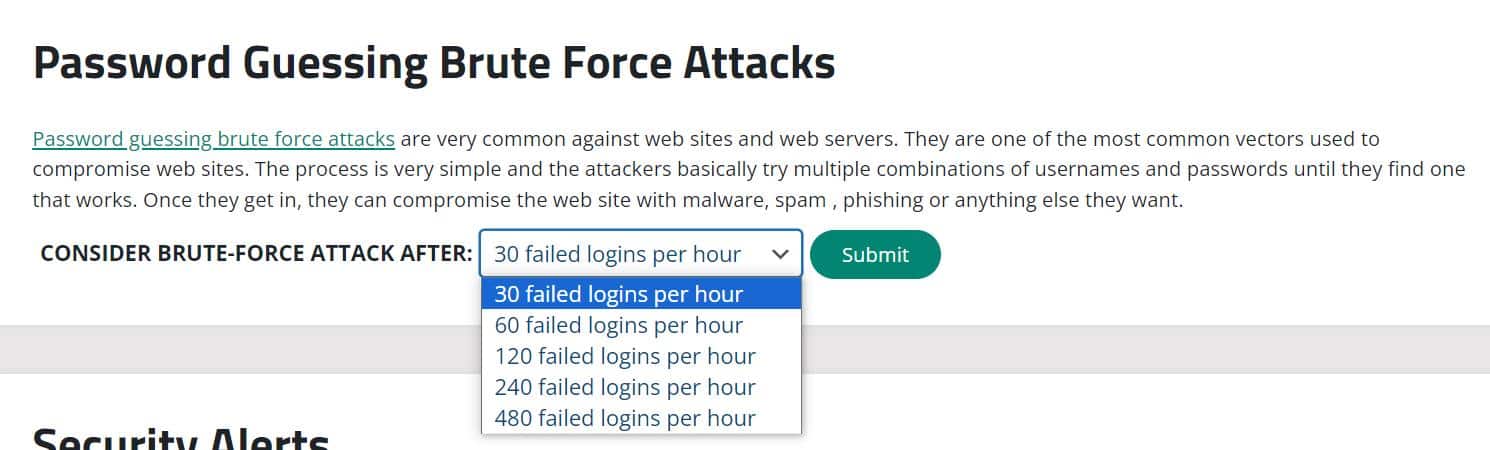
4. Limit the Login Attempts to 30 Per Hour
In case of a brute force attack, the hacker tries multiple combinations of your login credentials until they get the right one.
Sucuri alerts you when a brute force attack occurs after certain failed login attempts. However, if this setting (failed logins per hour) is too high, Sucuri won’t alert you when someone attempts to guess your password.
To make sure you receive timely warnings, set the limit to 30 failed login attempts per hour, which is the lowest possible setting available.
5. Activate All Necessary Security Email Alerts
Sucuri sends you email alerts for a whole bunch of events. So, make sure that you have enabled the ‘Event’ for which you want to receive an email.
- To do so, go to the ‘Security Alerts’ section under the ‘Alerts’ tab.
- Carefully read all the lines beginning with “Receive Email Alerts for…..”
- Check Mark the event which you want to enable email arts for.
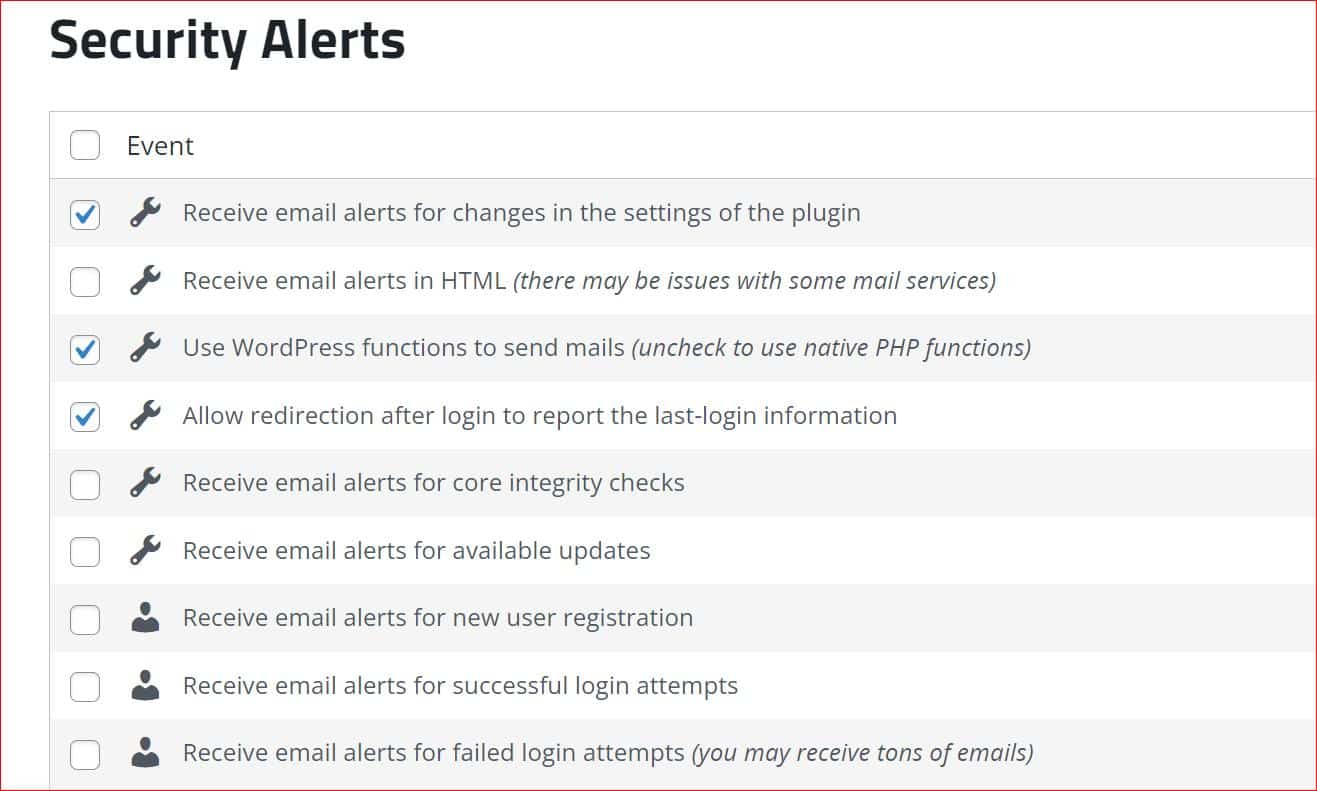
- Finally, hit the ‘Submit’ button to save the changes.
That’s all you need to look for in Sucuri email alert settings. If you are still facing the same issue, then it’s time to address the WordPress email delivery issue.
Step #3: Fix WordPress Email Delivery with Post SMTP Plugin
The default ‘wp_mail’ function in WordPress is a common cause of WordPress not sending emails. You need to replace this with the standard SMTP (Simple Mail Transfer Protocol). To achieve this, we will install the Post SMTP plugin to switch from `wp_mail` to SMTP.
Post SMTP is an advanced WordPress SMTP plugin that connects your site to all popular SMTP service providers, such as Gmail SMTP Server, Brevo, Microsoft 365, Amazon SES, Zoho Mail, Mailgun, SendGrid, or any private SMTP server.
To install and set up the Post SMTP plugin, follow the instructions below:
- Sign in to your WordPress dashboard as an Administrator.
- Go to the ‘Plugins’ section and select ‘Add New Plugin.’
- Search for ‘Post SMTP’ and find the plugin titled “Post SMTP – 100% Reliable WordPress Email…..”
- Click ‘Install Now’ and then ‘Activate’ the plugin.
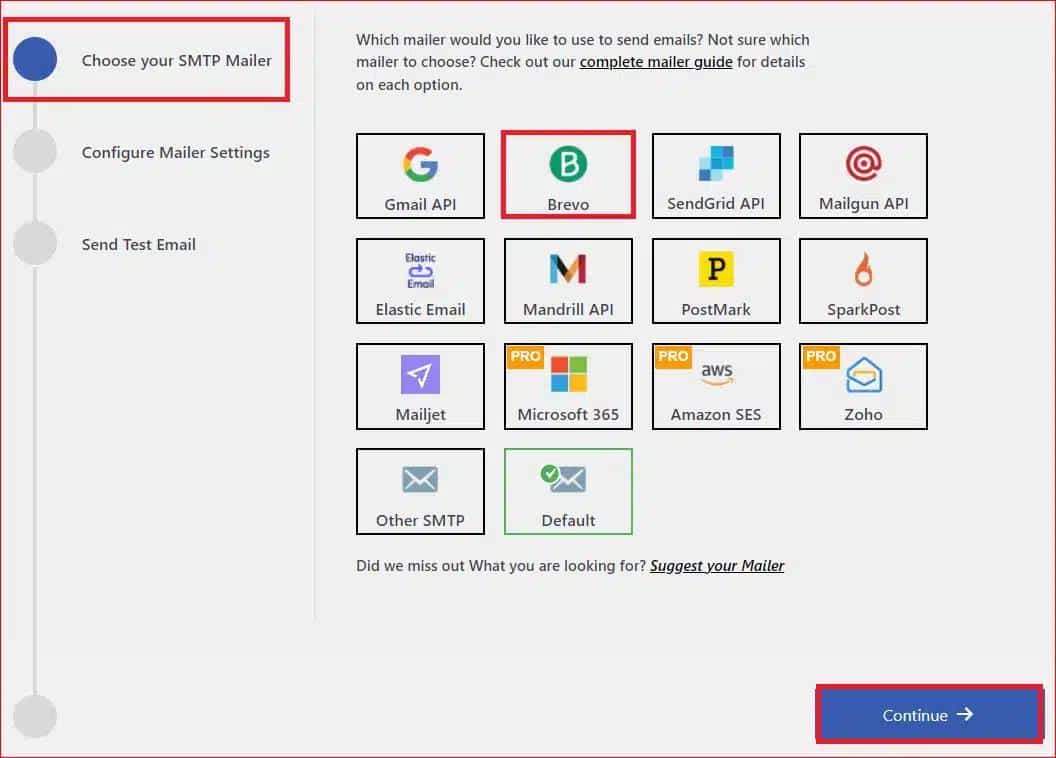
After activation, you’ll see the 3-Step Setup Wizard screen, as shown below:
- Here, choose an SMTP service and click ‘Continue.’
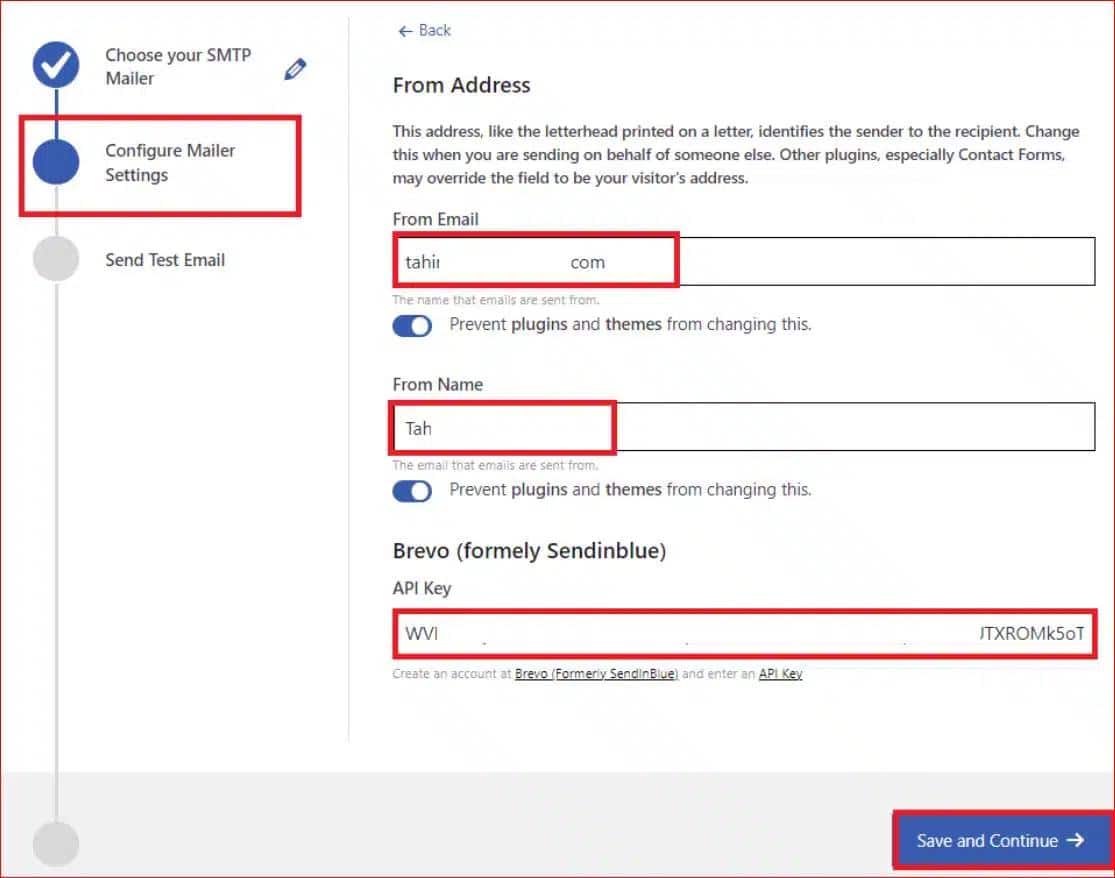
- Next, enter your email address and name in the “From Email” and “From Name” fields.
- Also, enter the API Key to authenticate your SMTP service account, then select ‘Save and Continue.’
Once your SMTP account is authenticated, you can test your SMTP configuration right away using the Post SMTP plugin:
- Type a valid email address in the ‘Recipient Email Address’ field and select the ‘Send Test Email.’
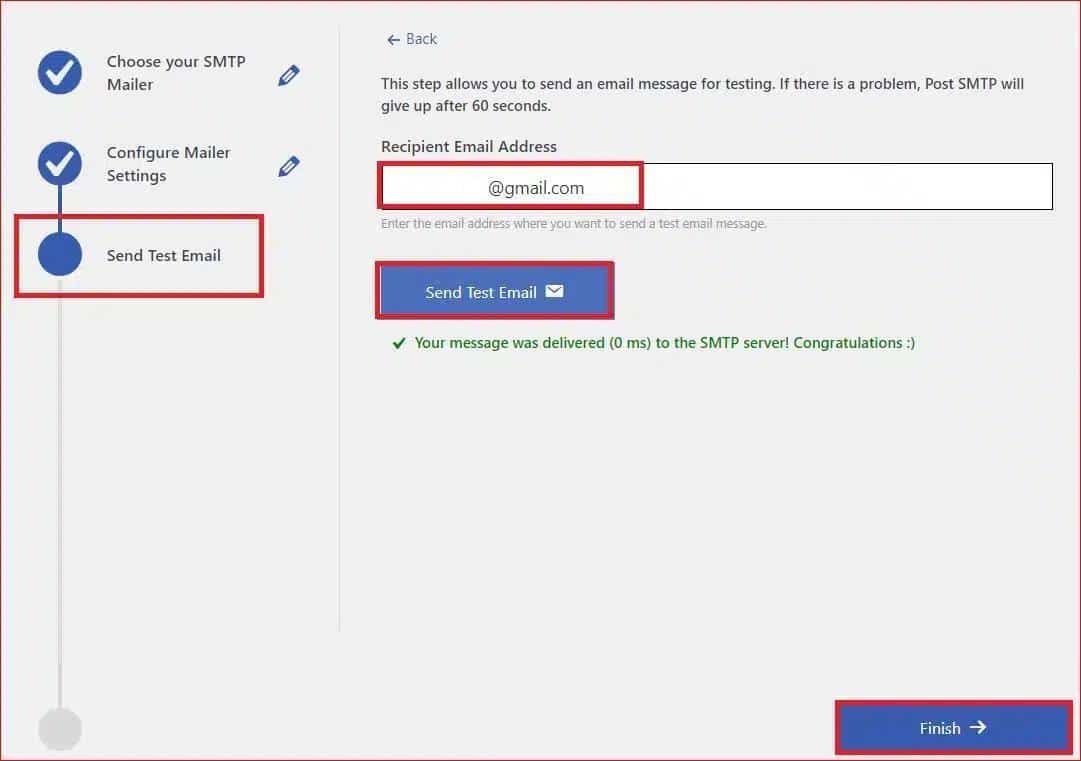
Upon successful email delivery, you will see the green ‘Congratulations :)’ status.
- Finally, click the ‘Finish’ button at the bottom to end the SMTP configuration process.
That’s it. Now, you should have started receiving Sucuri email alerts in your primary inbox, but for any reason, if you are still getting them in the spam or even not getting them at all, then you need to set up DNS records for your domain.
Finally, Configure DNS Records for Your Email Domain
If you don’t set up DNS records such as SPF, DKIM, and DMARC for your domain, this can trigger spam filters.
These DNS records verify that your emails are legitimate and help you improve your email deliverability by verifying your sender identity.
To configure these DNS records for your domain, you can refer to a comprehensive guide on SPF, DKIM, and DMARC setup.
Alternatively, if you need any help, you can reach out for expert assistance. Our team of experts can help you set up these DNS records, improving your email deliverability and ensuring all your Sucuri email alerts land in your primary inbox.
Final Remarks
When there is any suspicious activity on your WordPress site, Sucuri sends you an email alert. However, if you are facing the ‘Sucuri not sending email alerts’ issue, there can be two main reasons:
- Incorrect Sucuri email alert settings
- WordPress default (wp-mail) mailing function
To address both, follow the three easy steps we have mentioned in the guide. Also, make sure you install the Post SMTP plugin, as in most cases, the WordPress default mailing function causes email failures.
Lastly, if the ‘Sucuri not sending email alerts’ issue persists, don’t hesitate to contact us via our support channel. We would love to help you optimize your WordPress email deliverability.

