
 OpenAI
 Perplexity
Do you want to set up WooCommerce email notifications? If so, then you have landed on the right page!
Email notifications like order confirmations, processing updates, or shipping alerts are crucial for managing your WooCommerce store. They ensure smooth communication, improve customer experience, and help you stay on top of your business operations.
In this guide, we’ll discuss:
- Why email notifications are essential for your WooCommerce store.
- The types of email notifications WooCommerce offers.
- Step-by-step instructions to enable and customize email notifications.
- Troubleshooting tips to resolve common WooCommerce email issues.
Ready? Let’s get started!
Why Should You Set Up WooCommerce Email Notifications?
Email notifications are essential for managing customer communication in any WooCommerce store. These transactional emails serve as an automatic touchpoint, providing updates about order statuses, refunds, and other activities.
Here’s why email notifications are vital:
- A Better Customer Experience: Automated emails keep customers informed, reducing uncertainty and improving satisfaction.
- Boost Efficiency: Notifications for orders, refunds, and cancellations reduce the need for manual follow-ups.
- Prevent Mistakes: Timely updates prevent scenarios like canceled orders.
- Strengthen Brand Loyalty: Thoughtfully designed emails nurture relationships with customers, turning them into repeat buyers.
- Increase Revenue: Engage with customers using targeted follow-ups and promotional messages to drive more sales.
In a nutshell, setting up WooCommerce email notifications deepens your brand’s connection with your customers.
Types of WooCommerce Email Notifications
WooCommerce provides several built-in email notifications to help manage your store’s operations efficiently. Following is the list of these notifications, along with what they mean:
- New Order: Sent to the store admin when a new order is placed. It helps you stay on top of incoming orders.
- Canceled Order: Alerts you when an order is canceled, ensuring your team does not process or ship the order.
- Failed Order: Sent when an order fails due to payment issues. Useful for troubleshooting payment gateways.
- Order on Hold: Notifies customers when their order is on hold, often due to awaiting payment confirmation.
- Processing Order: Informs customers that their order is being prepared or processed.
- Completed Order: This lets customers know their order has been fulfilled and is on its way.
- Refunded Order: Confirms that a refund has been issued for an order.
- Customer Note: Sent to customers whenever a note is added to their order, keeping them updated on any changes or requests.
- Reset Password: Helps customers reset their password securely if they’ve forgotten it.
- New Account: Welcomes customers when registering a new account on your site.
How to Enable WooCommerce Email Notifications
First, you need to enable and configure the notifications, which you can do so by following the steps below:
Step #1: Access WooCommerce Email Settings
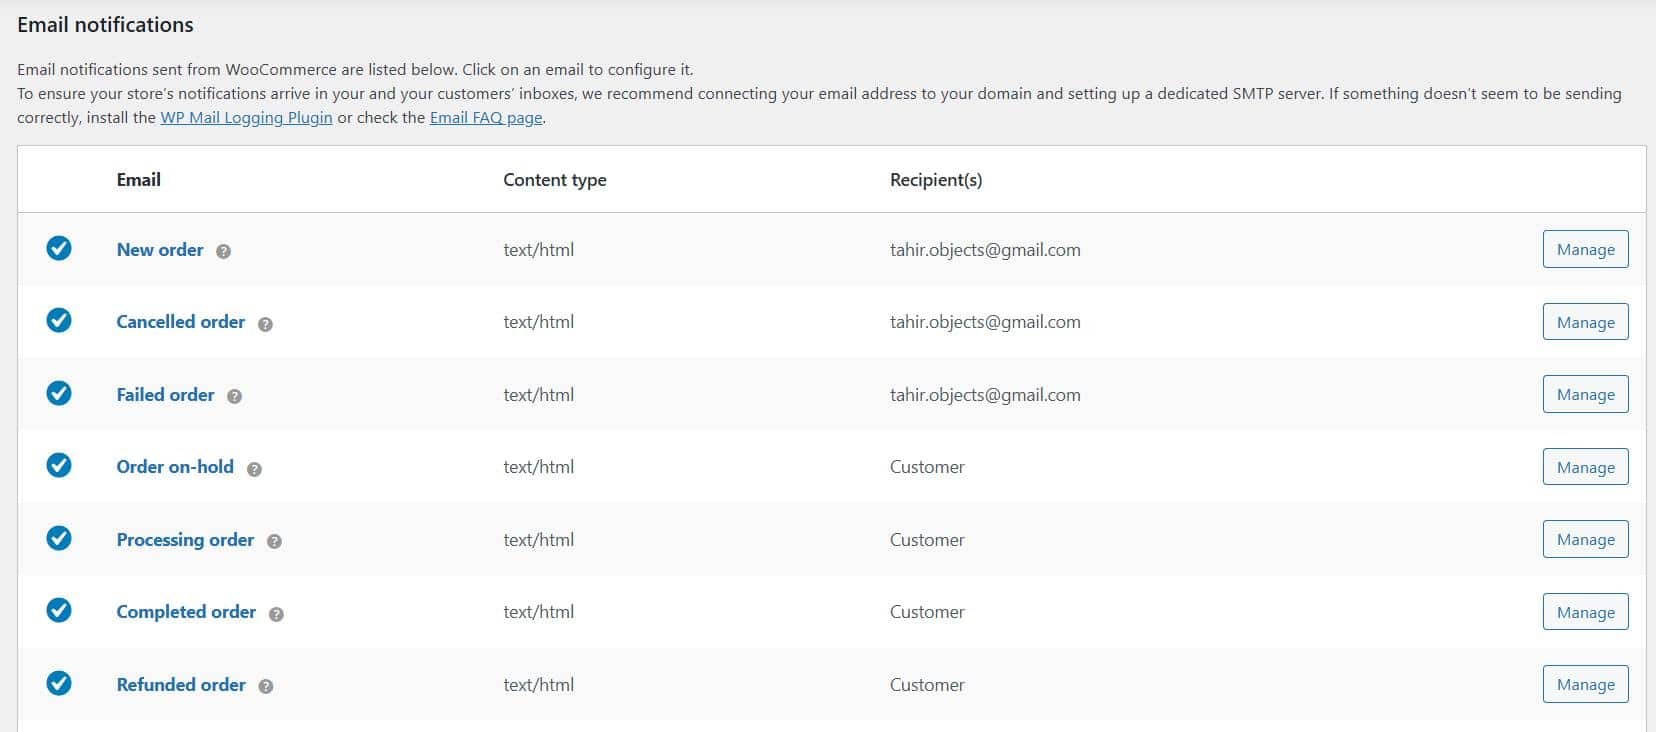
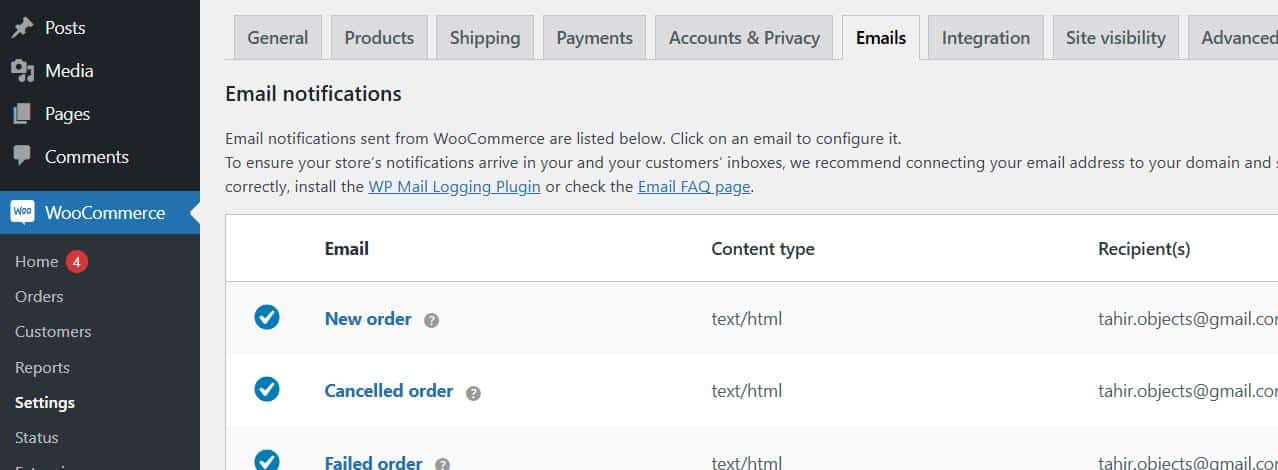
Log in to your WordPress dashboard and navigate to WooCommerce → Settings → Emails. Here, you’ll see a list of all email notifications available.
Step #2: Enable Specific Email Notifications
Click the Manage button next to the email notification you want to configure. Check the box labeled Enable this email notification.

Step #3: Set Recipient Email Addresses
For admin-related notifications (e.g., New Order), verify that the correct email address is listed under Recipient(s). Use a professional email address for reliability.

📕 If you don’t have a custom email domain, check out our guide on How to Get an Email Domain for Your Business – 100% Free
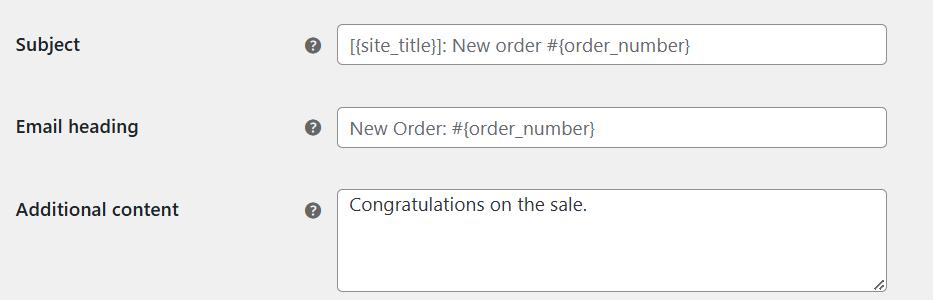
Step #4: Customize Email Notification Content
Add the Subject, Email heading, and Additional content, as shown in the screenshot below.
Step #5: Save Changes
Once all the configurations are in place, click the Save Changes button. This ensures your email notifications are active and functioning.

How to Customize WooCommerce Email Notifications
WooCommerce’s built-in email customization options are limited. To add advanced features and styling, consider using one of these plugins:
#1: WC Multiple Email Recipients
This plugin allows you to send notifications to multiple recipients. You can configure additional email addresses per customer, product, or category.
#2: YITH WooCommerce Email Templates
This plugin helps you improve the design of your emails by offering pre-designed templates. Customize colors, layouts, and branding to create a professional look.
#3: AutomateWoo
AutomateWoo enables advanced automation for WooCommerce emails. It can send tailored emails based on specific customer actions, such as abandoned carts or high-value purchases.
#4: MailOptin
Integrate your WooCommerce site with Mailchimp to send marketing and transactional emails. MailOptin also includes features for creating opt-in forms and sending automated follow-ups.
#5: Flow Notify
Flow Notify provides a drag-and-drop editor to create personalized, branded email notifications. It also tracks email performance with metrics like open and click-through rates.
Using these plugins, you can transform basic transactional emails into engaging, customized communication tools.
How to Fix WooCommerce Email Notifications Not Working
If your WooCommerce email notifications aren’t working, here’s how to troubleshoot and fix the issue.
- Check WooCommerce Email Notification Settings
The first step in fixing the WooCommerce not sending email issue is to check the email notifications settings.
Step #1: Verify Enabled Notifications
Go to WooCommerce → Settings → Emails and ensure the relevant notifications are enabled.

Step #2: Confirm Email Addresses
Double-check the recipient email addresses, especially for admin notifications. Use a domain-based email for better deliverability.

Step 3: Test Notification Functionality
Place a test order to verify that emails are being triggered correctly. This helps identify whether the issue lies in WooCommerce settings or elsewhere.
After configuring notifications, if you don’t receive the email alert, then it’s time to replace the WordPress default mail function with SMTP. For this, check out the following step.
- Set Up SMTP for WooCommerce Email Alerts
The default WordPress mail function (PHP Mail) often causes the WordPress not sending emails issue because emails are sent from your site, not through your email server. Switching to SMTP resolves this, and to connect an SMTP server with your WordPress site, we will install the Post SMTP plugin.
Post SMTP is the #1 WordPress SMTP plugin. It doesn’t just let you connect to an SMTP server; it also provides many other useful features that help you optimize your email deliverability.
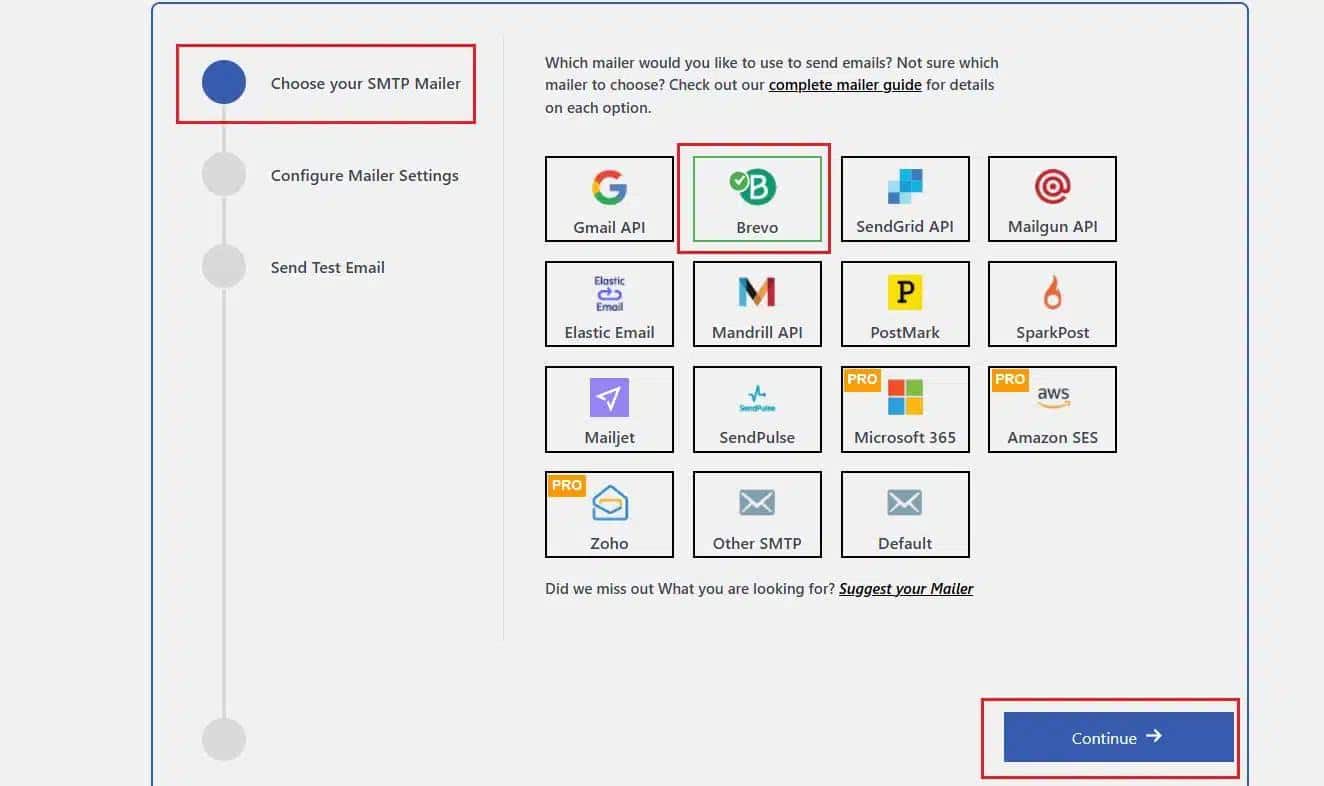
Post SMTP supports all popular SMTP service providers such as Gmail SMTP Server, Microsoft 365 SMTP, Brevo, Mailgun, SendGrid, SendPulse, Mandrill SMTP, etc.
Additionally, using Post SMTP, you can:
- Track every email sent from your WordPress site
- Securely authenticate your SMTP mailer using OAuth 2.0
- Set up a secondary SMTP mailer to ensure email delivery
- Automatically retry sending any failed emails.
- Receive daily, weekly, or monthly email health reports.
- View and resend emails with attachments directly from the log screen.
- Get failure alerts on admin email, SMS, or Slack.
- Track emails from anywhere using the Post SMTP mobile app.
- Email open tracking to optimize your email campaigns
- Stay informed about email delivery failures through the Chrome Extension.
To set up the Post SMTP plugin, follow the steps below:
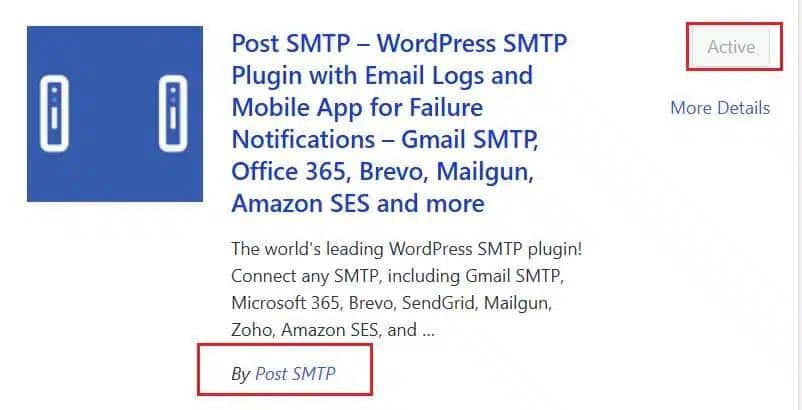
Step #1: Install the Plugin
In your WordPress dashboard, go to Plugins → Add New Plugin, search for Post SMTP, and click Install Now. Activate the plugin once installed.
Step #2: Run the 3-Step Setup Wizard
Navigate to Post SMTP → Settings and click Start the Wizard. Select your email provider (e.g., Gmail, SendGrid, Brevo).
Step #3: Configure SMTP Settings
Fill in your From Email and From Name fields. Enter the SMTP server details and API key provided by your email service.

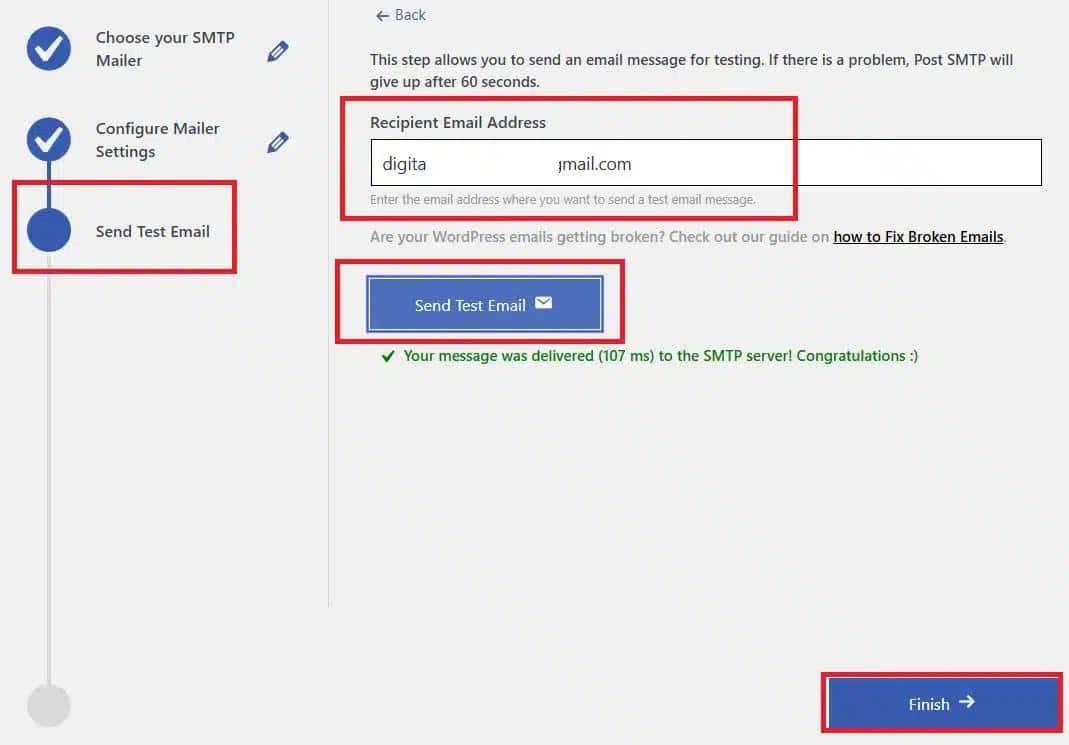
Step #4: Test Email Deliverability
Send a test email in the third step to verify the email deliverability.
Step #5: Lock the “From” Email Address
Prevent plugins or themes from changing the sender email by enabling the Prevent plugins and themes from changing this option in the plugin settings.
- In your dashboard, navigate to Post SMTP » Settings and open the Message tab.
- Enter the desired email address for outgoing emails in the Email Address field, typically the one you set earlier.
- Check the box labeled Prevent plugins and themes from changing this to lock the email address against modifications by other plugins or themes.

Using SMTP improves email reliability and ensures notifications are delivered correctly.
As of now, your WooCommerce email notifications should work completely fine, but if they are not working as they should, feel free to contact us for expert assistance.
To Sum It Up
WooCommerce email notifications are a vital part of any online store. They automate communication, enhance customer experience, and streamline operations.
Key Takeaways:
- Enable and configure WooCommerce email notifications to stay connected with customers.
- Use plugins like WooCommerce Multiple Email Recipients and AutomateWoo for advanced customization.
- Resolve deliverability issues by setting up SMTP with the Post SMTP plugin.
- Regularly test email functionality to ensure smooth operations.
Proper email notification management boosts efficiency and customer satisfaction. If you encounter any challenges or need expert assistance, feel free to reach out. We’re here to help!


