If you are facing the FluentCRM not sending email issue, you are not alone. Many WordPress users face the same issue.
But don’t worry, we have the perfect solution to this problem!
FluentCRM is a powerful and user-friendly email marketing and CRM plugin for WordPress. It helps you manage customer relationships, grow your email lists, run email campaigns, create funnels, boost profits, and improve conversion rates.
Despite its robust features, sometimes you might encounter email deliverability problems that cause your emails to be blocked or flagged as spam.
In this guide, we will show you how to fix Fluent not sending email in three easy steps using the Post SMTP plugin.
Ready? Let’s get started!
What Is FluentCRM? —Brief Introduction
FluentCRM is an email marketing plugin for WordPress that allows you to create and manage email campaigns using a drag-and-drop block editor. This powerful solution supports smart tags for dynamic content personalization, which makes sure that your emails are engaging and relevant to each recipient.

Additionally, the plugin offers features like subscriber segmentation, automated drip campaigns, and comprehensive reporting. It integrates perfectly with learning management systems (LMS) and membership plugins to enhance functionality.
If you’re experiencing issues with FluenbtCRM email deliverability, don’t worry. We’ll guide you through the step-by-step process to resolve this issue and make sure that your emails reach the recipients.
Why is FluentCRM Not Sending Email Notifications?
Before we move on to fix the issue, it’s important to understand why FluentCRM might not be sending email notifications.
Basically, there are two primary reasons for this problem:
#1: WordPress Default Email Function
FluentCRM, by default, uses the WordPress mail function [wp_mail()] to send email notifications. This method relies on your web server’s configuration and does not use proper email domain authentication.
Nowadays, almost all major web hosting services require proper email authentication and encryption to prevent spam, which means that even if FluentCRM sends emails from your WordPress site, they might not reach the recipient’s inbox.
#2: Incorrect FluentCRM Email Settings
Another common issue is incorrect email settings within FluentCRM. When you first set up the plugin, FluentCRM automatically sets your admin email address as a default for sending notifications. This email address might not be the one you intend to use, or it might contain a typo.
You can check and correct this email address in the “From Email” field under FluentCRM’s email notification settings, which we will show you how in the following section.
3 Easy Steps to Fix FluentCRM Not Sending Email
If you are using Fluent Forms to create contact forms on your website, then to resolve the contact form email delivery issues, check out our guide on how to fix Fluent Forms not sending emails step-by-step.
For the FluentCRM email delivery issues, follow the steps below.
Step #1: Check FluentCRM Email Settings
To check your FluentCRM email settings, follow the steps below:
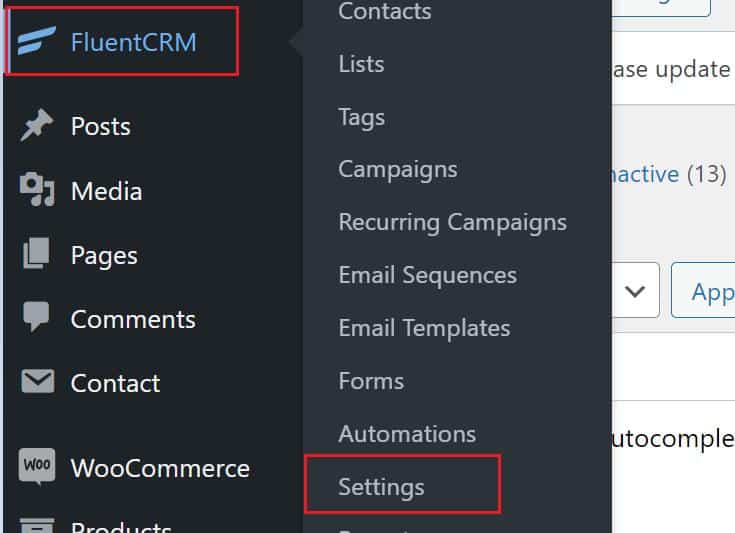
- First, access your FluentCRM settings from your WordPress dashboard. Go to FluentCRM → Settings.
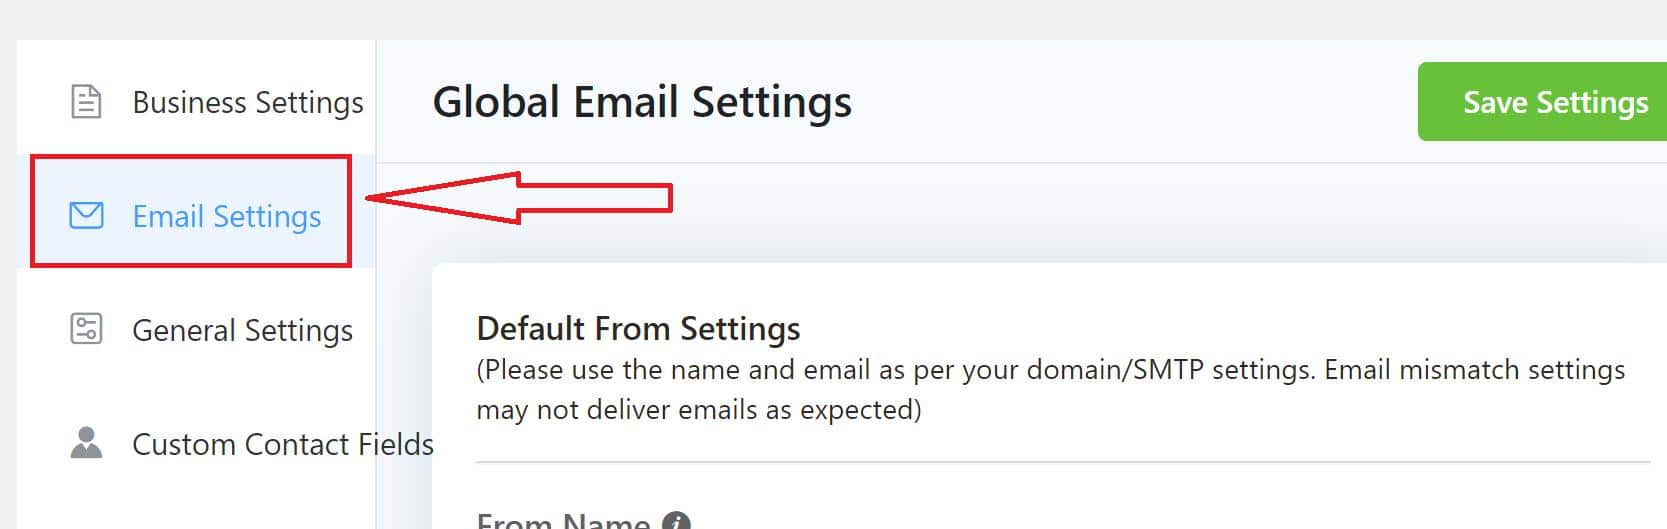
- Inside the settings, click on the Email Settings tab. Here, you’ll find fields to set the sender options.
- Next, in the “From Name” field, enter a name that your subscribers will recognize. This could be the name of your website or your business.
- For the “From Email Address” field, use an email address with the same domain as your website. This can help improve email deliverability.
If you don’t have a custom email domain, check out our guide on how to get an email domain for your business – 100% free.

- On the same page, you can set up a Reply to Name and Email. Also, we recommend setting the Email Per Second limit to avoid spam triggers.

- Finally, click on the “Save Settings” button on the top to apply your changes.
Now that your email settings are configured, the next step is to install the Post SMTP plugin to achieve reliable email delivery.
Step #2: Install Post SMTP Plugin
As we mentioned earlier, the primary reason for WordPress not sending emails is the default PHP ‘wp_mail’ function.
To address this issue, we need to switch from WordPress’s default ‘wp_mail’ function to SMTP (Simple Mail Transfer Protocol). For this, we need to install the Post SMTP plugin, which allows you to connect your WordPress site to all popular SMTP service providers like Gmail SMTP Server, Brevo, Amazon SES, Microsoft 365, SendPulse, SendGrid, Zoho Mail, Mailgun, and many others.
To install Post SMTP on your WordPress site, follow the steps below:
- Sign in to your WordPress dashboard as an Administrator.
- Navigate to ‘Plugins’ and click the ‘Add New Plugin’ button at the top left.
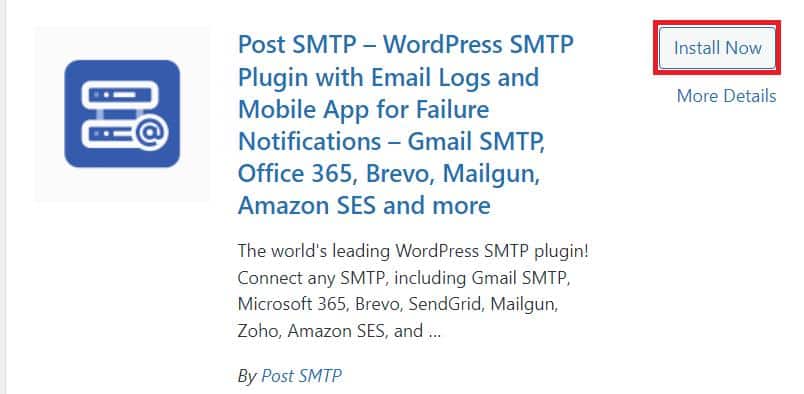
- In the search bar, type ‘Post SMTP’ and look for “Post SMTP —WordPress SMTP Plugin with Email….”
- Once you find it, click on “Install Now” and then “Activate.”
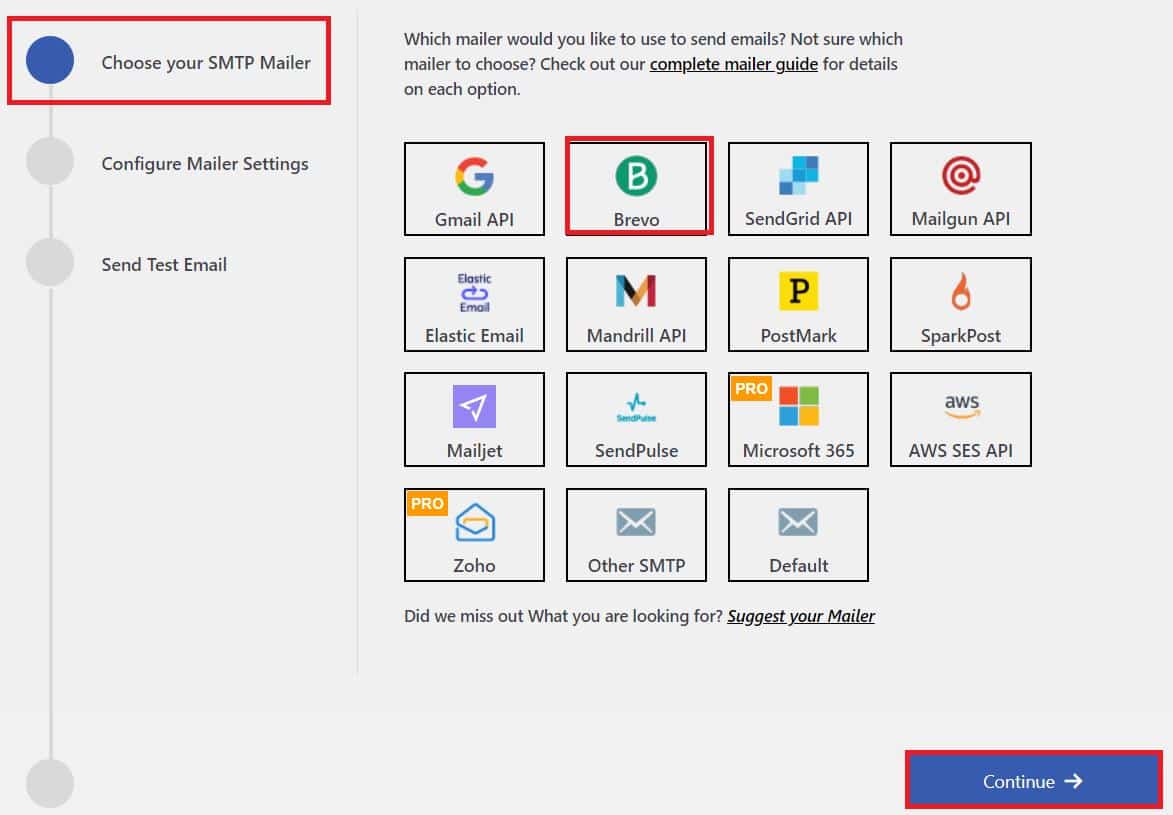
Once the plugin successfully activates, you’ll see the 3-Step Setup Wizard screen.
- First, you need to select your preferred SMTP service and click ‘Continue’.
We will use “Brevo” as an example in this guide.
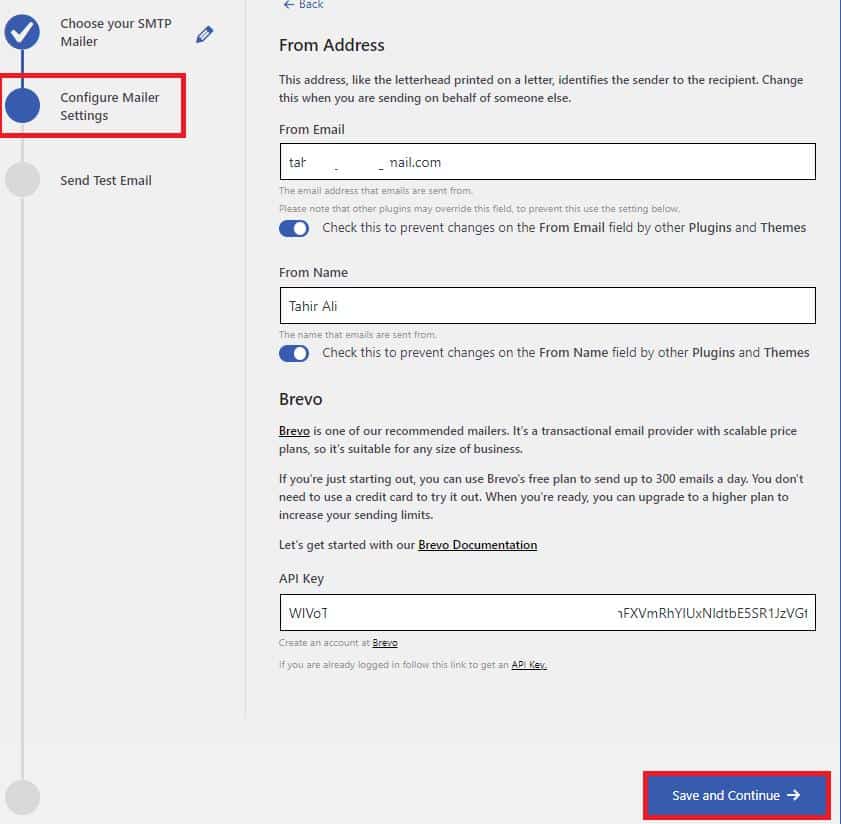
- Now, fill in the “From Email” and “From Name” fields with your email address and name.
- Also, enter the API Key to authenticate your SMTP service (Brevo account), then click ‘Save and Continue’.
To get this API Key, you need to log in to your respective SMTP service provider account.
Upon successful authentication, it’s time to verify your SMTP configuration.
- To validate your SMTP settings, enter a valid email address in the ‘Recipient Email Address’ field and click ‘Send Test Email’.
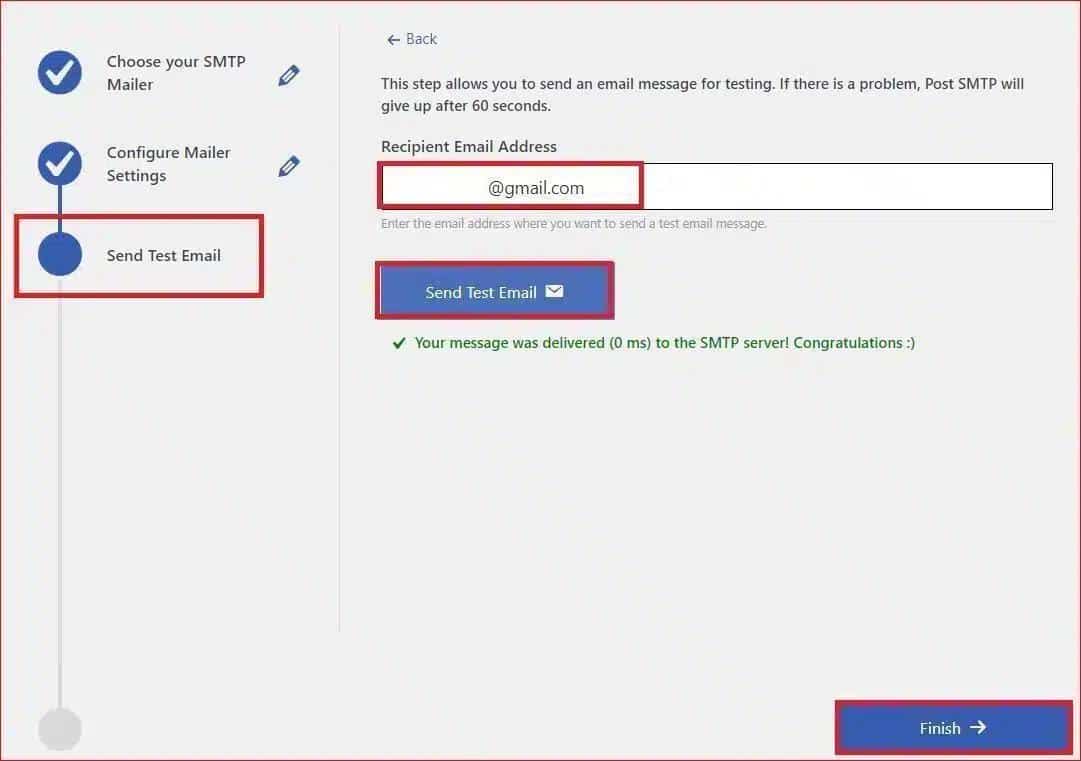
If the test email is delivered successfully, you will see a green ‘Congratulations :)’ status message.
- Finally, click the ‘Finish’ button to complete the setup.
That’s it, now the FluentCRM not sending email notifications has been resolved. Let’s see how you can resend all the previous failed emails using the Post SMTP plugin.
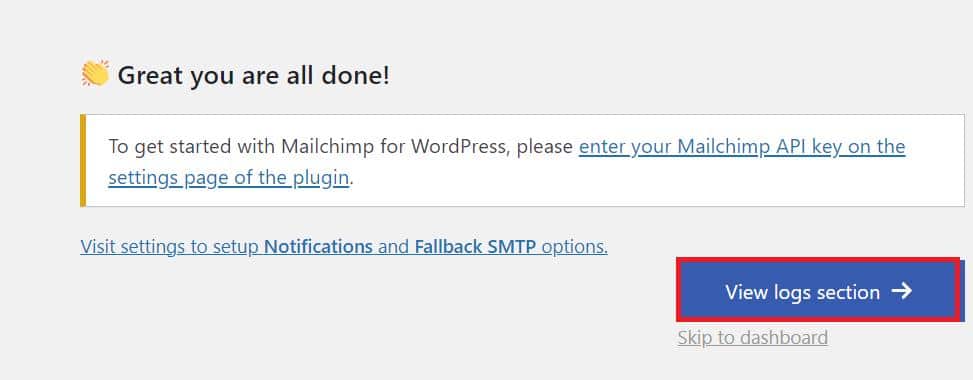
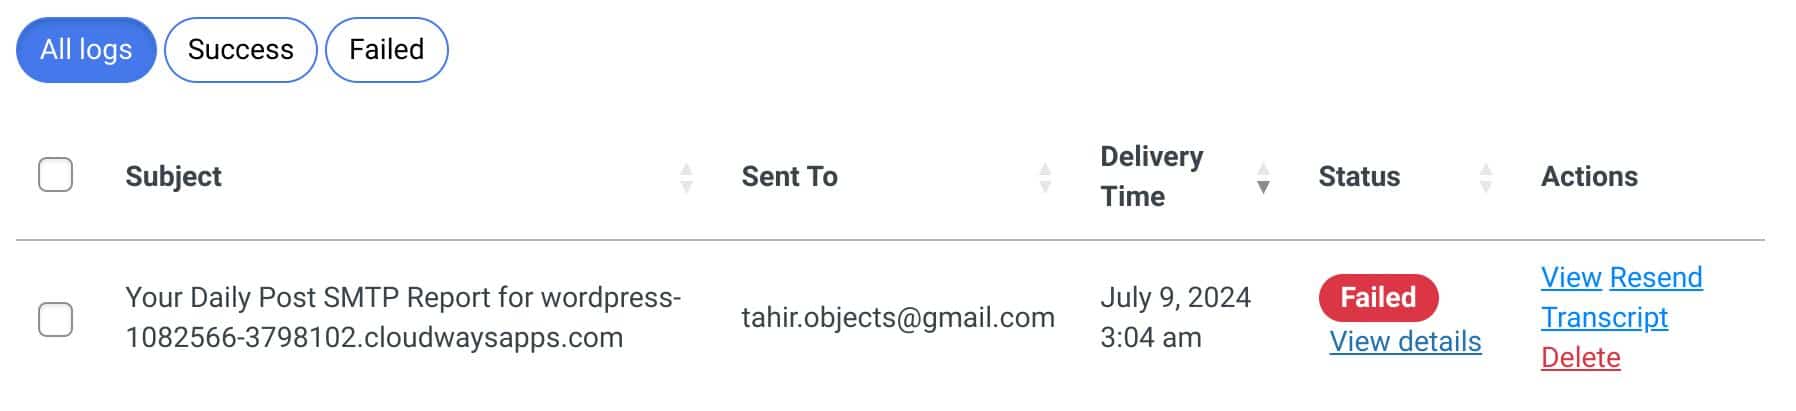
Step #3: Resend All Failed Email Deliveries
To resend all the failed email deliveries, click on the “View logs section →” button, as shown in the screenshot below.
Or go to the Post SMTP → Email Logs from the WordPress dashboard.
On the email logs screen, for any email that you want to resend, simply click on the “Resend” option, which you can find under the Actions column.
If you are still facing the FluentCRM not sending email notifications issue. Then, we recommend checking your email domain spam score.
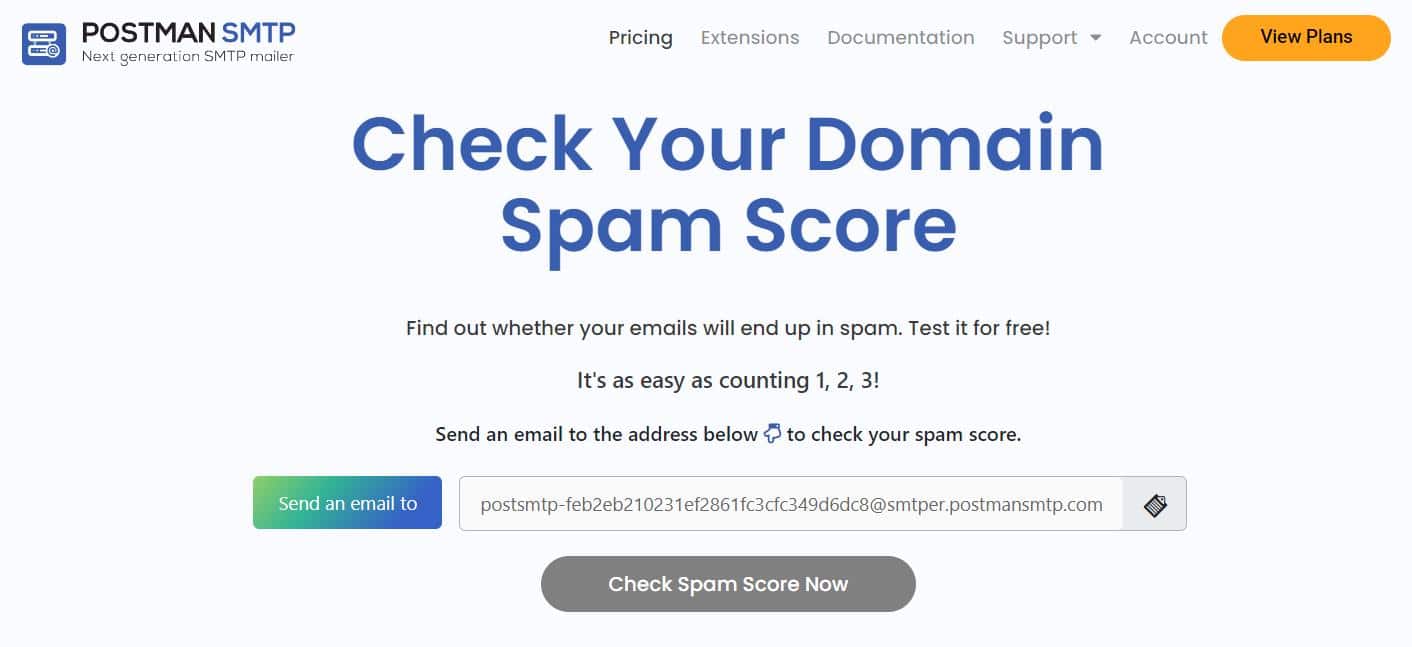
Next, Check Spam Score for Your Email Domain
Spam Score determines how likely email service providers mark your emails as spam. A high Spam Score indicates a higher chance of your emails landing in the recipient’s spam folder.
To determine your email spam score, use our free Spam Score Checker to receive a detailed health report directly to your inbox. This report will reveal factors that are impacting your email deliverability, such as DNS records (SPF, DKIM, and DMARC) , the use of spam-triggering words, etc.
If your Spam Score is high, don’t worry! We offer on-demand expert assistance for all things related to WordPress email delivery, including improving your Spam Score to ensure your emails reach their intended recipients.
Final Thoughts on FluentCRM Not Sending Email
Without a doubt, FluentCRM is an excellent plugin for managing email marketing and CRM needs on WordPress, but email deliverability issues can sometimes occur. If you’re experiencing the ‘FluentCRM not sending email’ problem, follow these steps to resolve it:
- Check Your FluentCRM Email Settings: Verify that your email settings are configured correctly within FluentCRM.
- Install and Set Up Post SMTP Plugin: Use the Post SMTP plugin to improve email deliverability by connecting to a reliable SMTP service.
- Resend All Failed Email Deliveries: Access the Post SMTP email logs to resend any previously failed email notifications.
If the FluentCRM not sending email issue persists or you need further help, don’t hesitate to contact us by opening a support ticket. We are here to help with any WordPress email delivery issues you might be experiencing.